# Unity Target Collection Editor
The Unity plugin includes a Target Collection Editor that allows you to create and modify zip files and wtc collections right inside the Unity Editor without the need to go through Wikitude Studio.
# Overview of Target Collection Editor
To open the Target Collection Editor, click on the Window menu item and select Wikitude -> Target Collection Editor.
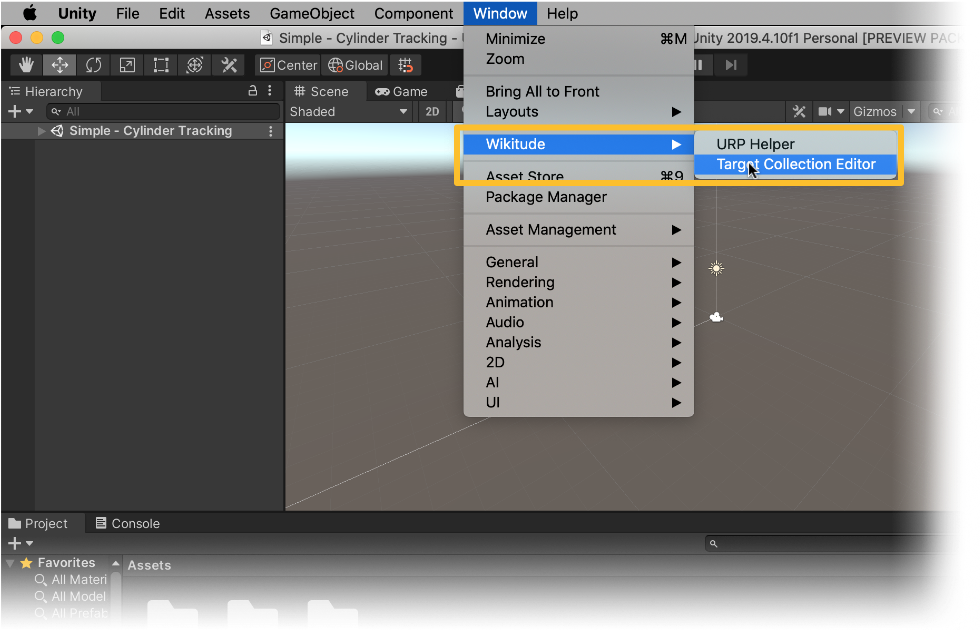
This will open a new dockable window that allows you to manage all your target collections.
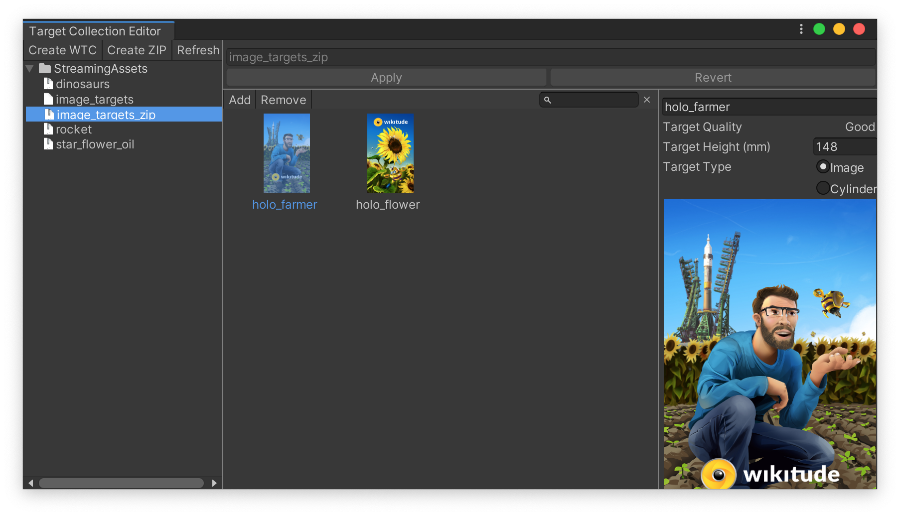
On the left side you will find the project panel, which contains a tree view of all the wtc and zip files found in the StreamingAssets folder. Selecting any of these will display a grid of all the targets in that collection in the middle view. Clicking any of these targets will display additional info about it on the right side of the editor window.
# Create a target collection in Target Collection Editor
To create a new collection, click the Create WTC or Create ZIP buttons in the upper part of the left panel.

A new window will appear prompting you to select an image from your project.
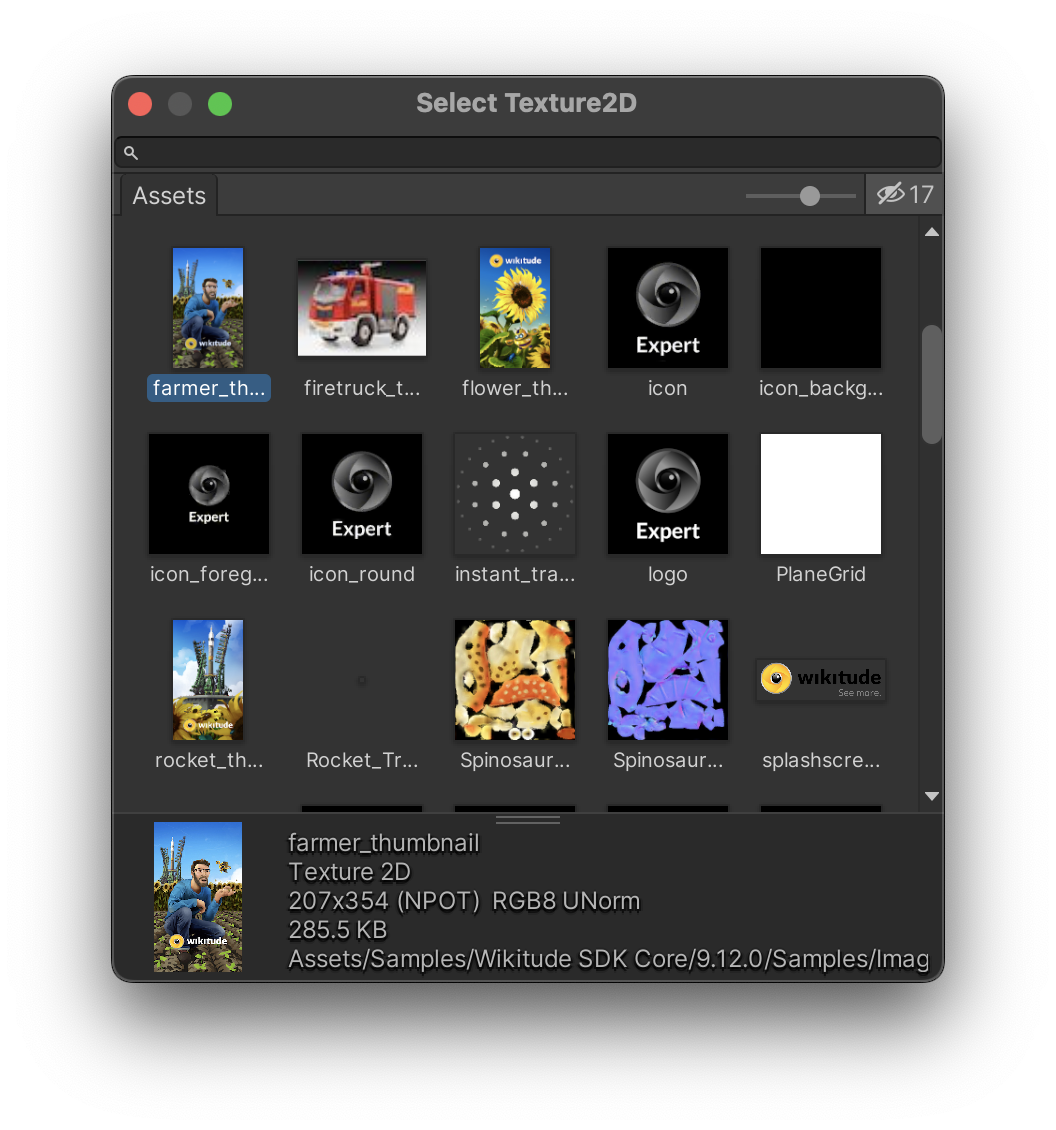
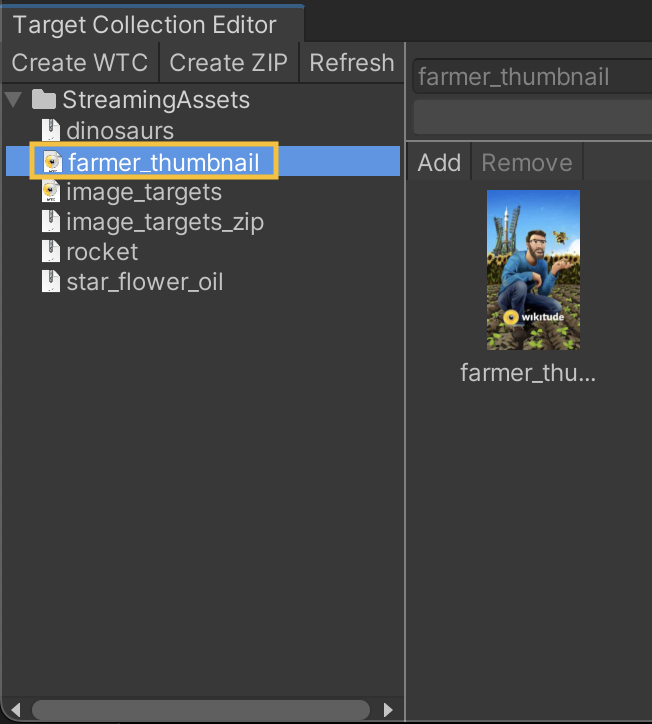
A new collection will be created in the StreamingAssets folder with the same name as the selected image. To rename the collection, simply rename the file in the Unity editor project view or in Windows Explorer / Finder. The collection will initially contain only the selected image, but you can edit it further by adding new ones.
# Edit target collection
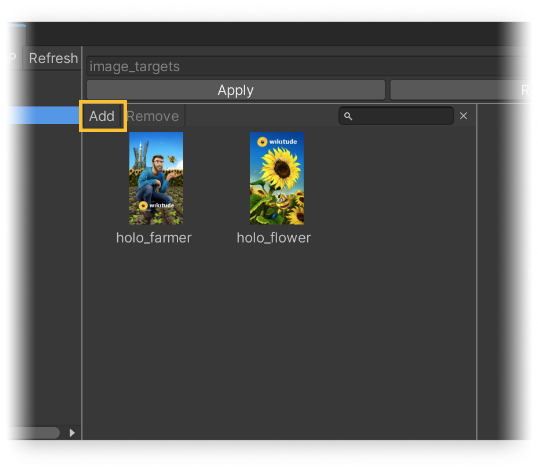
# Add images to a target collection
You can add new images to a target collection by clicking the Add button from the upper part of the middle panel. This will open a new window asking you to select which image to add. You can also drag and drop multiple images at once from the Unity editor project view.
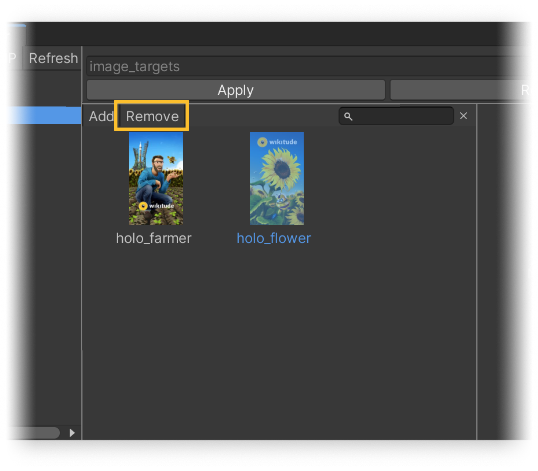
# Remove images from a target collection
You can select targets by clicking on them in the middle panel. Using Shift and Ctrl/Cmd allows you to select multiple images at once. You can delete the selected targets by pressing the Delete button in the upper part of the middle panel.
# Modify target collections
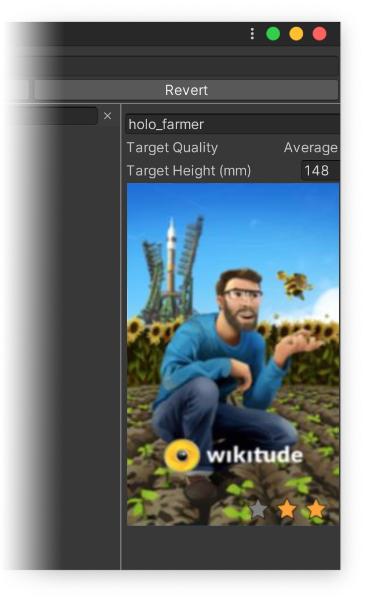
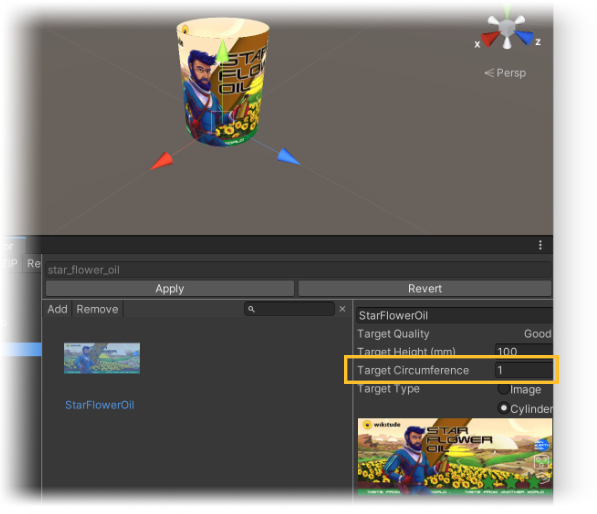
When a single target is selected in a wtc file, additional info about it will be displayed in the right panel. Here you can also rename the target and change its physical height, specified in millimeters. The default value of -1 means that the physical height is not set.
In a zip file, more additional info about the target will be displayed in the right panel depending on the type of the target. In case the target is a plane image, a radio button will be displayed to let you change the type of the target. In case the target is a cylinder, it will also let you change circumference value.
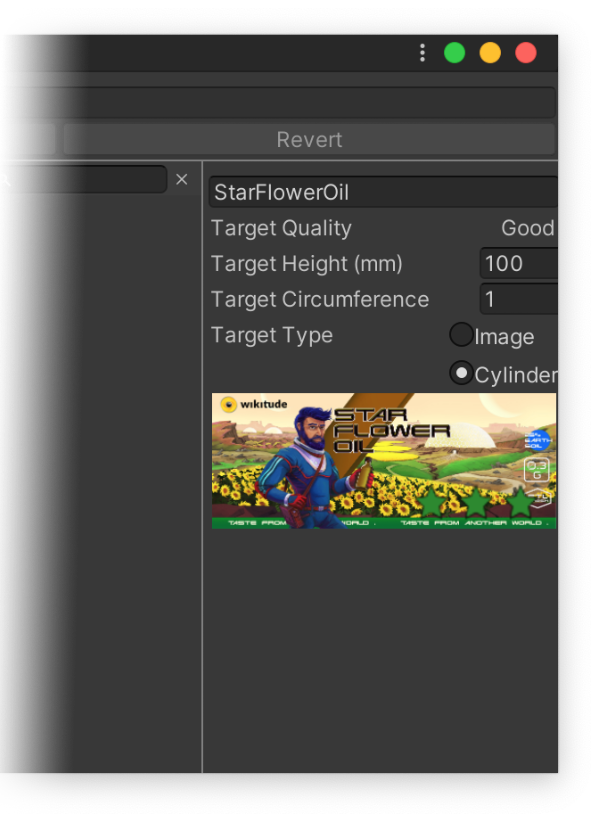
Here you can see more about the circumference value.
# Preview live updating
When you are modifying a target collection, it can work in combination with our preview tool (Image Tracking custom augmentation) to see how the target will look like with the parameters you are setting.
In this case, a cylinder is being previewed with 100 millimeters height. When changing the value in the Target Collection Editor, the cylinder previewed will change its value automatically.
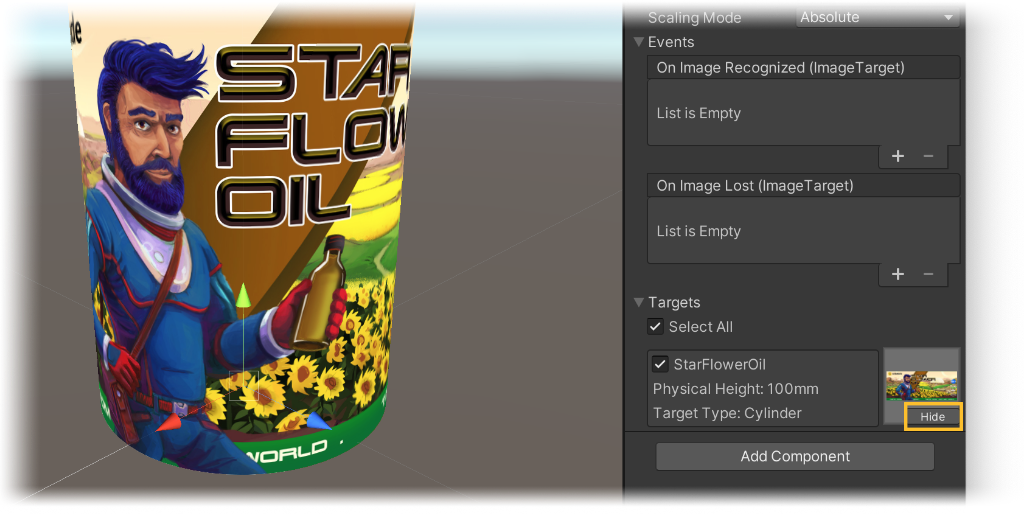
This is also available for image targets and for the circumference value.
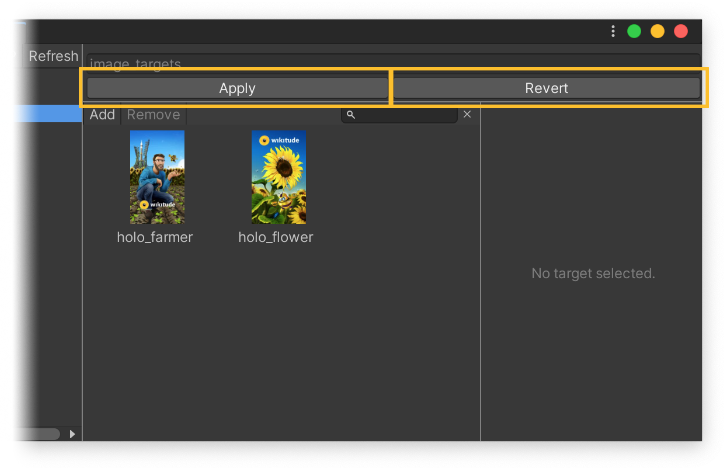
# Save and discard changes
All modifications made to the collection are cached and applied to the actual collection only when you hit the Apply button in the upper part of the window. You can also discard any changes made to a collection by pressing the Revert button.
Important
Make sure you save all your modifications before closing Unity or your changes will be lost!