# Unity Workflows
# Manual Unity scene setup
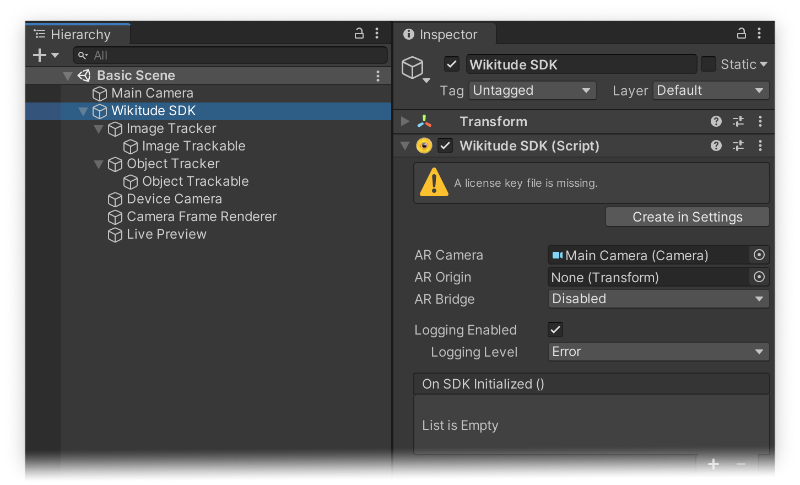
The samples included in the downloaded archive can always be deleted and are not required for a final build. There are several components needed to construct a basic Wikitude scene from scratch.
- The
Wikitude SDKcomponent controls the lifetime of the SDK (only one instance allowed). - A scene can consist of multiple
Image TrackerorObject Trackercomponents. Each tracker component specifies which image or object target collection should be used for recognition and tracking. - One or more
Image TrackableorObject Trackablecomponents can be parented to each tracker. Each trackable specifies which target/targets from the target collection should be used and provides recognition callbacks. - The
Device Cameracomponent controls the hardware camera properties (such as resolution, frame rate and Android specific settings). - The
Camera Frame Renderercomponent controls the rendering of the camera frames acquired from the hardware camera. ACameracomponent is required next to it. - The
Live Previewcomponent is optional and provides multiple ways to run theWikitude SDKinside the Unity Editor. - Finally, a main camera object is needed and has to be linked in the
AR Camerafield of theWikitude SDKcomponent.
# Live preview in the Editor
The Live Preview component provides a way to test a scene within the Unity Editor and without the need of exporting a mobile app.

There are several options available, which will be described in the following.
# Static Image
This mode enables testing a scene with an image as an input. The image can be defined in the component and has to be a Texture 2D object with the Read/Write Enabled flag enabled.
# Webcam
This mode enables testing a scene with a webcam, which can be defined in a dropdown. There is also an option in this mode to mirror the webcam feed.
# Remote Camera
This mode enables testing a scene with the Unity Remote 5 application. There is an option to specify if either the front or back camera of a mobile device should be used. Please refer to the Unity documentation (opens new window) for how to link the app to the Editor.
# Video Clip
This mode enables testing a scene with a video as an input. There are options to set the loop behaviour and the playback speed. Additionally, buttons inside the component provide a way to play/pause, restart and skip through frames.
# Input Plugin
This mode enables testing a scene with a Plugin component that has an input module. In this case, the frames that are inputed into the Plugin component will be display in the Editor.
TIP
AR Foundation scenes can be previewed with the AR Foundation Editor Remote.
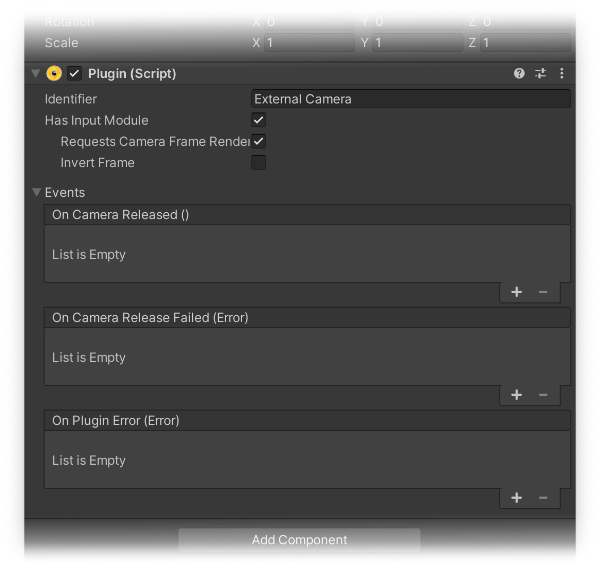
# Input and Output via Plugins
The Plugin component provides access to the rendered camera frame (as a native pointer) as well as an interface to input a custom camera frame. The former concept allows to forward the camera frames coming from the SDK to e.g. a QR code scanner library, that does some additional computation on the camera frame (as demoed in the sample scene Simple - QR Plugin). Inputing a custom camera frame on the other hand, enables using a completely different input source than the default mobile camera. An external camera feed for instance.
# Receiving camera frames from the SDK
Camera frames can be received by registering to the Plugin component's OnCameraFrameAvailable event.
The following example shows how to convert the received CameraFrame (see class documentation (opens new window)) into a Color32 array, which then could e.g. be used to input into another library.
using UnityEngine;
using System.Runtime.InteropServices;
using Wikitude;
...

    public void OnCameraFrameAvailable(CameraFrame frame) {
        // Extract the data from the native frame into a Color32 array.
        var metadata = frame.ColorMetadata;
        var data = new Color32[metadata.Width * metadata.Height];
        if (metadata.ColorSpace == FrameColorSpace.RGBA) {
            var rawBytes = new byte[frame.ColorData[0].DataSize];
            Marshal.Copy(frame.ColorData[0].Data, rawBytes, 0, (int)frame.ColorData[0].DataSize);

            for (int i = 0; i < metadata.Width * metadata.Height; ++i) {
                data[i] = new Color32(rawBytes[i * 4], rawBytes[i * 4 + 1], rawBytes[i * 4 + 2], rawBytes[i * 4 + 3]);
            }

            ...
        }
        // See the PluginController.cs in the samples on how to handle other ColorSpaces
    }
Instead of a Color32 array, the frame's native pointer can also be directly used to create a Texture2D. The sample below shows how to do this if the texture format is RGBA32.
using UnityEngine;
using System.Runtime.InteropServices;
using Wikitude;
...

    public void OnCameraFrameAvailable(CameraFrame frame) {
        // Extract the data from the native frame into a Texture 2D array.
        Texture2D texture = new Texture2D(frame.ColorMetadata.Width, frame.ColorMetadata.Height, TextureFormat.RGBA32, false);
        texture.LoadRawTextureData(frame.ColorData[0].Data, (int)frame.ColorData[0].DataSize);
        texture.Apply(false);
    }
# Inputing camera frames into the SDK
Camera frames can be send to the SDK by passing a CamerFrame object (see class documentation (opens new window)) to the Plugin component's NotifyNewCameraFrame method. The Has Input Module in the component has to be set therefore. Additionally, the Requests Camera Frame Rendering flag can be set to also render the inputed frame (besides running the computer vision algorithms on it) and the Invert Frame flag can be set if the ipnut's source is delivering inverted frames.
The following sample shows how to input a simple Texture2D texture into the SDK.
using UnityEngine;
using System.Collections.Generic;
using System.Runtime.InteropServices;
using Wikitude;
...

    public Plugin InputPlugin;
    public Texture2D InputTexture;

    private int _frameIndex = 0;

    private void InputTexture2D() {
        var metadata = new ColorCameraFrameMetadata {
            Width = InputTexture.width,
            Height = InputTexture.height,
            ColorSpace = FrameColorSpace.RGBA
        };

        Color32[] pixels = InputTexture.GetPixels32();
        var handle = GCHandle.Alloc(pixels, GCHandleType.Pinned);

        var wikitudePlane = new CameraFramePlane {
            Data = handle.AddrOfPinnedObject(),
            DataSize = (uint) pixels.Length * 4,
            PixelStride = 1,
            RowStride = InputTexture.width
        };

        var planes = new List<CameraFramePlane>() { wikitudePlane };
        var cameraFrame = new CameraFrame(++_frameIndex, 0, metadata, planes);
        InputPlugin.NotifyNewCameraFrame(cameraFrame);
    }
# Android Camera2 API handling
Although the Camera2 API replaces the deprecated Camera class, there are still devices around that don't (or partially) support the new API. There are two settings in the Device Camera component to address this.
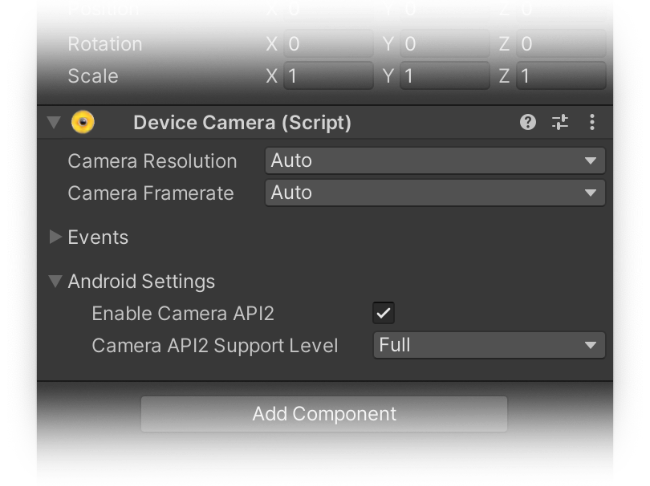
The support level of the Camera2 API can be set to one of 4 support levels once the option is enabled:
- Legacy
- Limited
- Level 3
- Full
Visit the official documentation here (opens new window) for more information.
Most of the time, the Device Camera will get an error if the API is not supported (but unfortunately not always). Therefore, leaving the support level at Full is recommended if there are no specific Android devices targeted.
Once an error occurs, the camera API should be switched to maintain camera functionality. The Wikitude SDK instances have to be restarted therefore. One way to do this is to set a PlayerPrefs (opens new window) value, restart the scene and retrieve the value to set the EnableCamera2 flag on the Device Camera (see code sample below).
using UnityEngine;
using UnityEngine.SceneManagement;
using Wikitude;

public class Camera2APIHandler : MonoBehaviour
{
    public DeviceCamera Camera;

    void Awake() {
        Camera.EnableCamera2 = PlayerPrefs.HasKey("Disable Camera2API") ? false : true;
    }

    void OnCameraError(Error error) {
        if (Application.platform == RuntimePlatform.Android && Camera.EnableCamera2) {
            // Reload scene after setting the PlayerPrefs value.
            PlayerPrefs.SetInt("Disable Camera2API", 1);
            PlayerPrefs.Save();
            SceneManager.LoadScene("Main");
        }
    }
}
# Known issues
# Issues on macOS
# UnityEditorMacOSBridge.bundle is damaged
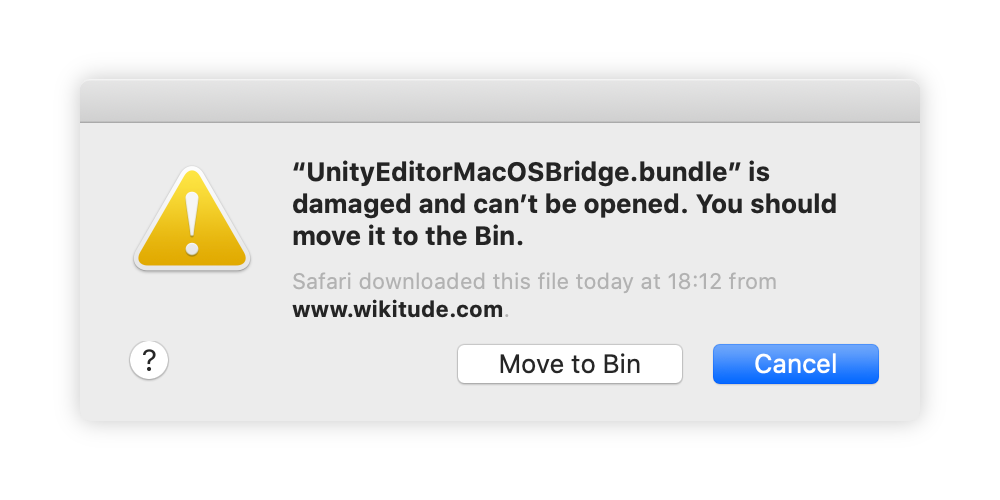
Apple has tightened up the Gatekeeper (opens new window) security in macOS (starting with Catalina) and that will mark an important file of the Unity Plugin as damaged (as seen in the image above). This error will occur if any Wikitude component is addressed in the Editor (either by focusing on a relevant GameObject or stepping into playmode). This can be fixed by removing a certain attribute from the flagged file with this terminal command:
xattr -rd com.apple.quarantine path_to_file
The value path_to_file should be replaced by the individual path to UnityEditorMacOSBridge.bundle, which is located in the Unity project folder under Packages/com.wikitude.core/Editor/Libraries/macOS/. Finally, the issue should be resolved after restarting the Unity Editor.
# ClearCachedPreview error in Unity
The Unity Plugin supports almost all - but not all - graphics APIs in Unity. A query is run on every scene start, to check if there are unsupported graphics APIs enabled. If yes, the Plugin will correct the graphics APIs located in the Player Settings. Doing so, internally PlayerSettings.SetGraphicsAPIs will fail on macOS Catalina, but a notification will still be shown, to give a hint of what to change in the Player Settings.