Setup Guide iOS

There are only a few steps necessary to add the Wikitude SDK to your iOS application. This guide will explain them in detail.
Prerequisites
- Xcode: Available in the Mac App Store
- A valid iOS Development Certificate
Load your Xcode project
The first step is to open an existing Xcode project. If there is no project available, create one using the Xcode project setup wizard.
Adding the Wikitude SDK Framework
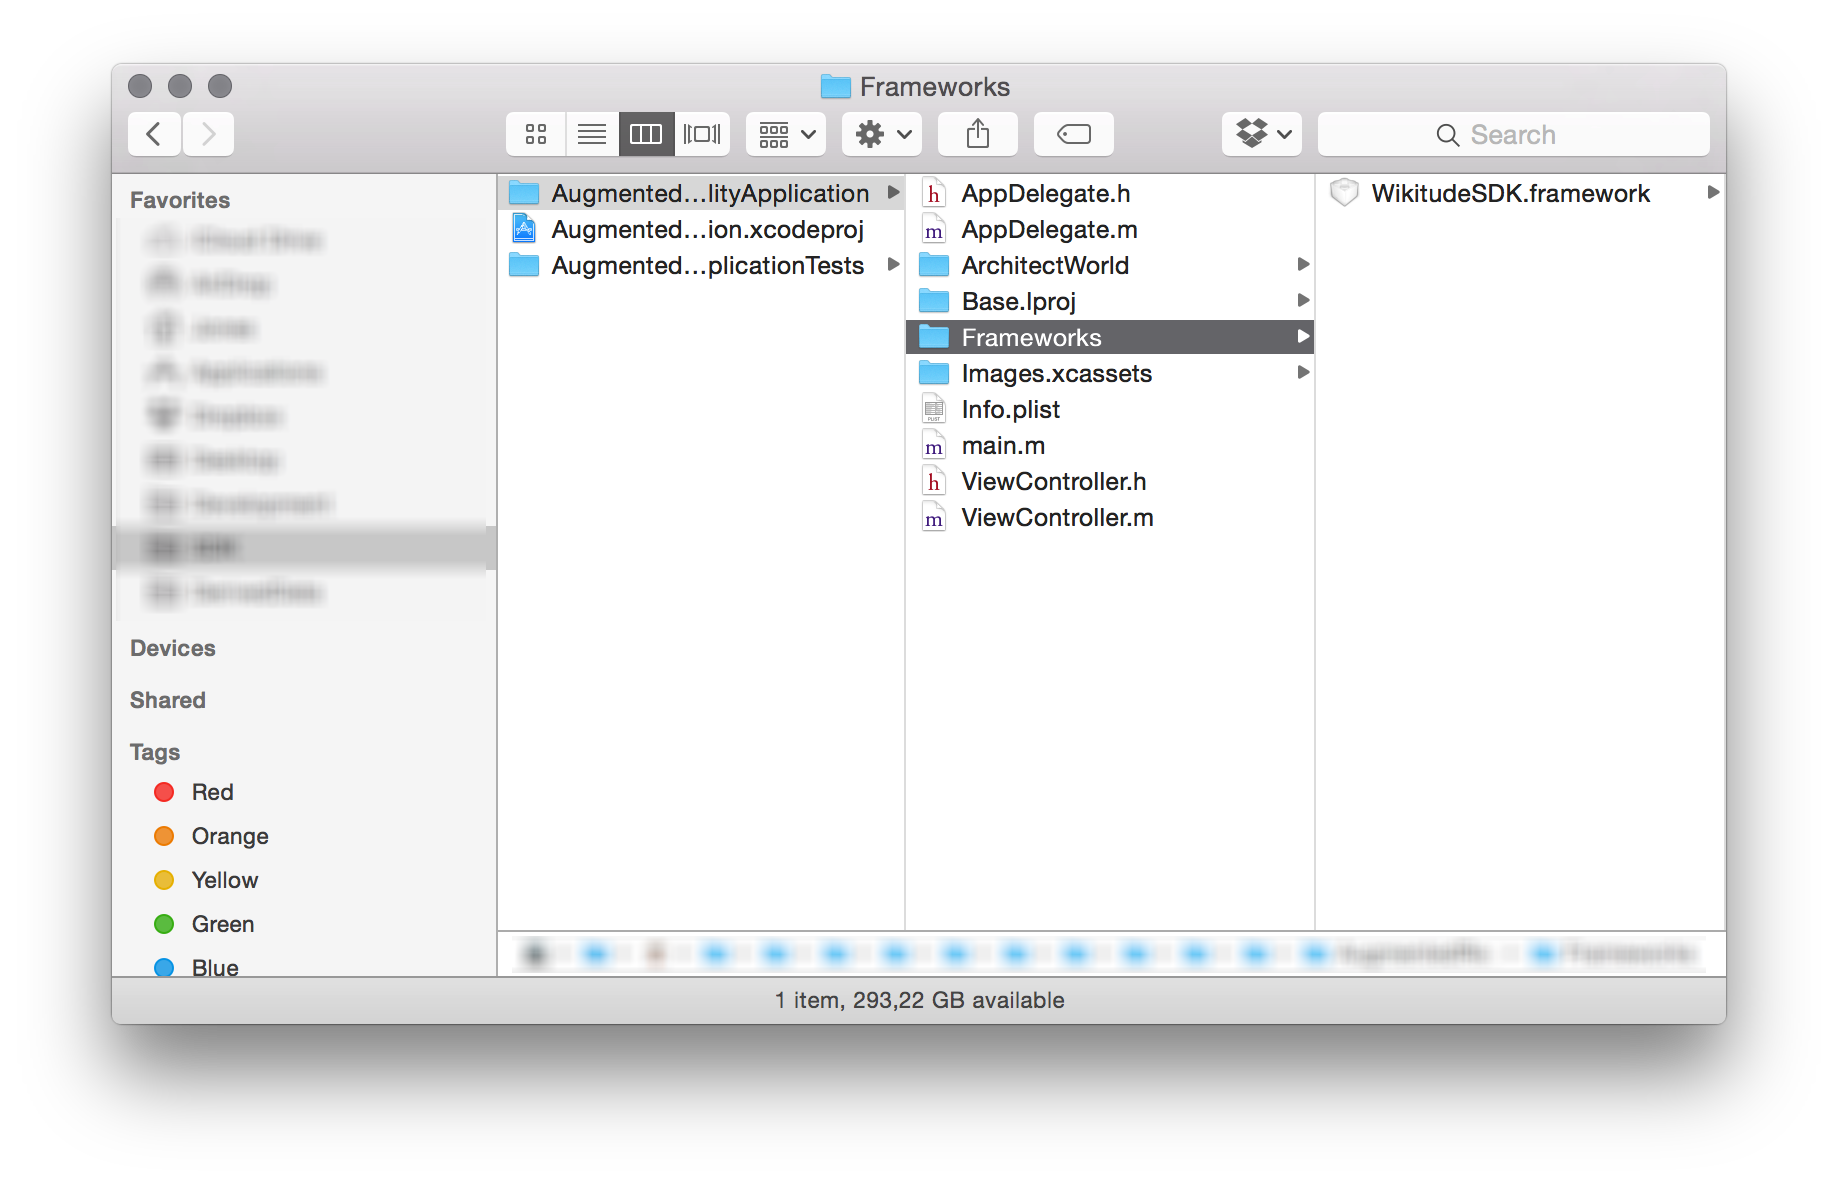
At first, create a new directory in your project structure and name it e.g. Frameworks. Copy the downloaded WikitudeSDK.framework into this directory afterwards.
After the Wikitude SDK Framework was copied into an appropriate location, it can be added using the Embedded Binaries panel from your targets General tab (Click on the little plus sign).
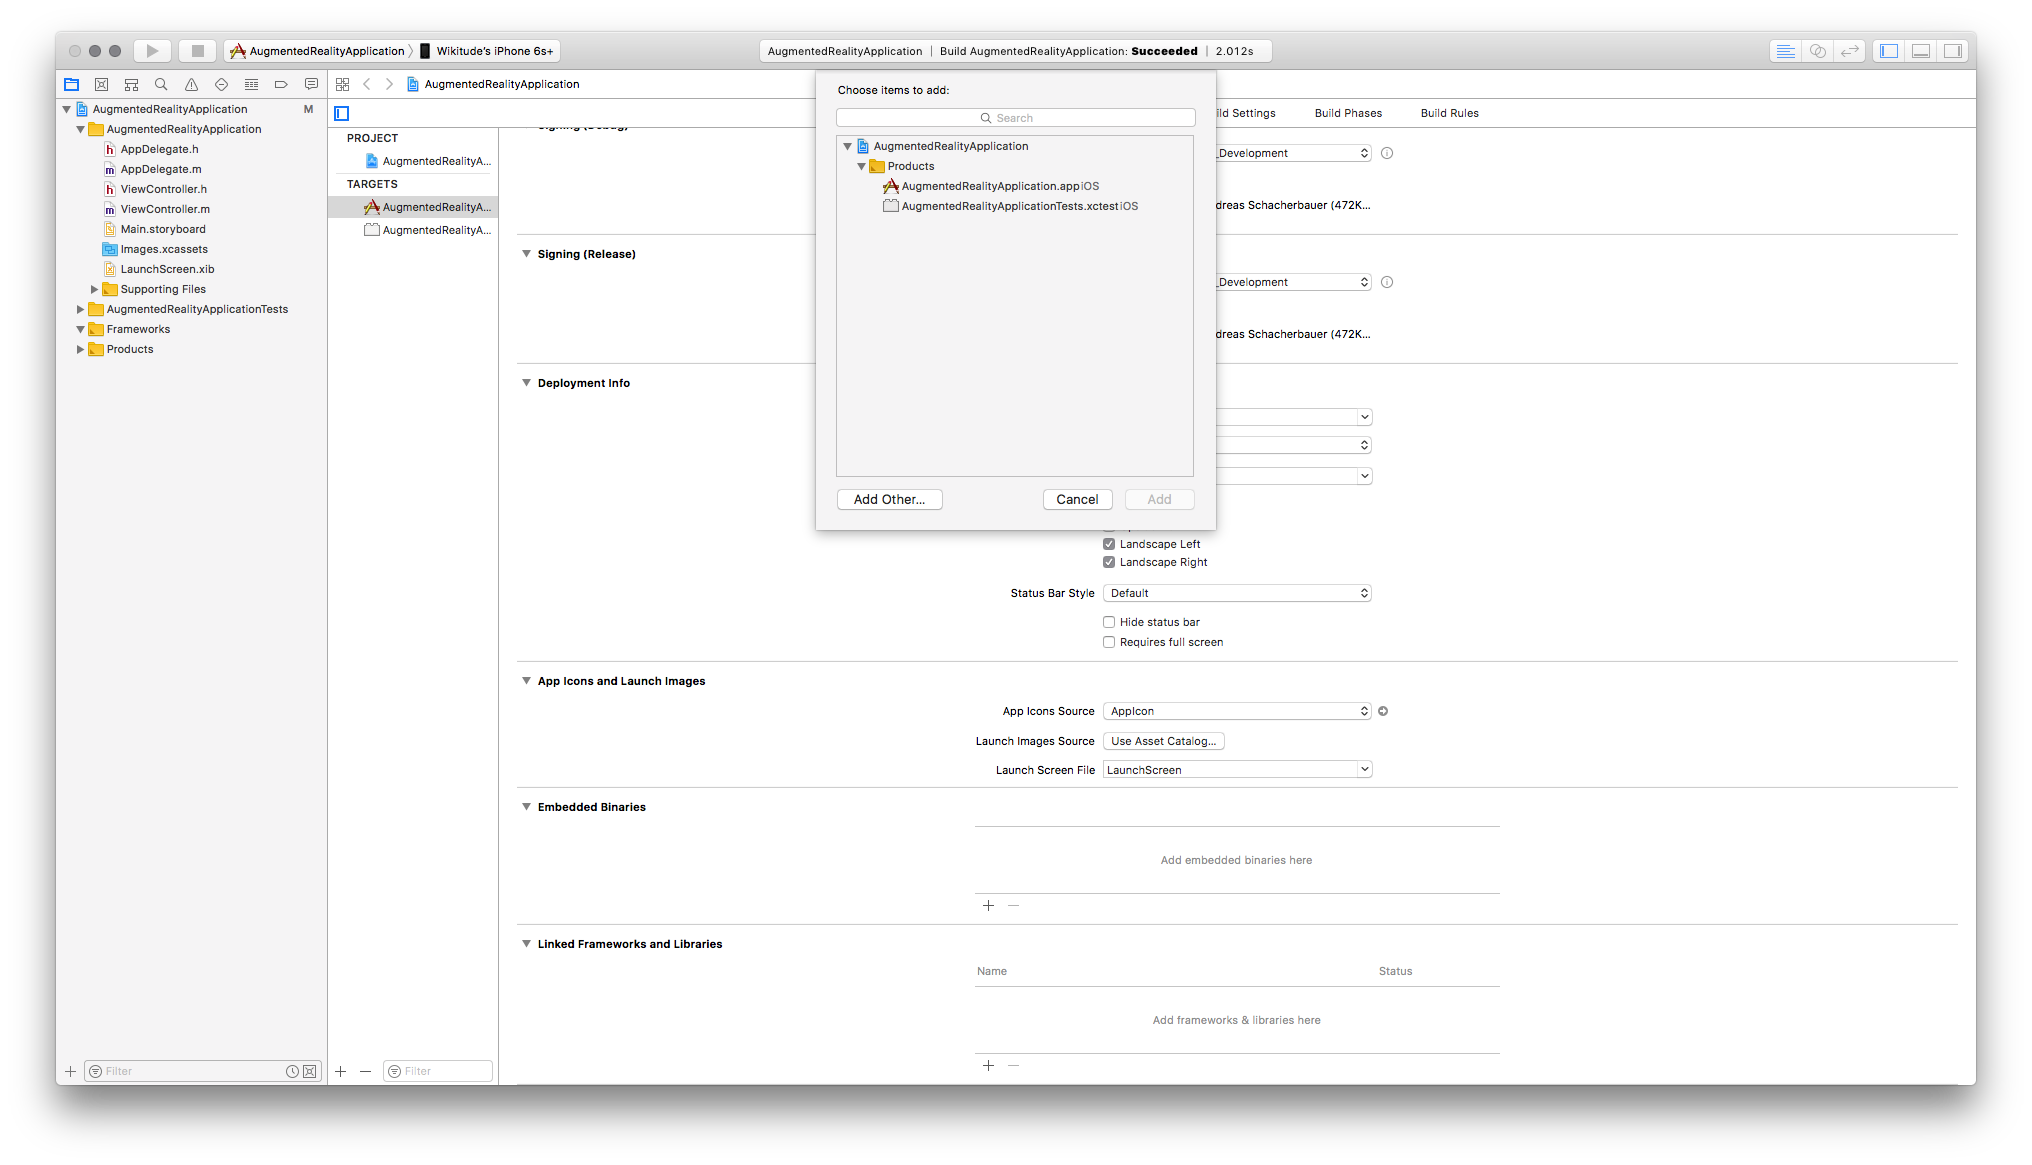
In the open dialog, navigate to the Framework location and click Open.

Configure Build Settings
The Wikitude SDK does not require any other build setting changes. It's fully Module and Bitcode compatible, so no additional system frameworks or build settings need to be changed.
Update the application's Info.plist
The Wikitude SDK requires the use of the device's camera. In order to use it, the NSCameraUsageDescription key has to be set to some text which describes to the app's user why access to his device's camera is needed. Feel free to use our default text "Access to the camera is needed to display augmented reality content on top of your camera image.".
If the app also needs to use a geo location, set the NSLocationWhenInUsageDescription key to some text e.g. "Access to your geo data is needed to display augmented reality images on your screen.".
In case the screenshot generation feature is used im combination with camera roll export, the NSPhotoLibraryUsageDescription key is required, again with some text describing why access is required.
Using the SDK in your Application
After all setup steps are completed, the Wikitude SDK is ready to be used within an iOS application. The class to work with is WTArchitectView. This UIView subclass allows you to load ARchitect Worlds.
Since the Wikitude SDK is a Framework, the header import should look like this: #import <*FrameworkName*/*HeaderFile.h*>. This import is typically done in the UIViewController subclass which manages the WTArchitectView instance.
#import <WikitudeSDK/WikitudeSDK.h>
It is common practice to add a WTArchitectView and WTNavigation property to the UIViewController subclass.
@property (nonatomic, strong) WTArchitectView *architectView;
To initialize an instance of type WTArchitectView in code, use the -init method. If the project uses Storyboards, -initWithCoder: is also implemented and ready for use.
The following snippet shows a complete WTArchitectView initialization.
- (void)viewDidLoad
{
    // ... other initialization code ...

    NSError *deviceNotSupportedError = nil;
    if ( [WTArchitectView isDeviceSupportedForRequiredFeatures:WTFeature_Geo | WTFeature_ImageTracking error:&deviceNotSupportedError] ) { // 1
        self.architectView = [[WTArchitectView alloc] init];
        self.architectView.delegate = self;
        self.architectView.requiredFeatures = WTFeature_ImageTracking; // 2
        [self.architectView setLicenseKey:@"YOUR_LICENSE_KEY"]; // 3
        [self.view addSubview:self.architectView]; // 4
          // ...
    } else {
        NSLog(@"device is not supported - reason: %@", [deviceNotSupportedError localizedDescription]);
    }
    // ... continue initialization ...
}
Use the
isDeviceSupportedForRequiredFeatures:error:method to determine if the current device is capable of running Architect Worlds with certain feature requirements. See the class reference ofWTArchitectViewfor more information.Use the
requiredFeaturesproperty to specify which Wikitude SDK features are intended to be used. This helps to only start necessary components.The
setLicenseKey:method allows you to pass a string containing the license key. Read this chapter on how to obtain a free trial key.The WTArchitectView instance needs to be added to the applications view hierarchy.
To start the camera, the WTArchitectViews -start:completion and -stop methods need to be called. The UIViewControllers -viewWillAppear: and -viewWillDisappear: methods can be used for this purpose. If the UIViewController which manages the WTArchitectView, is present at the moment the application will resign active (User pressed the Home button or an UIAlert is shown) or will become active again, the WTArchitectView needs to be started/stopped accordingly.
Loading an ARchitect World
All the necessary steps to include an ARchitect World into an iOS application are very similar on how to add the WikitudeSDK.framework to an iOS application.
- The ARchitect World files need to be added to the Xcode projects folder structure
- the Xcode project itself and
- finally used within the iOS application.
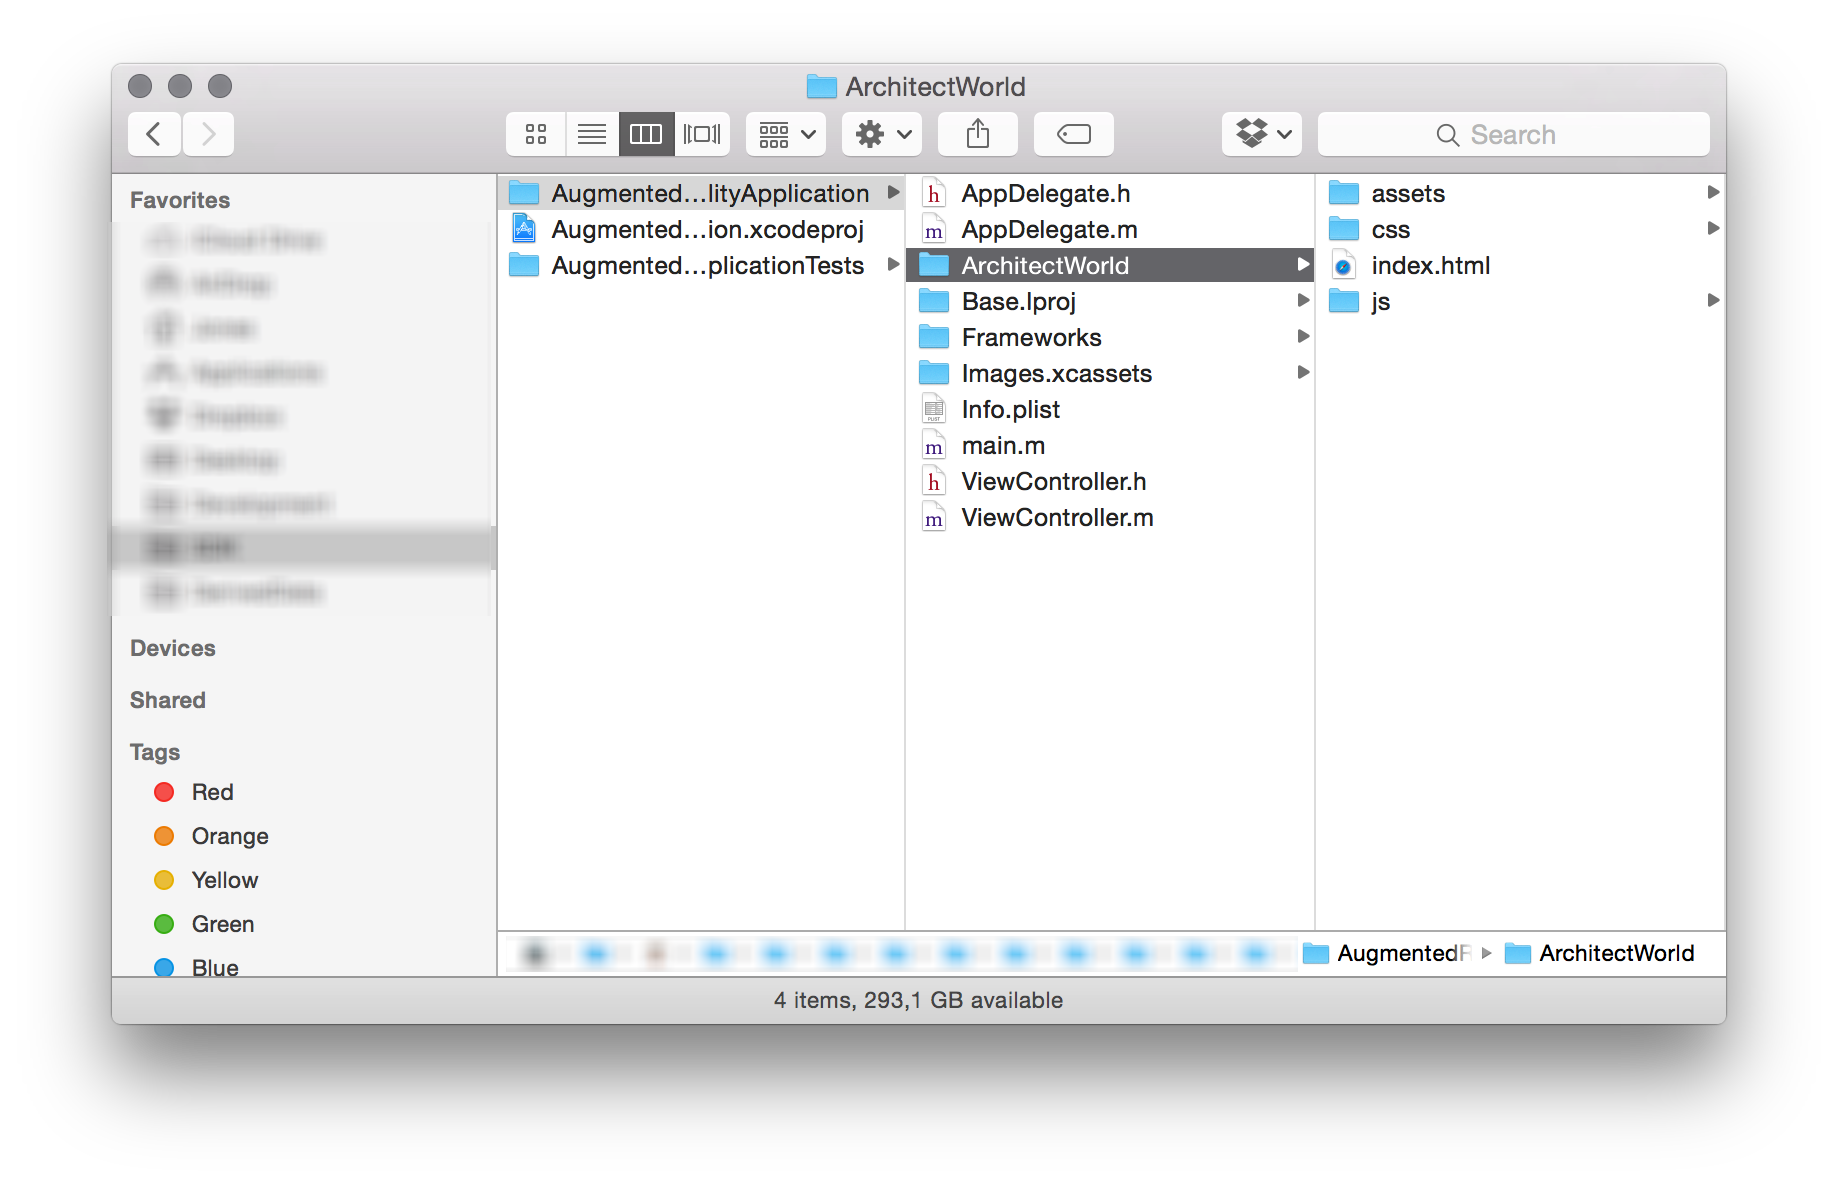
The following image shows a typical Xcode project structure. A new folder named ArchitectWorld was created and an Architect World was added.
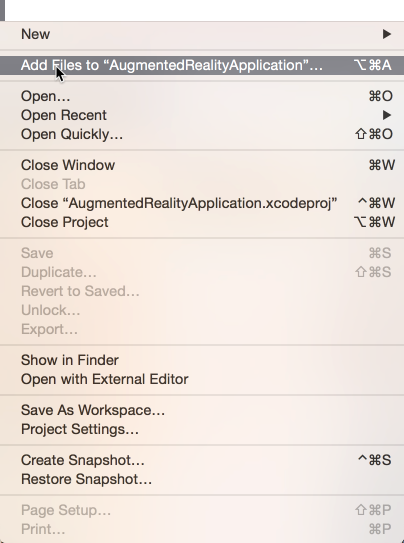
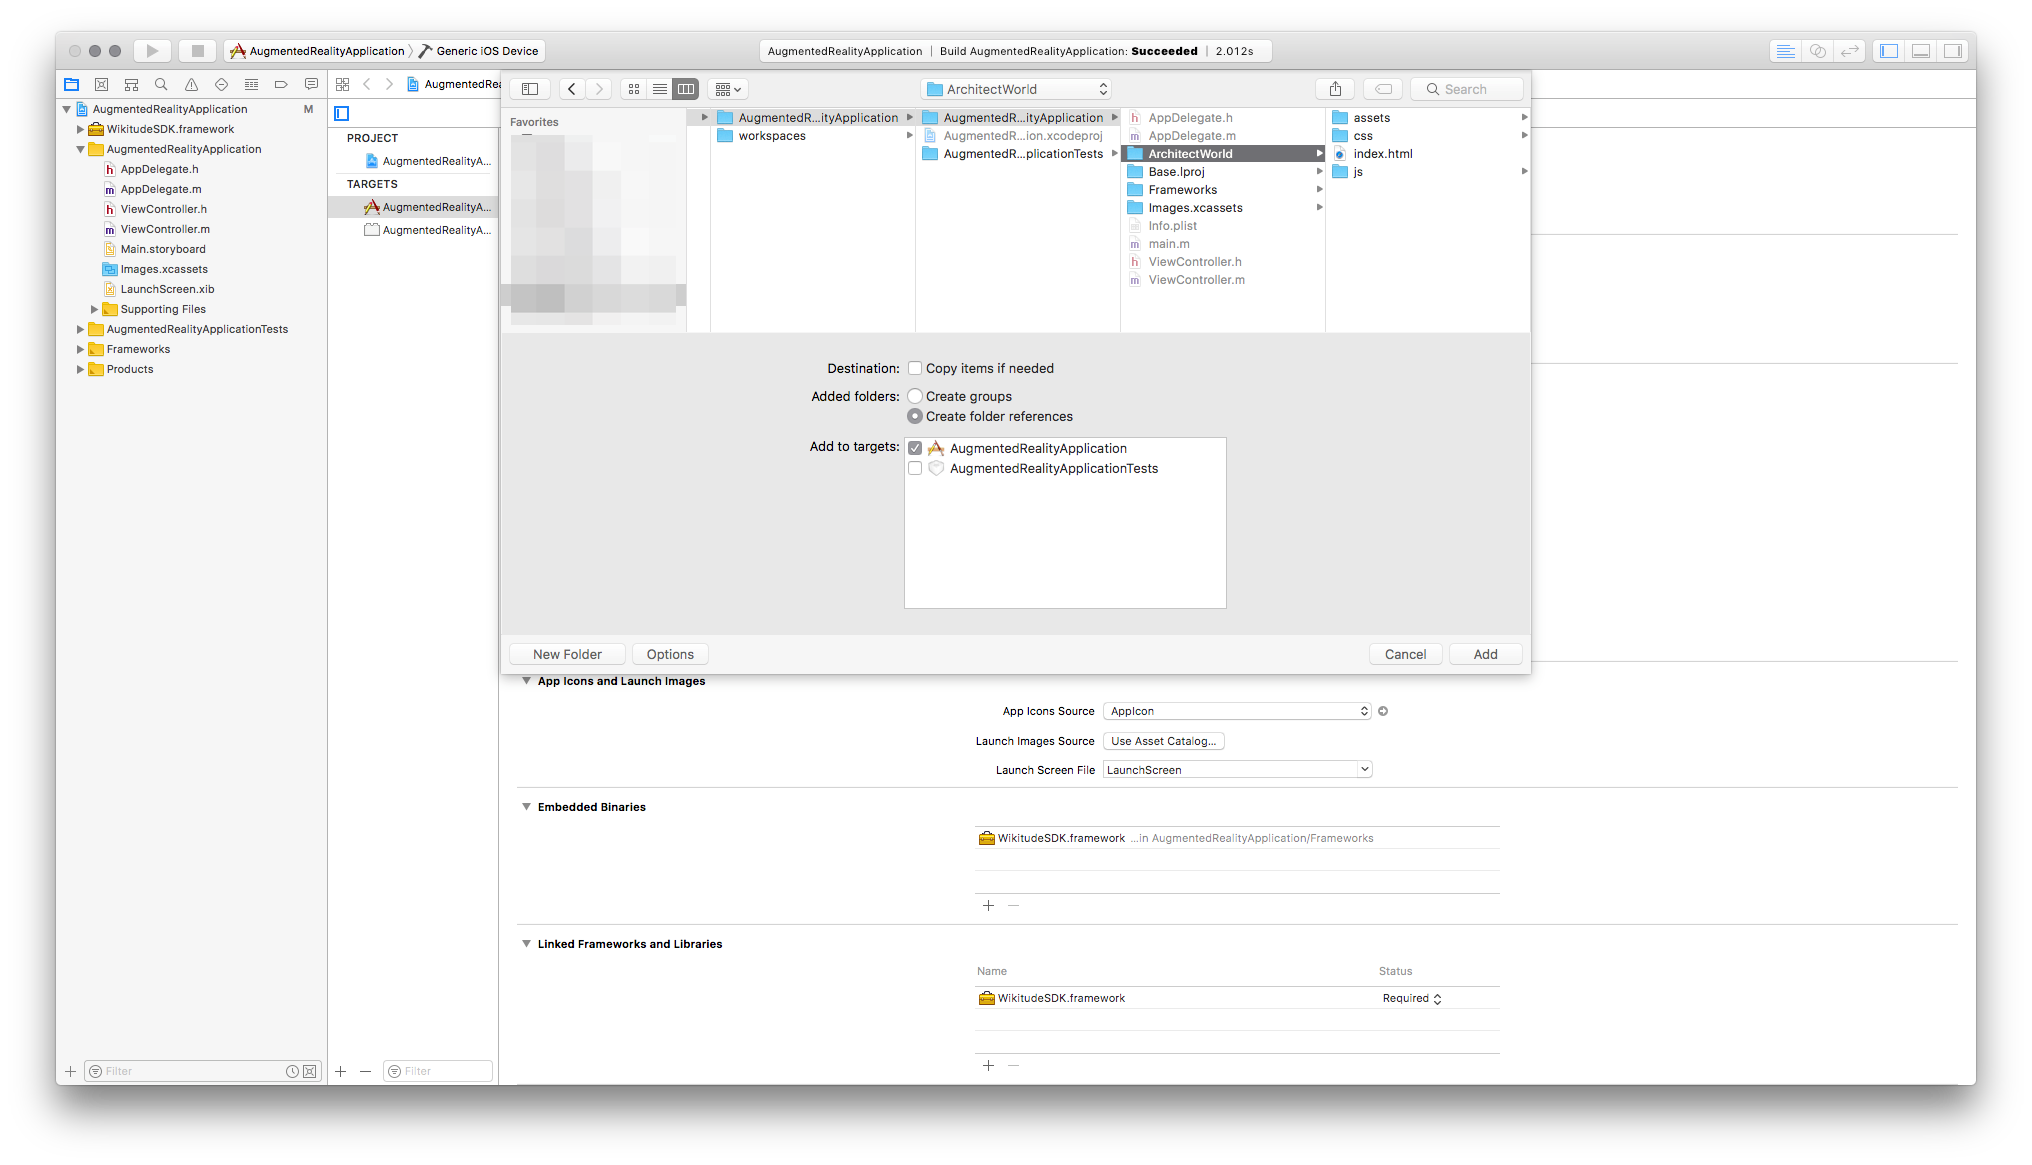
Back in Xcode, the ARchitect World can be added by choosing Add Files to "*Project_Name*" from the File menu.
In the File -> Open dialog, select the main ArchitectWorld folder.
Note: Please make sure to select the Create folder references for any added Folders option. This will copy all the files and subfolders to the applications resource bundle in the same structure. Additionally, any files that will be added later in time are automatically added to the resource bundle when you build your application.
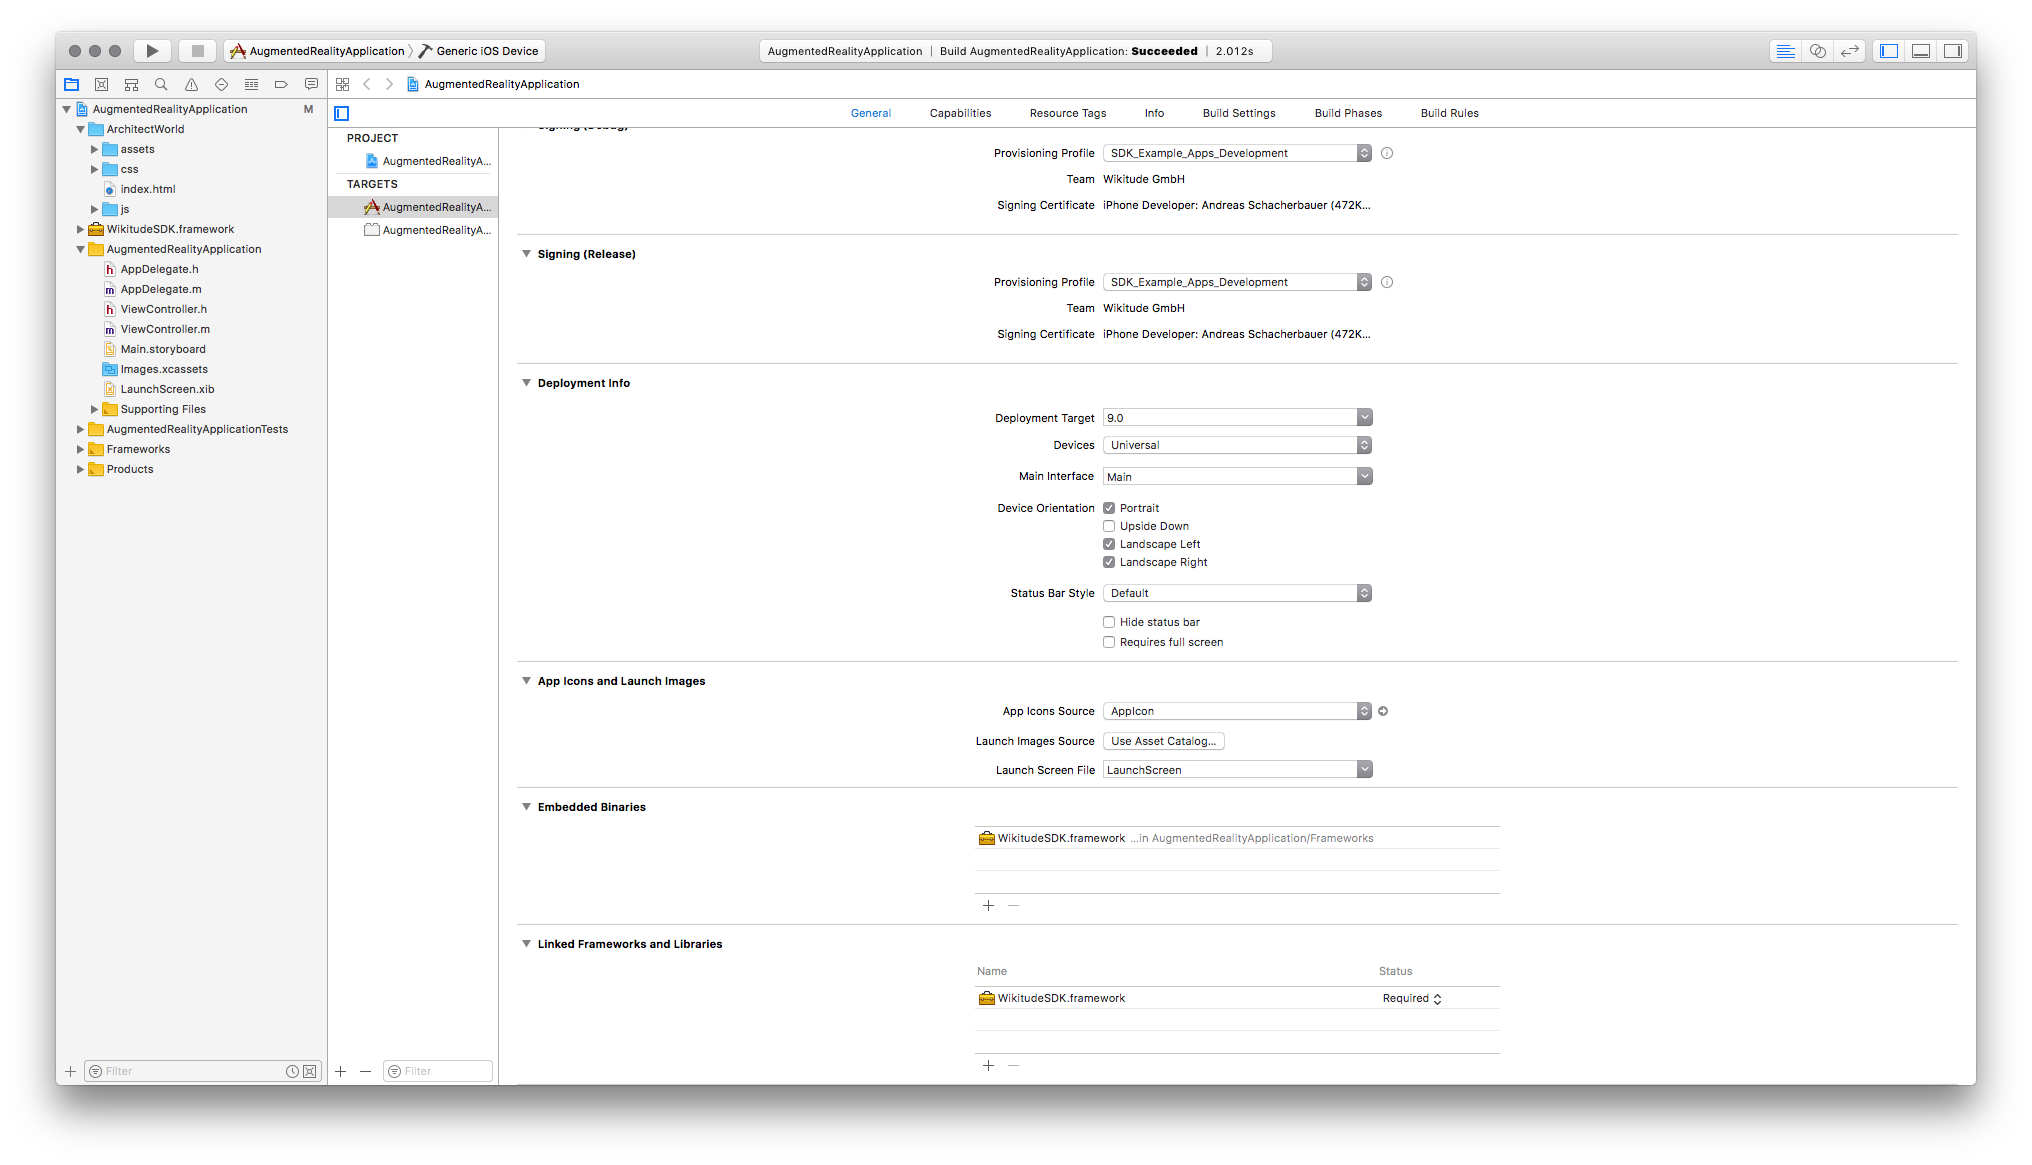
This is how your project should look like after all steps are properly completed.
Architect Worlds can be loaded using the -loadArchitectWorldFromURL: method provided by WTArchitectView. To get the Architect World URL, use NSBundles method -URLForResource:withExtension:subdirectory:.
The following listing shows how both methods should be used.
NSURL *architectWorldURL = [[NSBundle mainBundle] URLForResource:@"index" withExtension:@"html" subdirectory:@"ArchitectWorld"];
[self.architectView loadArchitectWorldFromURL:architectWorldURL];
Typically this will be done when the WTArchitectView instance was created. The -start:completion:/-stop and -loadArchitectWorldFromURL: methods do not depend on each other, so the order in which they are called does not matter.
It is not necessary to load the Architect World again if the WTArchitectView is started again. Loading a new Architect World while another one is already loaded will unload the current Architect World and release all its associated objects and resources.
Note: You can find a Xcode project on GitHub which covers proper WTArchitectView handling in every detail.
Using the Wikitude SDK in Swift
The Wikitude SDK is written in Objective-C and is thereby naturally compatible with Apple's Swift programming language. To use the Wikitude JS SDK in Swift, create a bridging header by creating some new empty Objective-C file with Xcode. Xcode will ask you if you want to create a bridging header, so please confirm that and the header will be created. You can delete the empty Objective-C file. After that simply add the following line to the bridging header:
#import <WikitudeSDK/WikitudeSDK.h>
You can now call all the interfaces of the Wikitude SDK from Swift. Add all the additional Objective-C headers you need to the bridging header in order to expose their classes to Swift. Xcode automatically generates Swift-interfaces for them.
Swift and Input Plugins
Swift can call Objective-C and Objective-C++ code naturally, but does not have the capability to call C++ code. In order to get input plugins running, you have to create Objective-C++ wrapper classes as intermediates to enable the Swift-C++ communication. Don't forget to expose the wrapper classes to Swift by importing them in the bridging header.
This is the implementation of one of the wrapper classes from our Swift examples, in which we add a C++ barcode reader into our app:
@implementation BarcodePluginWrapper
{
    std::shared_ptr<wikitude::sdk::Plugin> _plugin;
}

- (id)initWithCameraWidth:(int)cameraWidth :(int)cameraHeight :(UIViewController *) viewController
{
    self = [super init];
    if (self)
    {
        _plugin = std::make_shared<BarcodePlugin>(cameraWidth, cameraHeight, viewController);
    }
    return self;
}

- (void)registerPluginWithSDK:(WTArchitectView *)architectView;
{
    NSError *error = nil;

    BOOL pluginRegistered = [sdk registerPlugin:_plugin error:&error];
    if ( !pluginRegistered )
    {
        NSLog(@"Unable to register plugin '%@'. Error: %@", [NSString stringWithUTF8String:_plugin->getIdentifier().c_str()], [error localizedDescription]);
    }
}

- (void)removePluginFromSDK:(WTArchitectView *)architectView
{
    [sdk removePlugin:_plugin];
}

@end
Swift can't handle the std::shared_ptr that points to the plugin, so we're storing it in our Objective-C++ wrapper. For the initialization of this plugin we need two integer values as well as a UIViewController. Change your init method accordingly depending on which parameters you need for your own plugin.
Every input plugin needs to be able to register to and unregister from the Wikitude SDK, so we create methods for both purposes.