 Support
 FAQ
FAQImage Recognition & Tracking: best practices and target guidelines
Eva Triantafillopoulou
Augmented reality experiences come in all shapes and sizes. Some have a location-based trigger, while others are activated by features of the physical scenery itself. Some rely on a 3D object to make the augmentation come to life, while others depend on a 2D target image to reveal the digital content. Within the various AR-activating mechanisms, however, it is safe to say that Image Recognition & Tracking is the classic go-to feature when the subject is augmented reality.
If you are working with the Wikitude SDK, the Wikitude App or the Wikitude Studio, this Wikitude AR Guide series is for you. In this first installment, Wikitude shares Target Image guidelines as well as tips and tricks to achieve the best AR results for Image Recognition & Tracking.
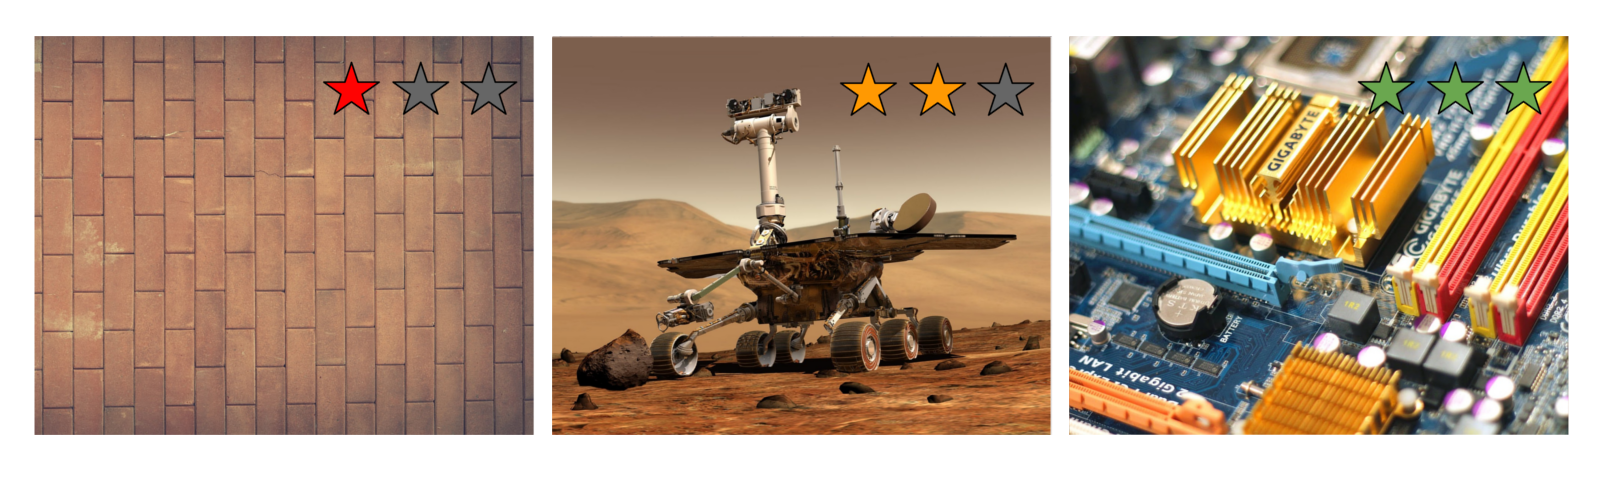
And make sure to take advantage of the star rating available on Wikitude Studio, which indicates the quality of the image target. The more stars a target has, the better it can be recognized and tracked. You just need to log in to Studio in order to use it for free.
Image Targets: Guidelines, Tips, and Tricks
Optimal Image Dimensions (500 ≥ 1000 pixels)
Images sized between 500 and 1000 pixels in each direction (width or height) are within the optimal range for achieving high-performing recognition and tracking.

Smaller images do not contain enough graphical information to extract the so-called feature points and larger images do not improve the tracking quality. The uniqueness, amount, and distribution of feature points are the key indicators for good detection and tracking quality
Aspect Ratio (1:1)
Images with a squarish aspect ratio (around 1:1) are the ideal proportion for optimal AR results.
Other aspect ratios such as 3:4, 2:3 up to 16:9, however, will also perform well.
Panorama images or other images with extreme aspect ratios, on the other hand, won’t deliver an optimal tracking performance.

Tip: Crop the most prominent squarish part of your image to use as the target image.
Image Contrast (high)
Images with high local contrast and a large amount of rich textured areas are best suited for reliable detection and tracking.
Color contrast (i.e. green to red edge) only appears as high contrast to the human eye but is not discriminative to computer vision algorithms as they are operating on grayscale images.

Tip: Use a photo editing tool to increase the contrast of a low-contrast target image to improve detection and tracking quality. Keep in mind that the digital and printed version of the image should be exactly the same.
Distribution of textured areas (even)
Images with evenly distributed textured areas are good candidates for reliable detection and tracking. This might be the hardest part to be in control of and often can’t be changed.

Tip: Check the feature distribution by using the heat map function of Studio and crop the most prominent part of your image to use as the target image.
Whitespace (minimum)
Single-colored areas or smooth color transitions often found in backgrounds do not exhibit graphical information suitable for detection and tracking.

Tip: Crop the most prominent part of your image to use as the target image.
Vector-based graphics
Logos and vector-based graphics usually consist of very few areas with high local contrast and/or textured structures and are, therefore, hard to detect and track.

Tip: Try adding additional elements to the graphic such as a logotype or other elements.
Images with a lot of text
Images consisting primarily of large areas of text are hard to detect and track.

Tip: Try to have at least some graphical material and/or images next to your text for your target image.
Repetitive patterns
Repetitive patterns exhibit the same graphical information at each feature point and therefore cannot be localized reliably.
Images with slightly irregular structures can convey similar information to the target audience while providing enough unique feature points to be detected.

Tip: Try a different selection of your image including non-patterned parts or use images with irregular patterns.
Star rating – Wikitude Studio
The star rating that appears when an image is uploaded to our target management tool is only a first estimation of how well the target is expected to work. Even images with a low initial rating (1 star) may work fairly well. An image does not need 3 stars to work well. A 2-star rating is already very good and will deliver good results in most conditions.
Tip: Test your image even if it gets an initial 1-star rating. Images with 2-stars do not need any further optimization for most use cases. The heat map tool can help differentiate between a workable 0-star image and an image that would not work at all.
Supported Devices with optimal performance
Fine-tuning your target image within these guidelines should result in a smooth and steady AR experience. Update to the latest Wikitude SDK version and make sure to use supported devices for maximum performance.
For more AR information, access the Wikitude Forum to browse through various AR topics discussed by active developers worldwide. Should you have any further questions, please contact studio@wikitude.com for extra support.
Stay tuned for the next installments of the Wikitude AR Guide series to learn more about best practices regarding Object Recognition and Tracking and Instant Tracking.
Interested in creating an AR project of your own?
Talk to one of our specialists and learn how to get started.


