Target Management
To augment planar surfaces (e.g. 2D pages of a magazine) or real objects (e.g. 3D statues), create a file which contains all information for recognition and tracking. A project is either of type 'Image' (2D) or 'Object' (3D). It consists of a set of targets for further augmentation. Image targets are collected in a WTC file, while Object Targets in the WTO format. The files are used to create fully functional offline AR experiences. Image Projects may be managed in the cloud, in which case the recognition is being processed online. The SDK client periodically sends the camera image to the server for the recognition to then track the matching target offline.
The interface
The target management interface consists of two views: the projects overview page, which lists all of your projects and the targets page of a single project. The interface contains a header and a toolbar with the user menu. If you are viewing the targets page of a particular project, the toolbar displays additional information.
User menu
The User menu, on the right side of the toolbar, contains all the information either related to your account or Wikitude Studio in general.

Storage
Below your email address, you will see how much storage is used by your project files. Storage is consumed by target files and augmentations. To upgrade your storage, you can buy more space.
Account
The Account dialog shows all the information you need to get started with the Cloud Recognition service.
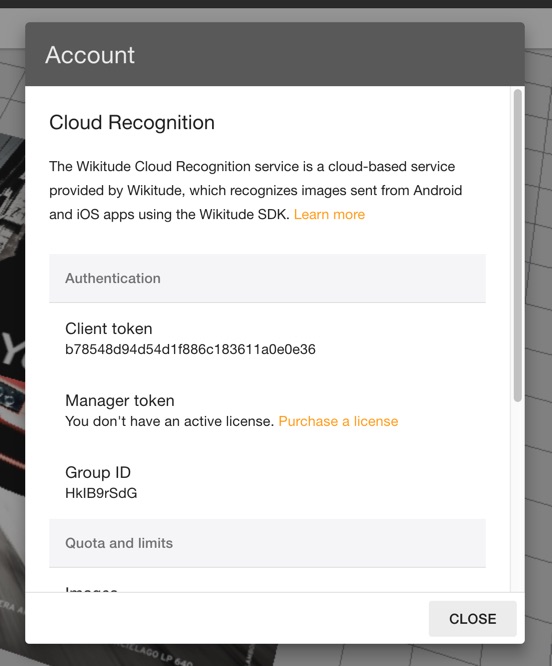
You need the Manager API token to authenticate yourself against the Wikitude Studio API. If your account doesn't have a Manager API token, you can purchase a license in the store. Please be advised that unless otherwise requested, your Manager API token will be enabled for the account which was used for the purchase. The Client API token authenticates calls from the Wikitude SDK to the Cloud Recognition service. This token is bound to your developer account.
This Group ID helps us with load-balancing your calls and providing a better service overall. It was introduced with SDK 8.0 and is mandatory since then. It's part of the Client API and needs to be added to your tracker.
Quota and limits show the two main limitations regarding the Cloud Recognition service: Your token has a certain number of Targets that can be uploaded and stored on the Cloud Recognition service. Scans are, in effect, calls from the Wikitude SDK to the via Wikitude Studio API. Those are also limited. All commercial licenses come with an allowance of 1,000,000 scans per month per developer account.
The License type displays the license you are currently owning. Wikitude offers different commercial licenses with various quota limits in the store.
Wikitude is providing several hosting locations for its Cloud Recognition services to cut down unwanted network latency. The Account dialog is showing you in which Region you and your customers are operating.
Language
The Language dialog lets you set the Wikitude Studio language.
Help
The Help menu item leads you directly to the Wikitude Studio documentation.
What's new
The What's new dialog keeps track of the latest features, improvements, and fixes.
Sign out
To exit Wikitude Studio click the Sign out menu item.
Project page
When logging on to Wikitude Studio the project page is displayed. It lists all project you created.
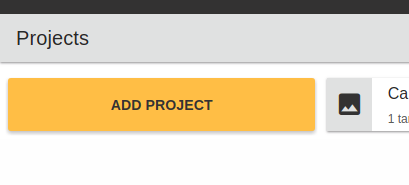
ADD PROJECT opens a dialog which allows you to select the project type, Image or Object, and to define the project name.
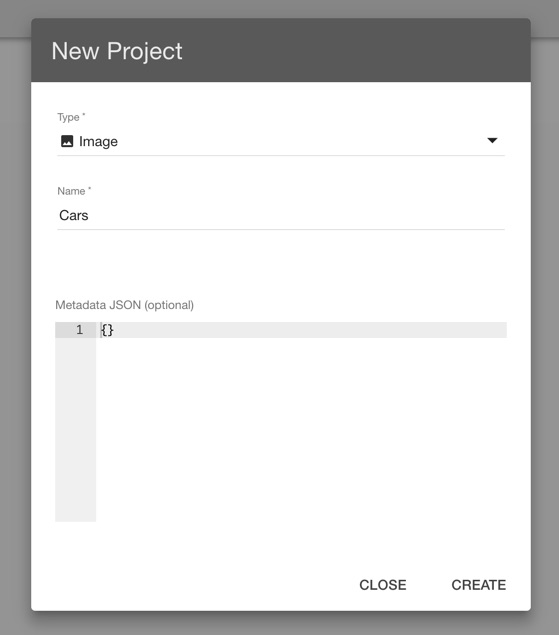
If you want to learn more about object projects, read more in the Object Targets section. The metadata JSON-field is optional. It allows you to store additional information to a project. This information can be retrieved via the Wikitude Studio API. After you created the project container, it appears as an item on the page. Click on it to open the target page.
Target page
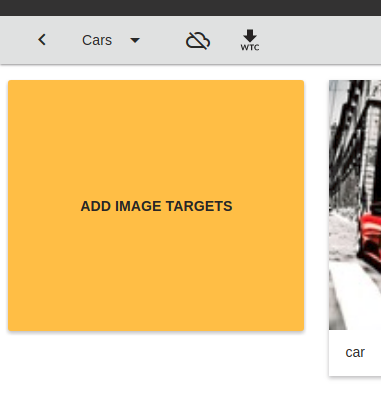
The target page lists the set of image or Object Targets (depending on the project type) which were uploaded to a project. Furthermore, you may add more targets by clicking on ADD IMAGE TARGETS or ADD OBJECT TARGETS.
Every target has a performance indicator. The stars indicate the quality of the target, how well the target is recognized on the device. The more stars a target gets, the more likely and the better it will be recognized and tracked. Currently, the star rating is unreliable for Object Targets. Test the recognition quality with the preview in the Studio Editor.
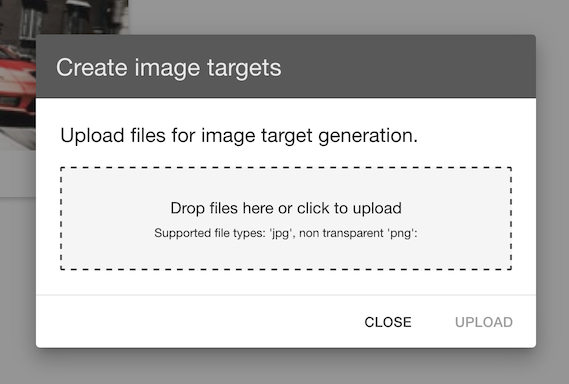
Image targets
Non-transparent PNG and JPEG files of maximum 3MB file-size are supported formats for image-target creation. A WTC file may hold up to 1,000 targets for offline processing while with online Cloud Recognition, the WTC file supports up to 50,000 different images.
The uploaded images should be between 500 to 1,000 pixels in each dimension, rich in contrast, and contain evenly distributed textured areas. Furthermore, the image should contain distinctive structures. Note that pictures with large areas with text, repetitive patterns and contrast only by edges will lead to a poor rating value. Color contrast will be ignored since images are processed in greyscale only.
More about choosing a proper target image can be read in our slide deck Best practice with image targets
Publish to cloud
Cloud Recognition is the preferred approach for managing a large number or a dynamic set of targets. For example, one may force update an application every time a new issue of an augmented magazine is published in order to enable having all assets offline. However, it can be much more convenient to instead manage the experience in the cloud. Cloud Recognition may operate on a set of up to 50,000 targets but also allows you to attach JSON information for each target.
In order to turn on CloudRecognition capabilities, open the preferred project and press on the cloud icon ![]() on the top bar. The required attributes for SDK usage are shown in the appearing dialog.
on the top bar. The required attributes for SDK usage are shown in the appearing dialog.
Have a look at the "Cloud Recognition" SDK Sample application for more details.
WTC generation
A Wikitude Image Collection (WTC) file is essential for offline recognition and tracking of a 2D planar image. It may contain a maximum of 1,000 assets. The 'download WTC'-icon ![]() WTC in the top left menu opens a dialog box that allows you to select the preferred SDK version. Moreover, you may set the recipient email address for retrieving the download information to the WTC file after it is generated. For best performance, always use the latest SDK and the related WTC version. Have a look at the "Image Recognition" SDK samples for more details. Note that it is also possible to build WTC files through a RESTful API.
WTC in the top left menu opens a dialog box that allows you to select the preferred SDK version. Moreover, you may set the recipient email address for retrieving the download information to the WTC file after it is generated. For best performance, always use the latest SDK and the related WTC version. Have a look at the "Image Recognition" SDK samples for more details. Note that it is also possible to build WTC files through a RESTful API.
Image Target properties
The properties of your targets can be found by clicking the more-icon  next to the target name and then
  Properties. In the opened dialog you will find a preview image, a heat map toggle, the targets star rating, distribution rating, the target ID, when it was last edited, the targets metadata and its physical height.
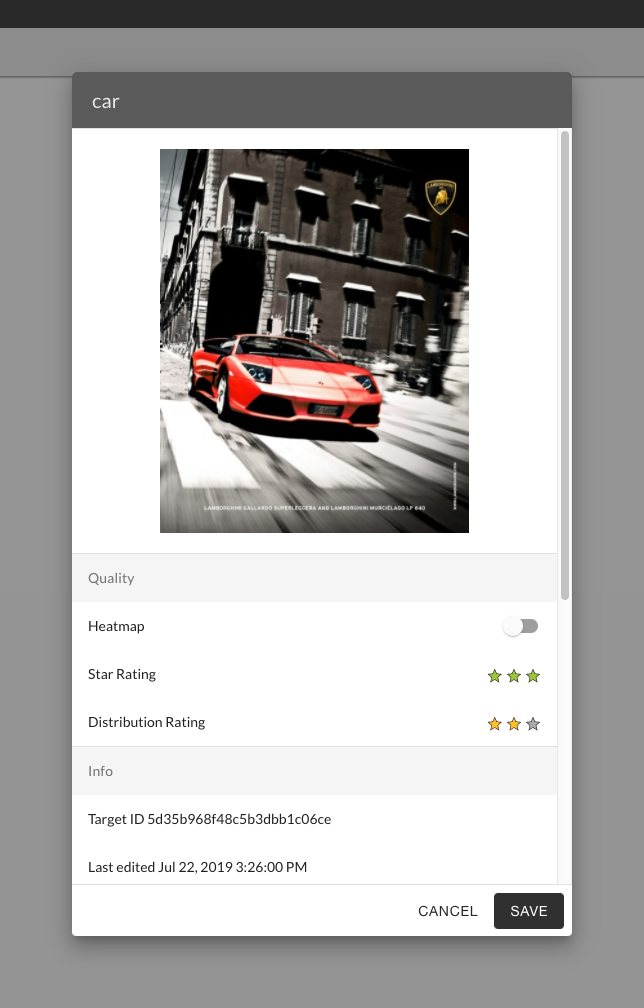
Heat map
By toggling the heat map, you'll get a graphical indicator, showing you hot zones in red color on top of your image. Hot zones are areas, which are more likely to be recognized.
Star rating
The star rating indicates the quality of the target, i.e. how well the target is recognized on the device. The more stars a target has, the better it can be recognized and tracked.
Distribution rating
The distribution rating indicates how well feature-points scatter over the target image. The more stars a target has, the more reliable it can be recognized and tracked, even if partly covered.
Metadata
The metadata field allows you to store additional project information. This information can then be retrieved via the Wikitude Studio API.
Physical height
Here you can determine the anticipated physical height of your target image in the real world in mm (1 millimeter = 0.0393701 inches). The value will mainly be used to calculate the distance between your target and the tracking device.
Object Targets
A WTO project may hold up to 10 objects using images for feature extraction. The three-dimensional objects need to be recorded from all different angles to guarantee proper recognition and tracking phase.
Structure and size of the object are significant. Objects below a size of 5cm/2-inches are challenging as well. The object should be static. Dynamic and deformable parts are ok, as long as the majority of the object stays static. For proper recognition and positioning, try to record only the static parts of the object. Depending on the number of glossy surfaces in the object, they may as well cause malfunction of the recognition and tracking. Check out the best practices for choosing a suitable Object Target.
Each Object Target has a star rating symbolizing the performance to expect during recognition and tracking.
Generation based on image files
A set of images showing the object from different angles serve as input for the WTO generation. The images are limited to a pixel count of 27 megapixels and best practices for the image based approach can be found in this guide. In general, blurry, noisy, or images showing unrelated objects, may cause incorrect feature extraction. It is also not advised to edit the images used for Object Target creation, because this can lead to the images meta-data (EXIF) being lost - which is required in the creation process.
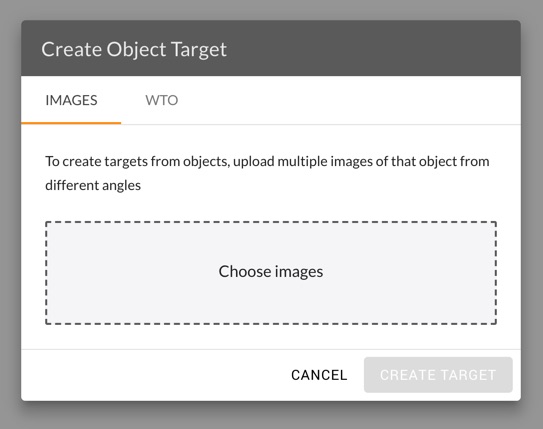
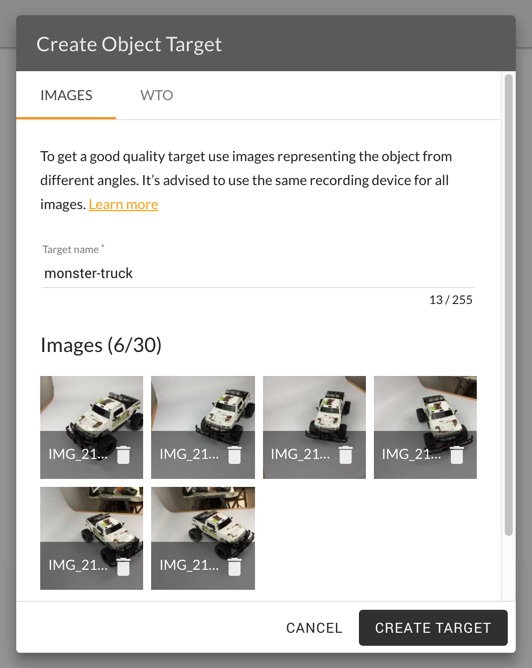
To create a target, click ADD OBJECT TARGETS, select the object's images and drag them onto the Add Target drag & drop area.
In the next dialog enter the targets name and click the Create target button. In this step, the camera's FOV is required and extracted from the images meta-data (EXIF). If the FOV extraction is not possible, please enter the device model manually so the image can be processed in the best way.
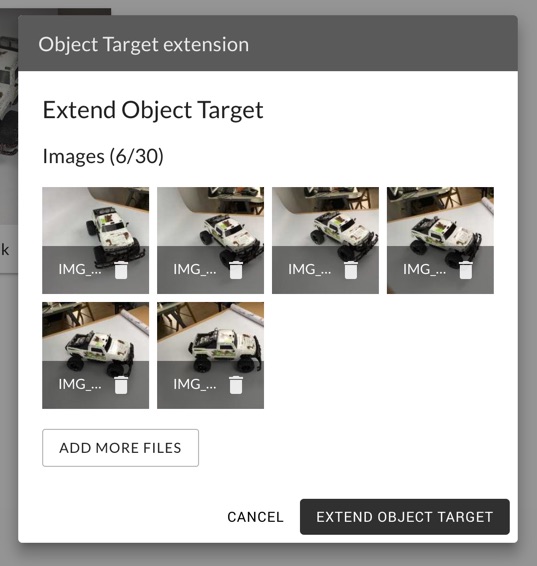
Object Target Extension
Image-based Object Targets can be extended with additional images to improve tracking and recognition quality.
To extend a target, you open a specific targets dropdown menu and select Extend Object Target. This will open a dialog in which you can upload additional images. After you picked your desired images, click Extend Object Target and wait for the process to finish.
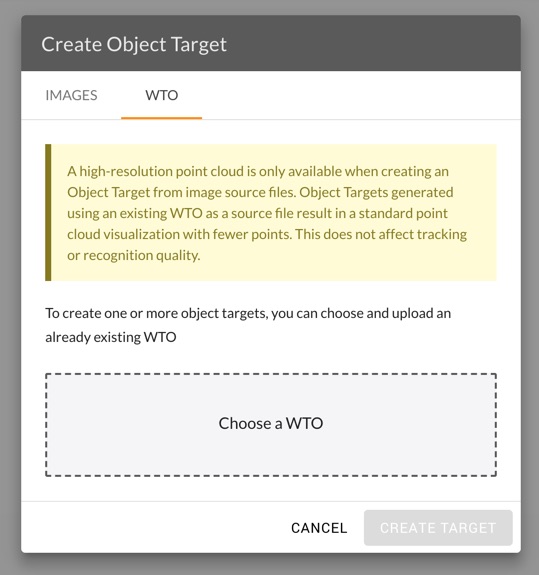
WTO files
Another option to create Object Targets is by uploading a WTO file (find the file size limit in the dialog). You can either download a WTO file from an existing Object Target Projects or use the Wikitude SDK "save and load instant target" feature.
To upload a WTO file, click ADD OBJECT TARGETS, select the WTO tab in the appearing dialog, select the WTO file and drag it onto the Choose a WTO drag & drop area.
After successful target creation, the dialog will close, and your newly created targets will be displayed in the project overview.
A high-resolution point cloud is only available when creating an Object Target from image source files. Object Targets generated using an existing WTO as a source file result in a standard point cloud visualization with fewer points. This does not affect tracking or recognition quality.
WTO generation
A so-called Wikitude Object Collection File acts as the core asset for offline recognition. It holds all the data required for recognition and tracking of the objects in a project. On the project page, after pressing the WTO button on top left menu, a dialog box appears. An email is sent once the file is available for download. For more details, have a look at the "Object Recognition" SDK samples
Object Target properties
The properties dialog for Object Targets can be accessed in the same way as the Image Targets properties dialog. The dialog shows your target's ID and when it was last edited. The target can also be renamed in the dialog.
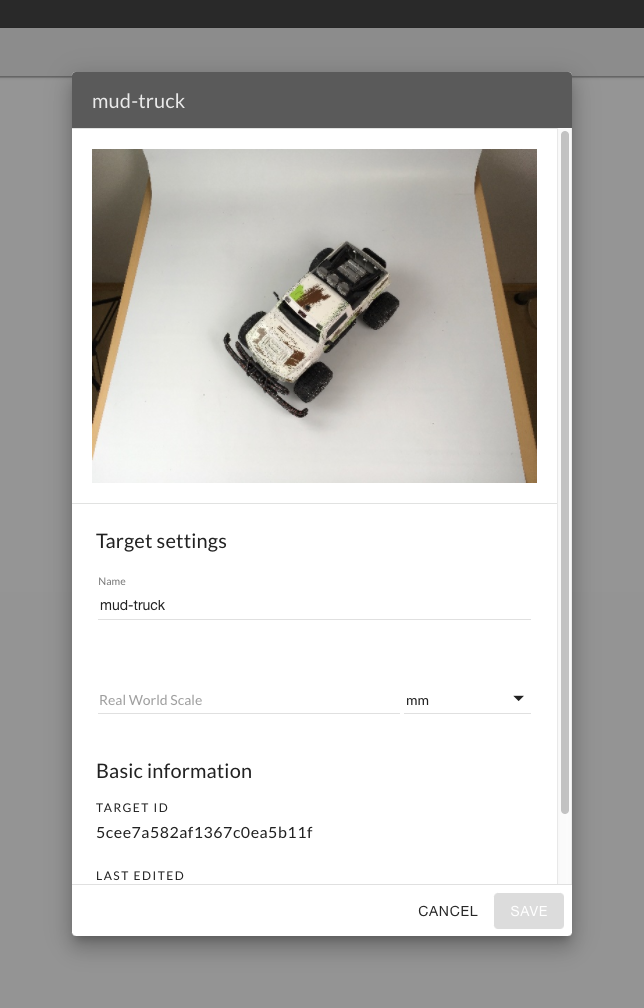
Real World Scale
Here you can determine the anticipated physical scale of your target in the real world. In the Studio Editor, 10 grid squares equal 1 SDU (scaled distance unit), which in turn equals 1 meter. The longest side of the point cloud must be scaled in Studio so that it matches the real-world scale of the object. So if the object is 50cm in length, the point cloud should be 0.5 units in Studio as well. This can again be verified in Unity after the .wto was exported. The visualization should also be authored with real-world scale in mind.
With the ruler setting enabled it is easier to identify the size of the bounding box
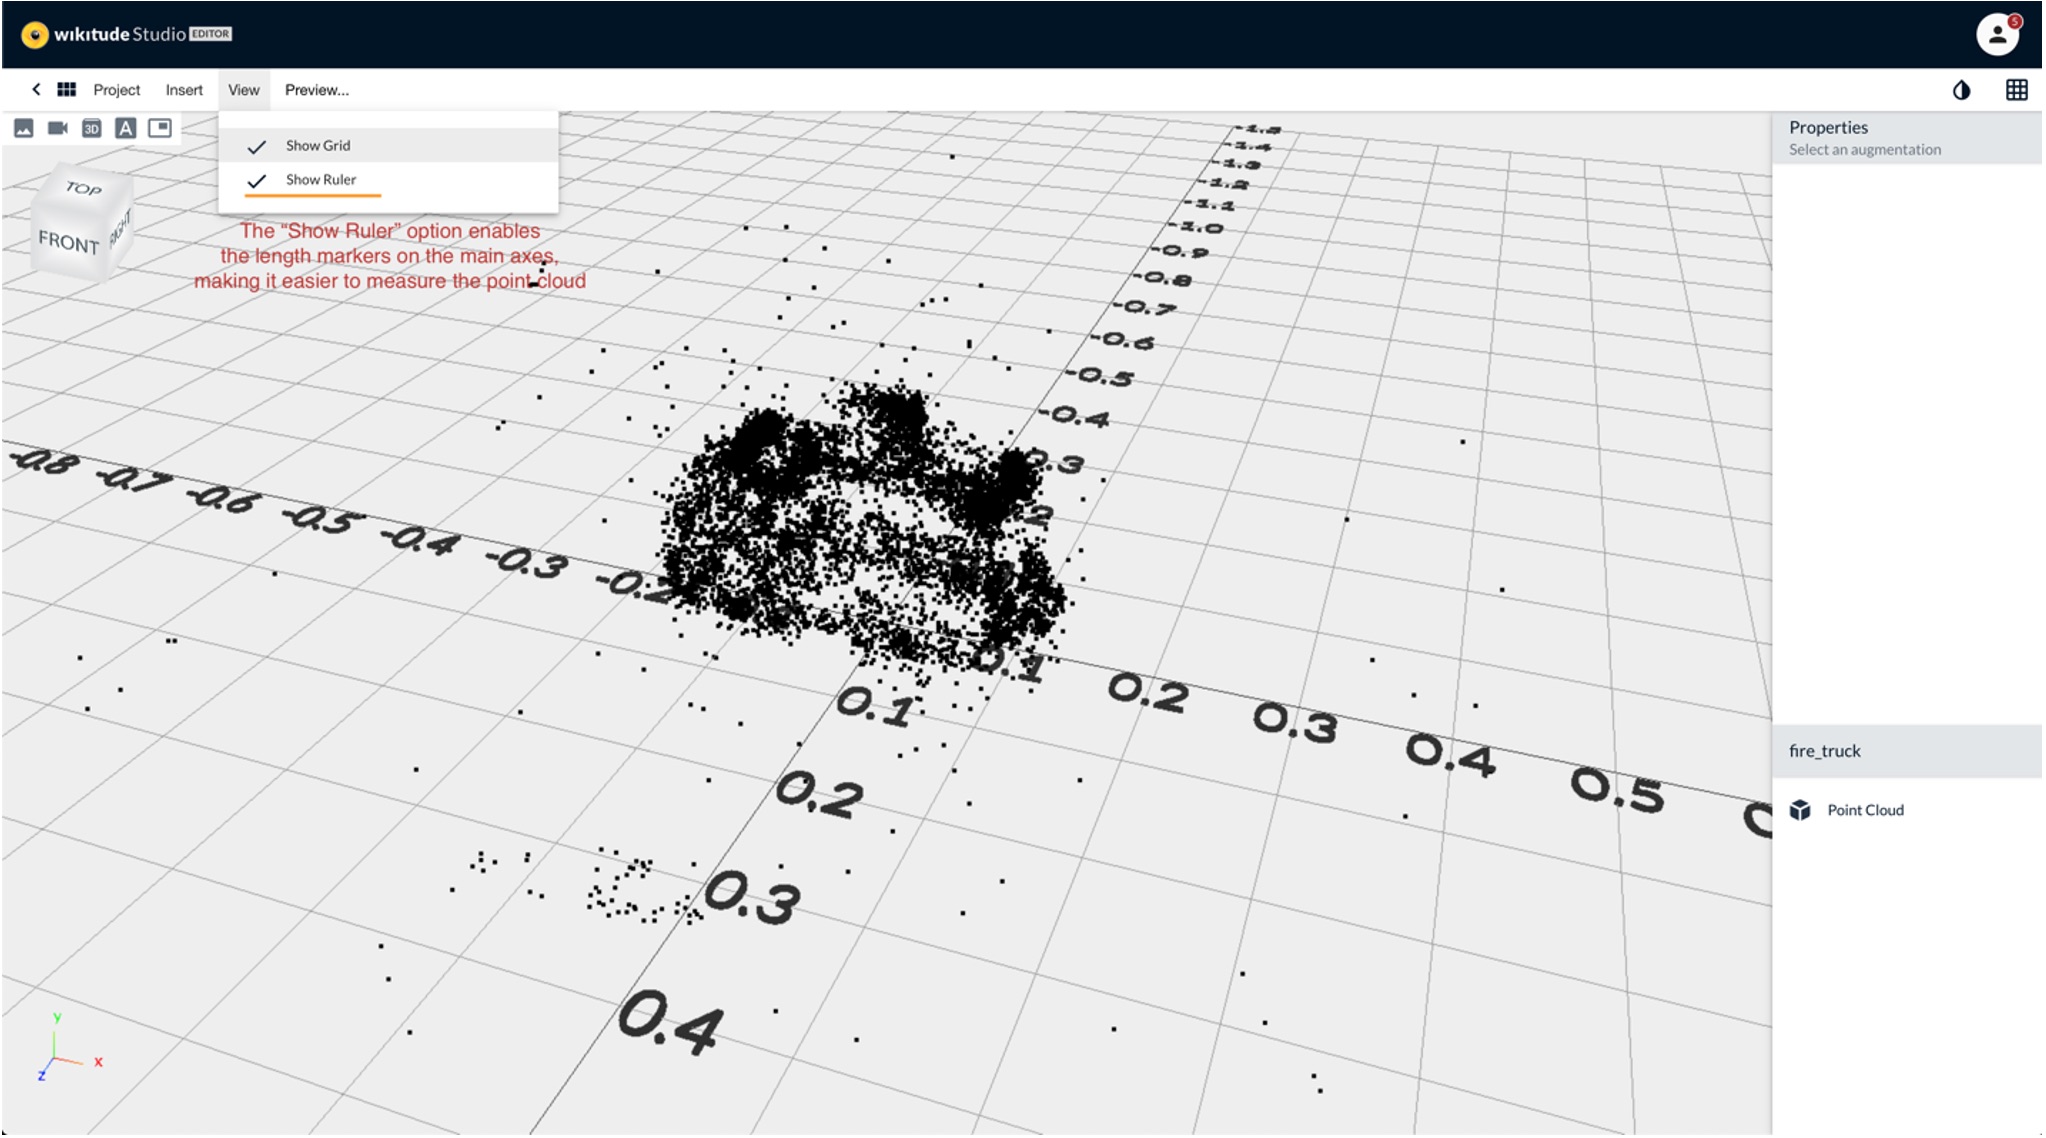
Select the point cloud object and go into edit mode
Top/side view helps with measuring the actual size. Re-scale the longest side of the object as needed, so that it matches real-world dimension (
0.1 = 10cm)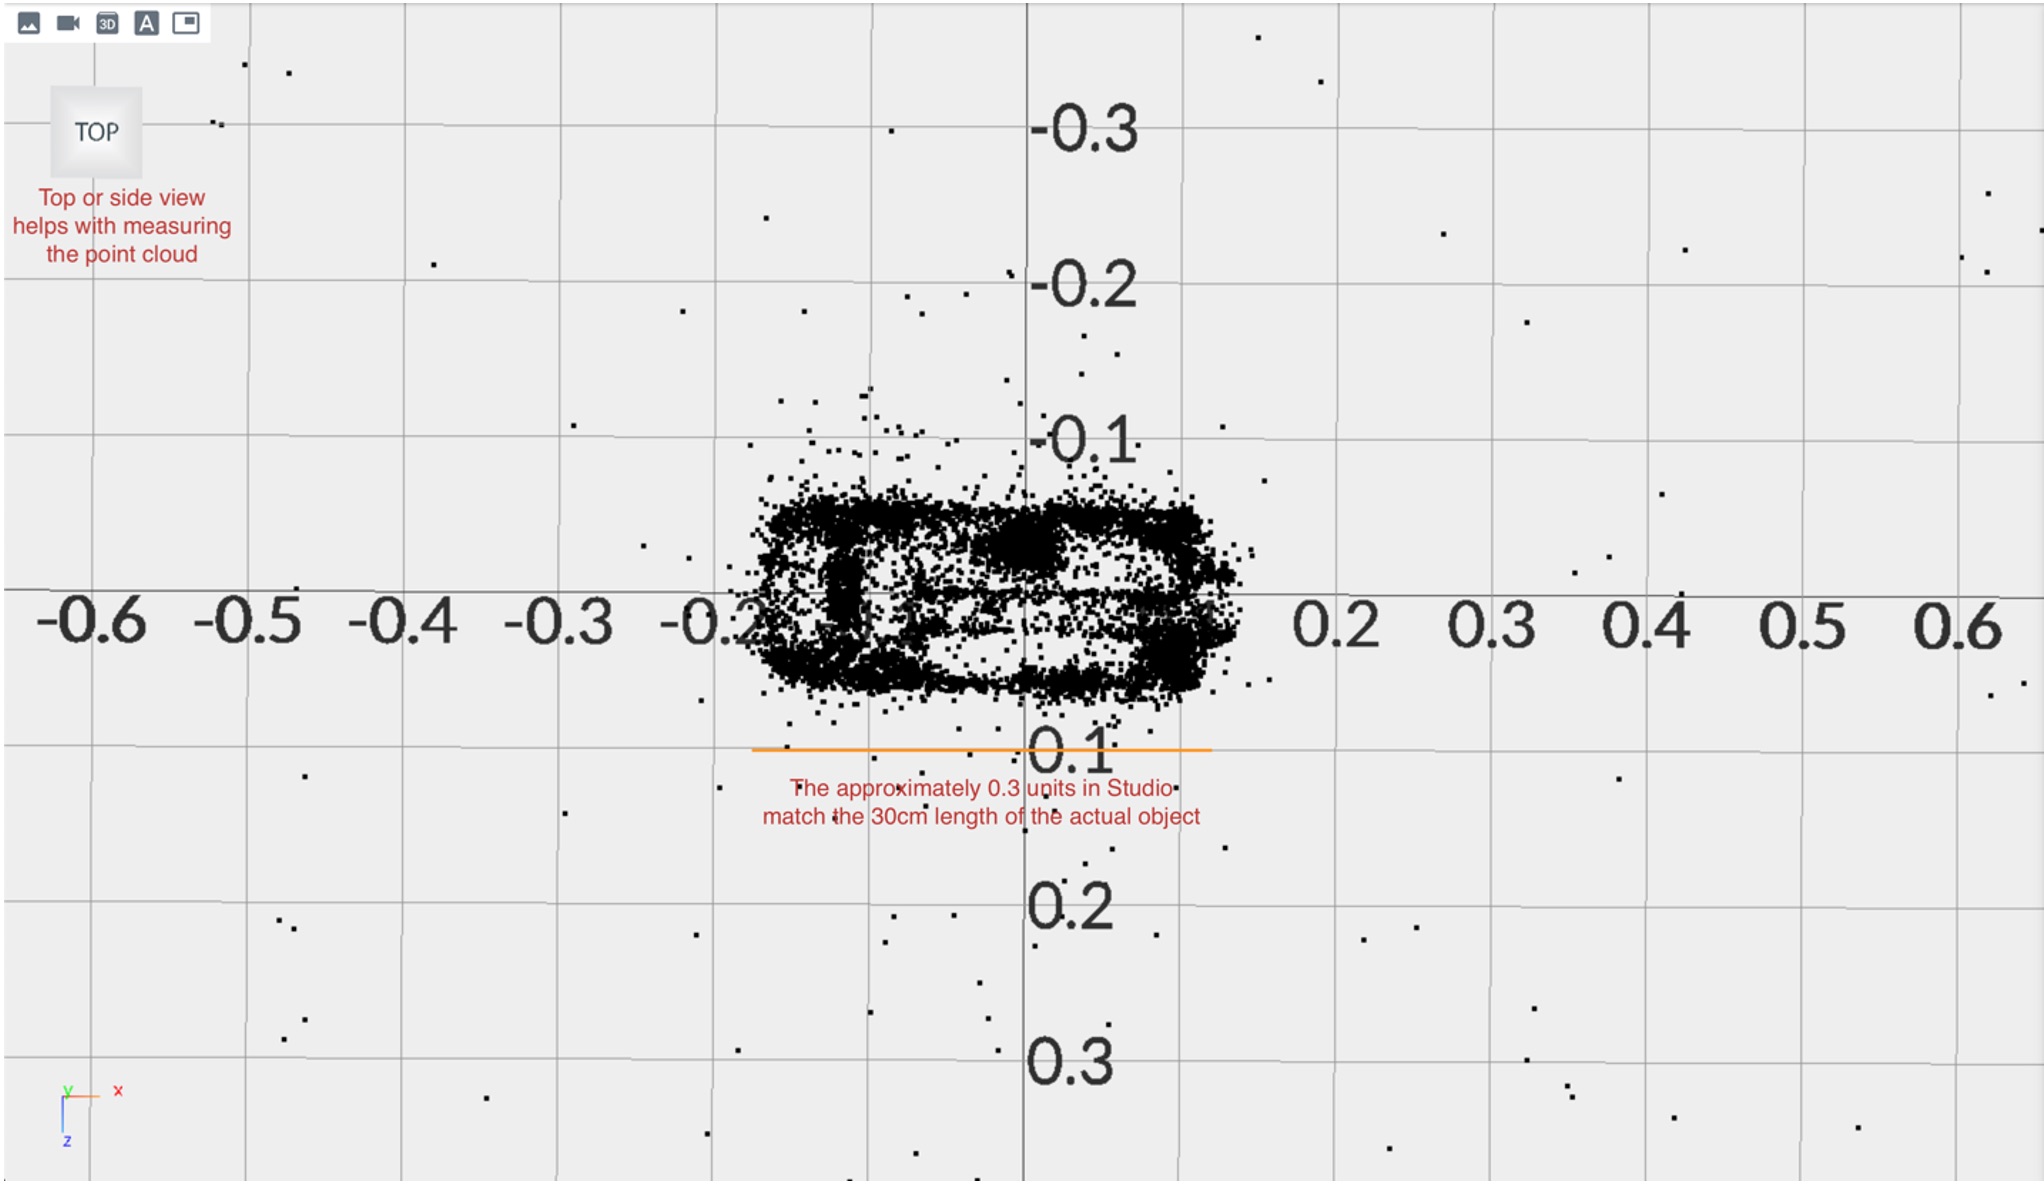
Make sure to save the changes by pressing the
Savebutton in the top right corner.
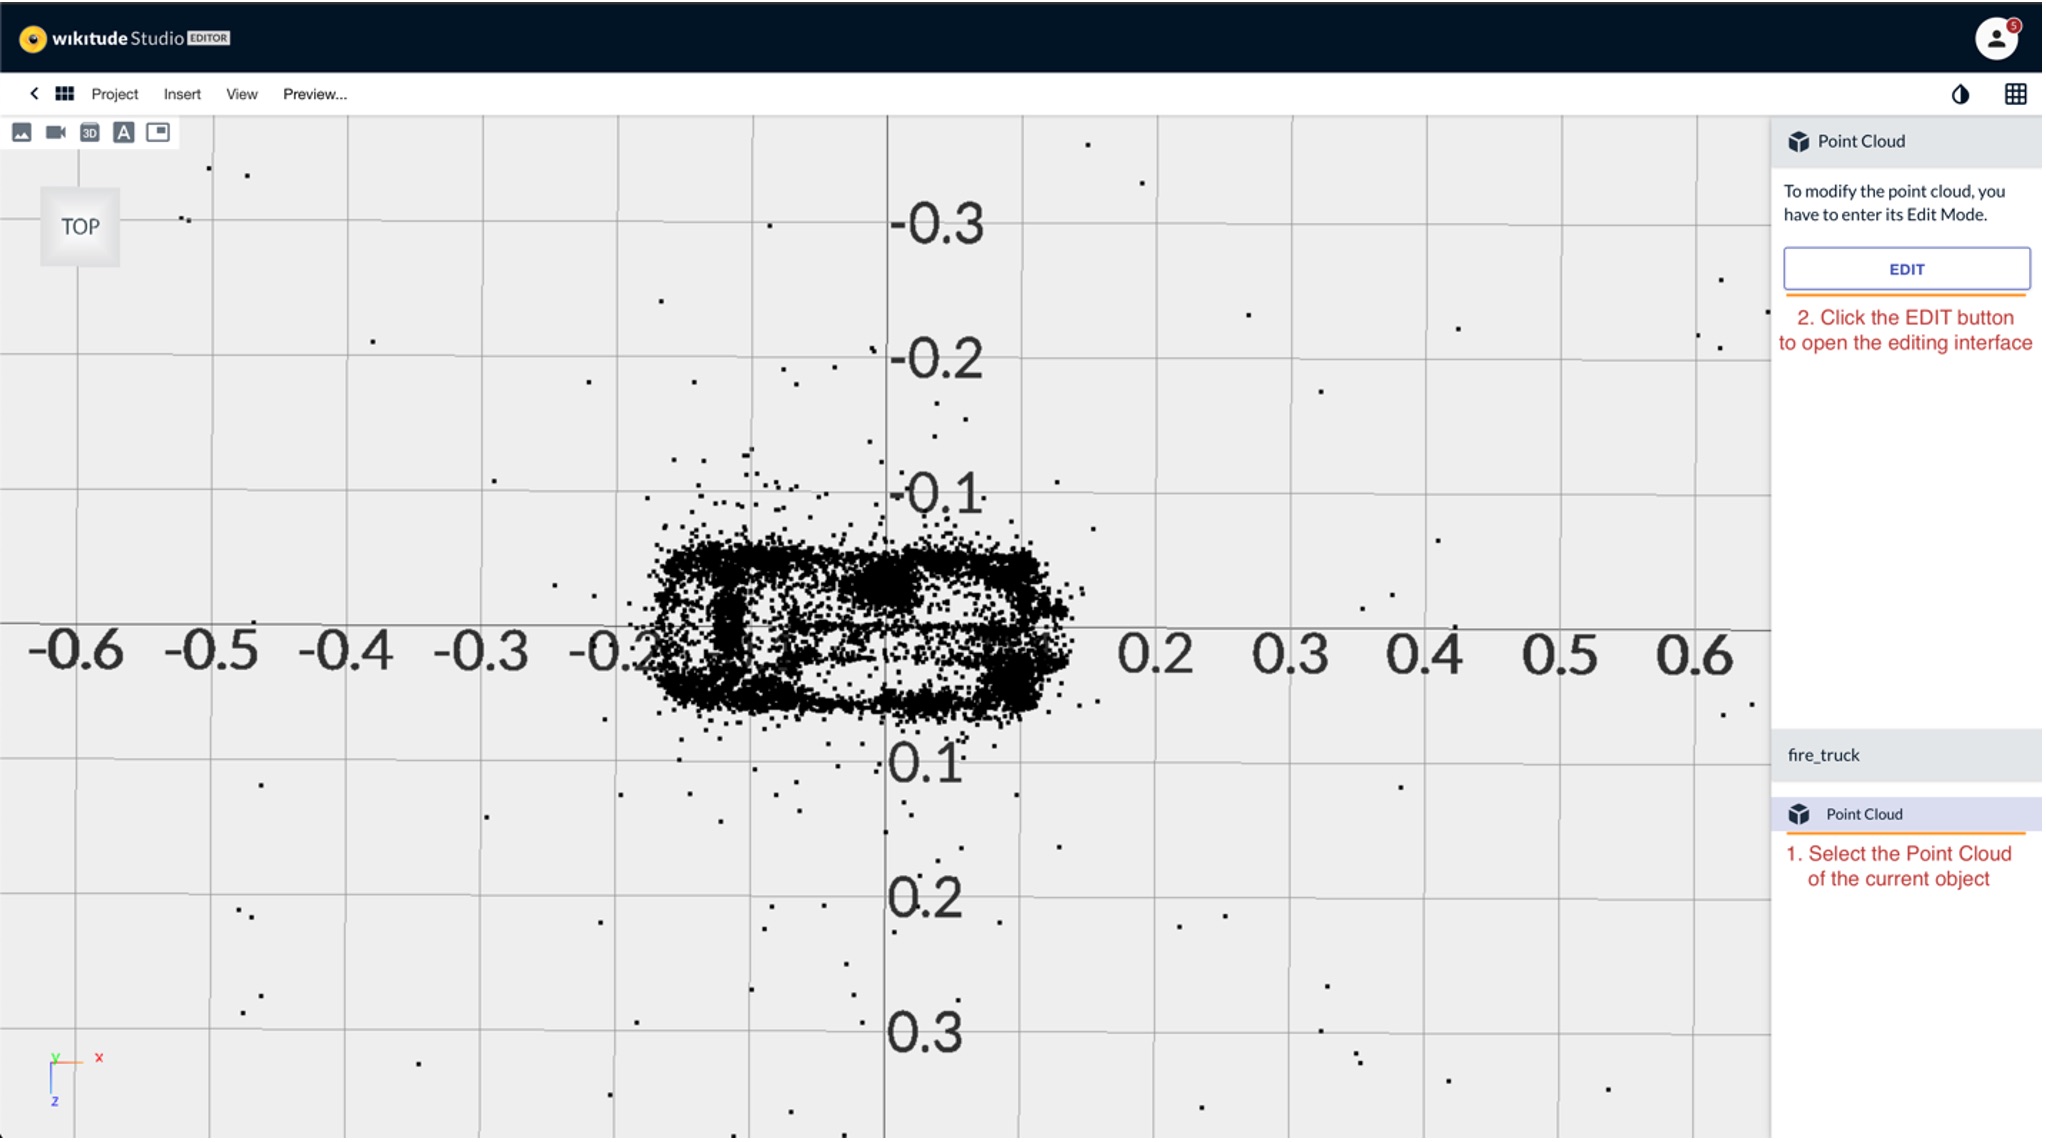
Point cloud transformation
For object targets, it's possible to transform the generated point cloud. This allows you to reposition, rotate and scale it.
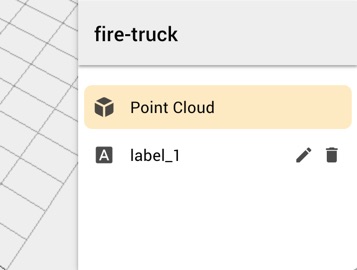
To enter the point cloud edit mode, you have to select the point cloud in the scene entities list. This will show the different point cloud properties in the properties panel above.
After selecting the point cloud, click the Edit button to start the Edit Mode.

In the edit mode, all augmentations are hidden to allow complete focus on the point cloud. The point cloud can be transformed in the same way as augmentations.
To discard changes, click the X icon in the top left corner. To save changes, click Save in the top right corner.