Setup Guide Unity Plugin
There are only a few steps necessary to add the Wikitude Unity Plugin to your existing Unity project. This guide will explain them in detail. In general the steps are
- Import the Wikitude.unitypackage into your project
- Add the
WikitudeCameraand one of theTrackerprefabs to the Unity scene hierarchy and configure their properties - Add a custom augmentation to the tracker as child GameObject to the
Trackable - Export your project in order to fully integrate the Wikitude API in your Unity project
Import the Wikitude.unitypackage
The Wikitude Unity Plugin comes as a standard .unitypackage and can be imported through the usual Unity package import procedure.
In your Unity project, open the Assets dropdown menu and choose Import Package -> Custom Package.
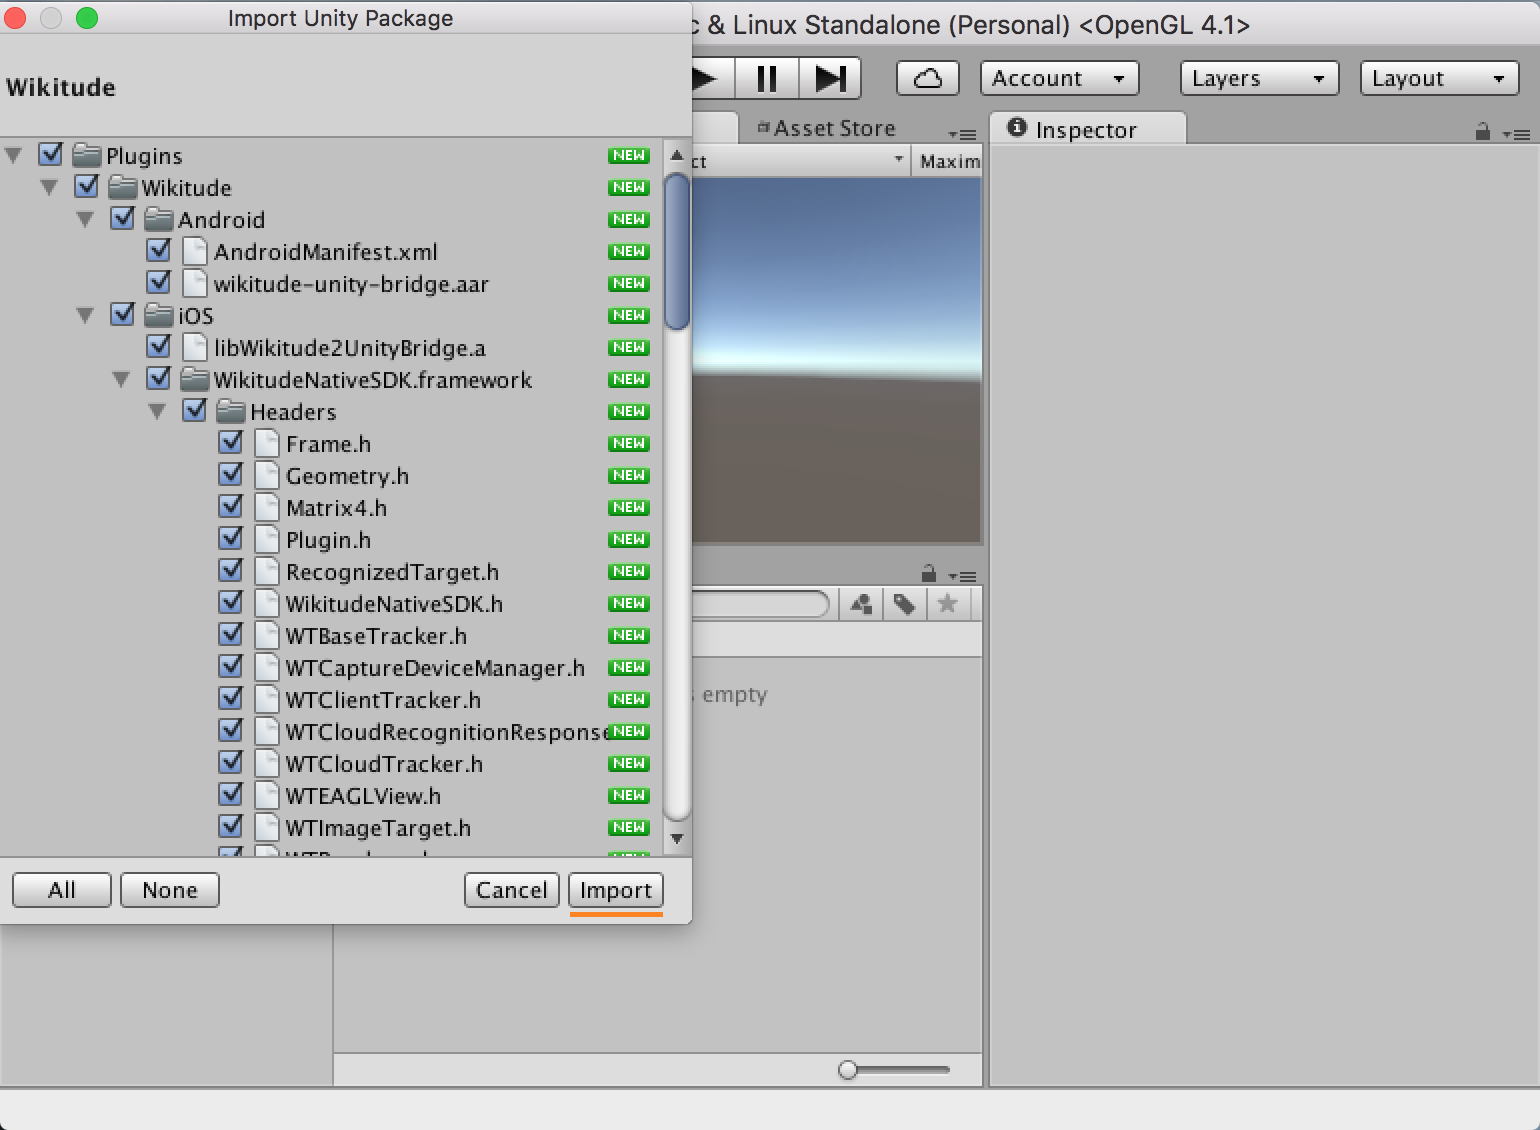
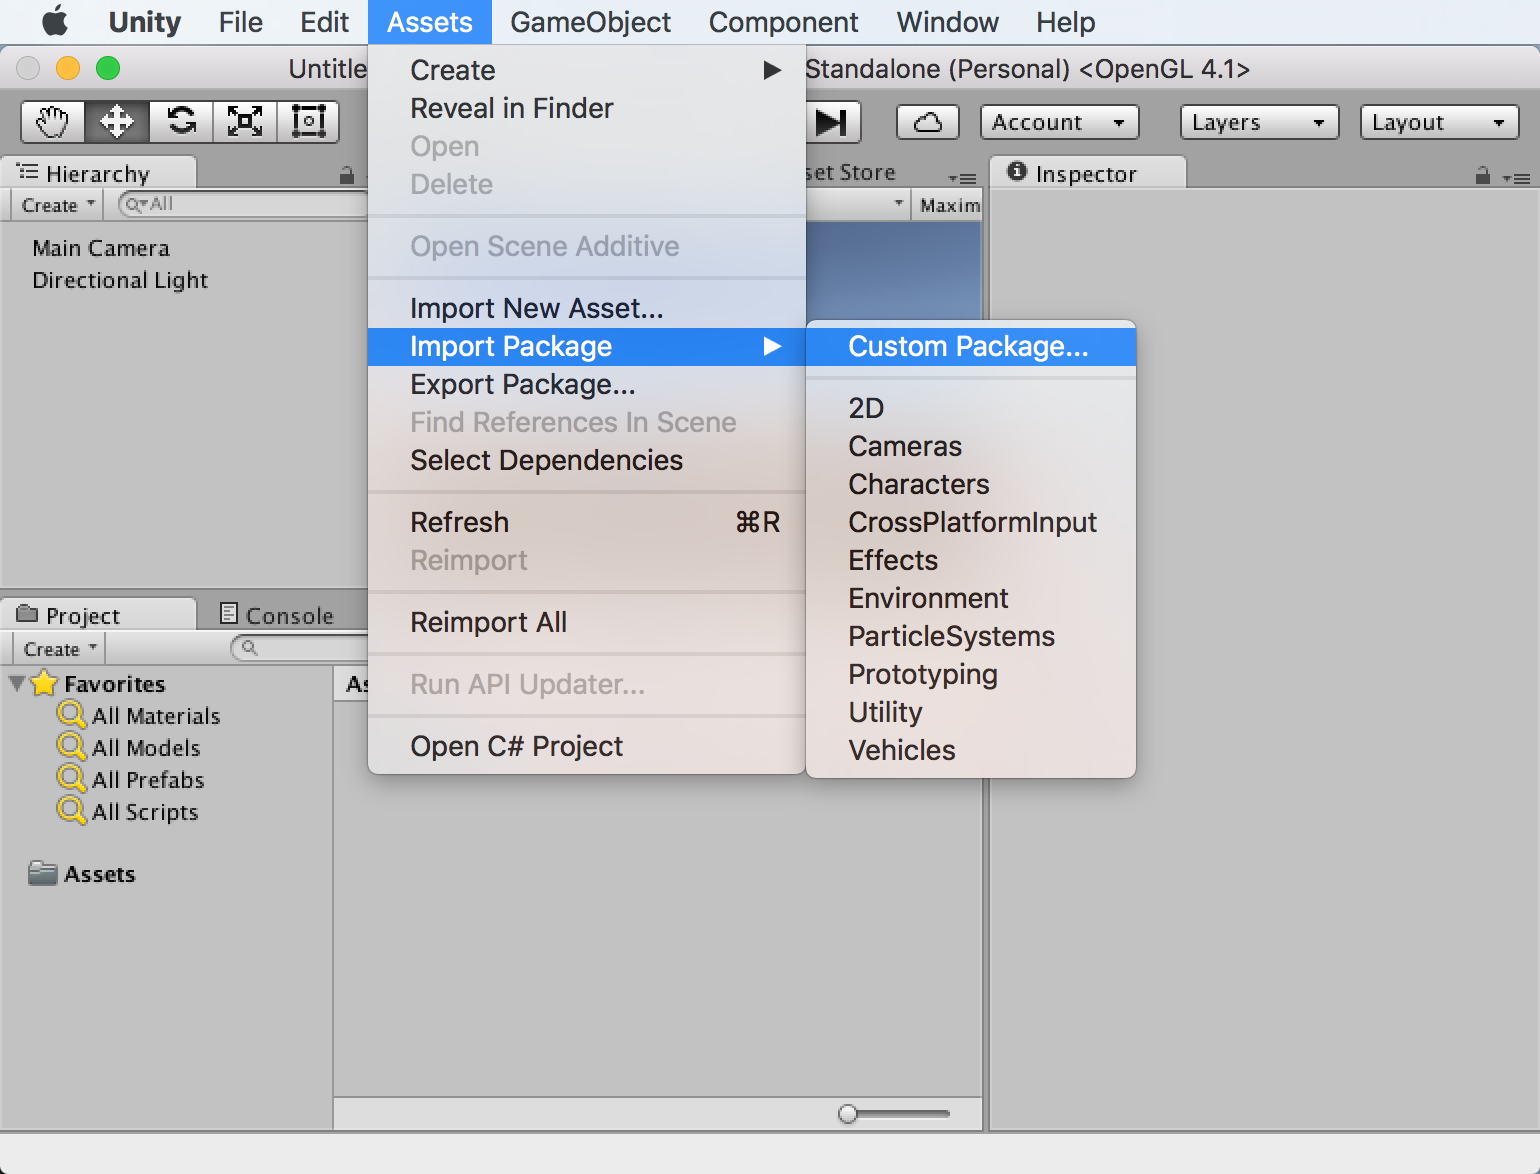 Select the downloaded Wikitude.unitypackage in the presented open file browser and click
 open. You should import all items that are part of the Wikitude.unitypackage.
Use the Wikitude Unity plugin
After the Wikitude.unitypackage was imported, its components and scripts can be used to define a custom augmented reality experience. The example section describes in more detail how those prefabs and scripts can be used to do so.
Export and Xcode Build Settings Changes
Once the application is setup in Unity and ready for testing on a real device, it needs to be exported as an Xcode project for iOS, Android Studio project for Android, or Visual Studio project for UWP. Alternatively, for Android you can build the .apk directly from Unity.
Export to Xcode
iOS developers need to open the exported project and manually do the steps listed below.
- Before exporting, make sure the
Target minimum iOS versionis set to 9.0 or later andCamera Usage Descriptionis set to an appropriate message in the Unity in Player Settings. These settings can also be done in the Xcode project, but setting them in Unity will ensure it they don't get overwritten when rebuilding your project. - After the Xcode project was exported, the
WikitudeSDKframework has to be added as anEmbedded Binary.
After these steps are done once, building with Append or by pressing Cmd + B will ensure that the settings are kept.
Export an .apk file
If you don't need an Android Studio project, building directly from Unity is the fastest way to run your app on an Android device.
- In Unity open
File | Build Settings...
- Make sure
Androidis the current build target. If not, selectAndroidfrom the list and clickSwitch Platform - Click
Build And Runand choose where to save the .apk file. If you have an Android device connected, it will also install the app on it.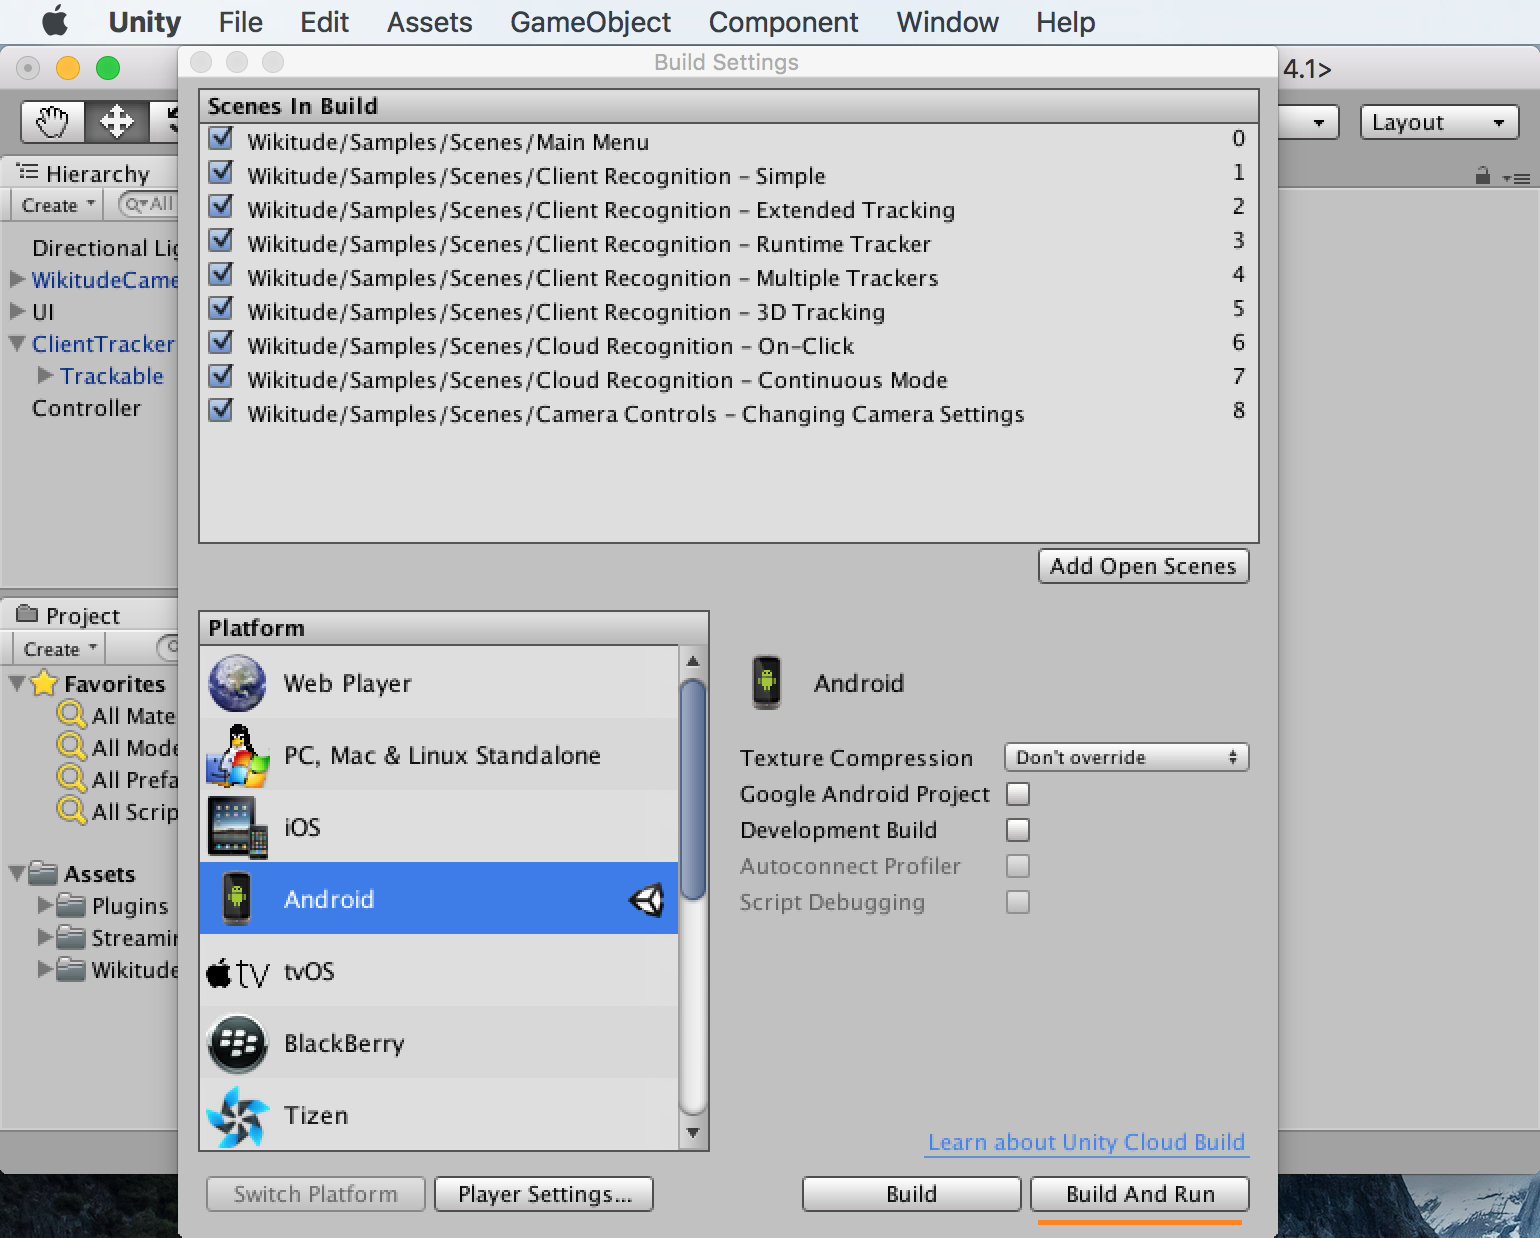
After this is done once, pressing Ctrl + B (Windows) or Cmd + B (Mac) will automatically create the .apk file and install it on your device, if it is connected.
Export to Android Studio
- In Unity open
File | Build Settings..., checkExport Projectand clickExport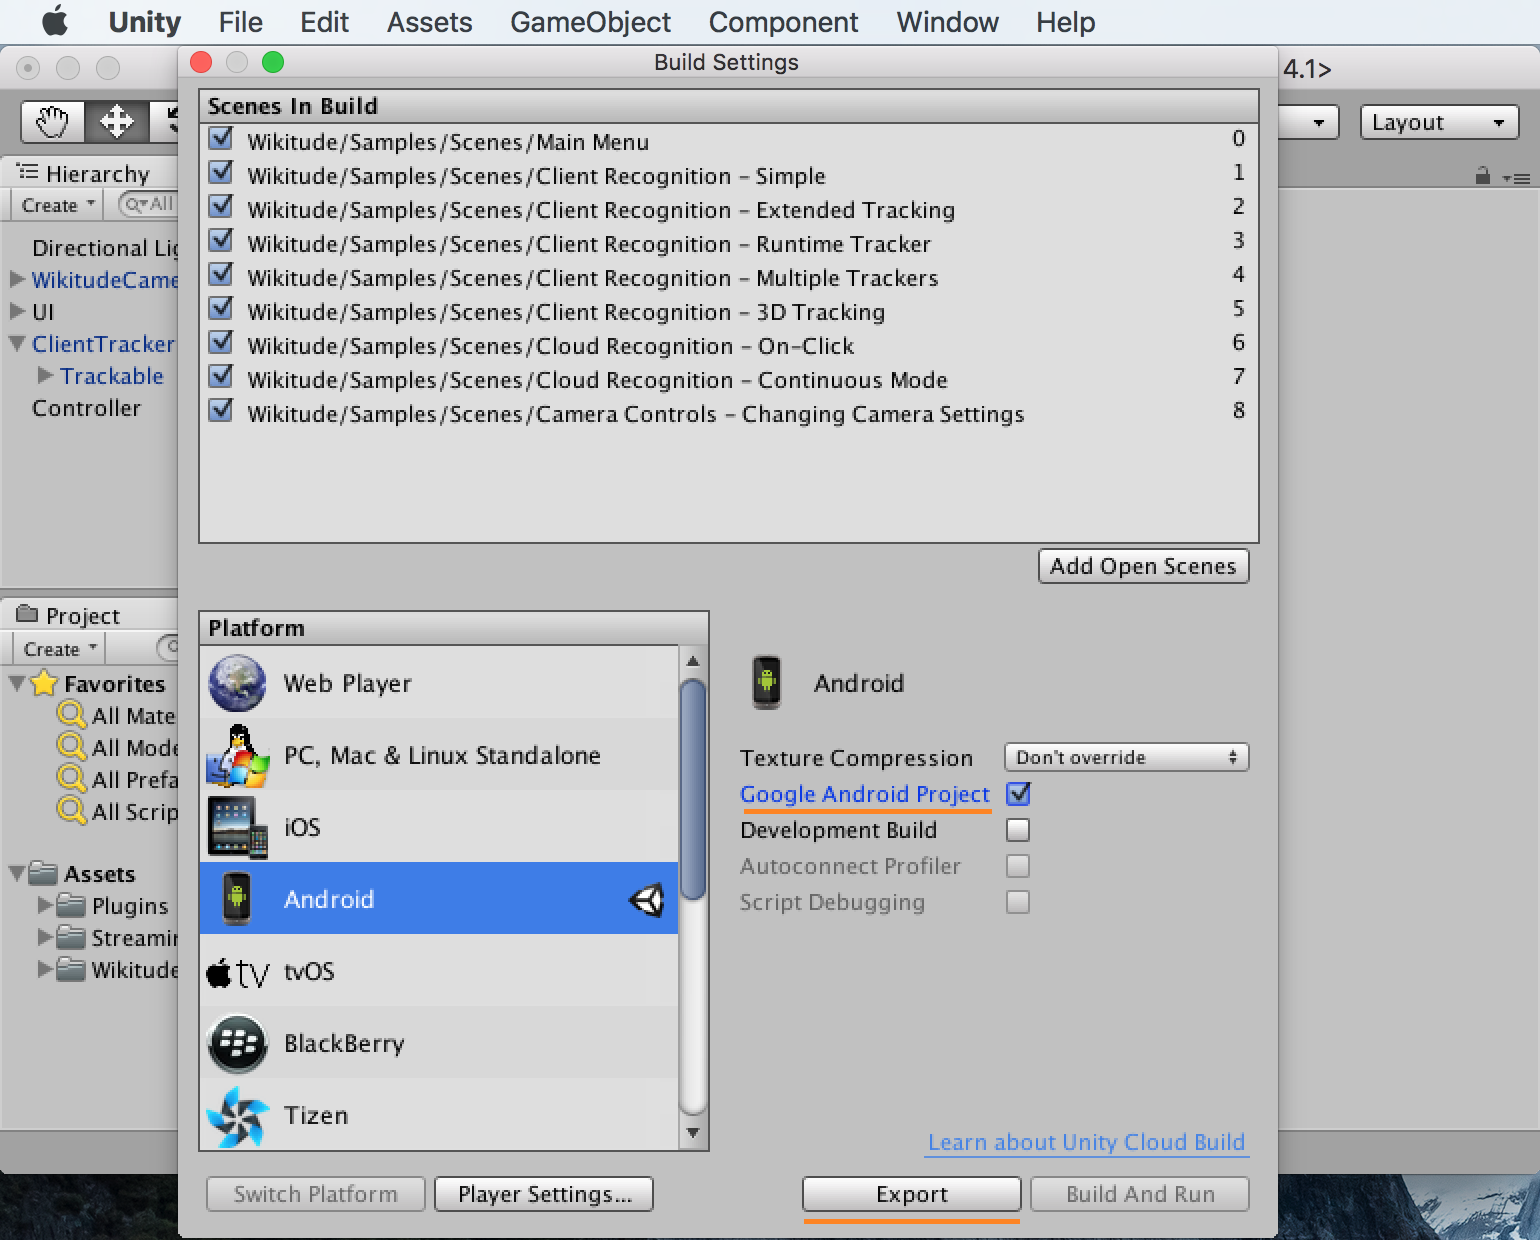
- Ensure the project folder contains no space, otherwise you will have troubles deploying the project.
- Open Android Studio and click
Open an existing Android Studio project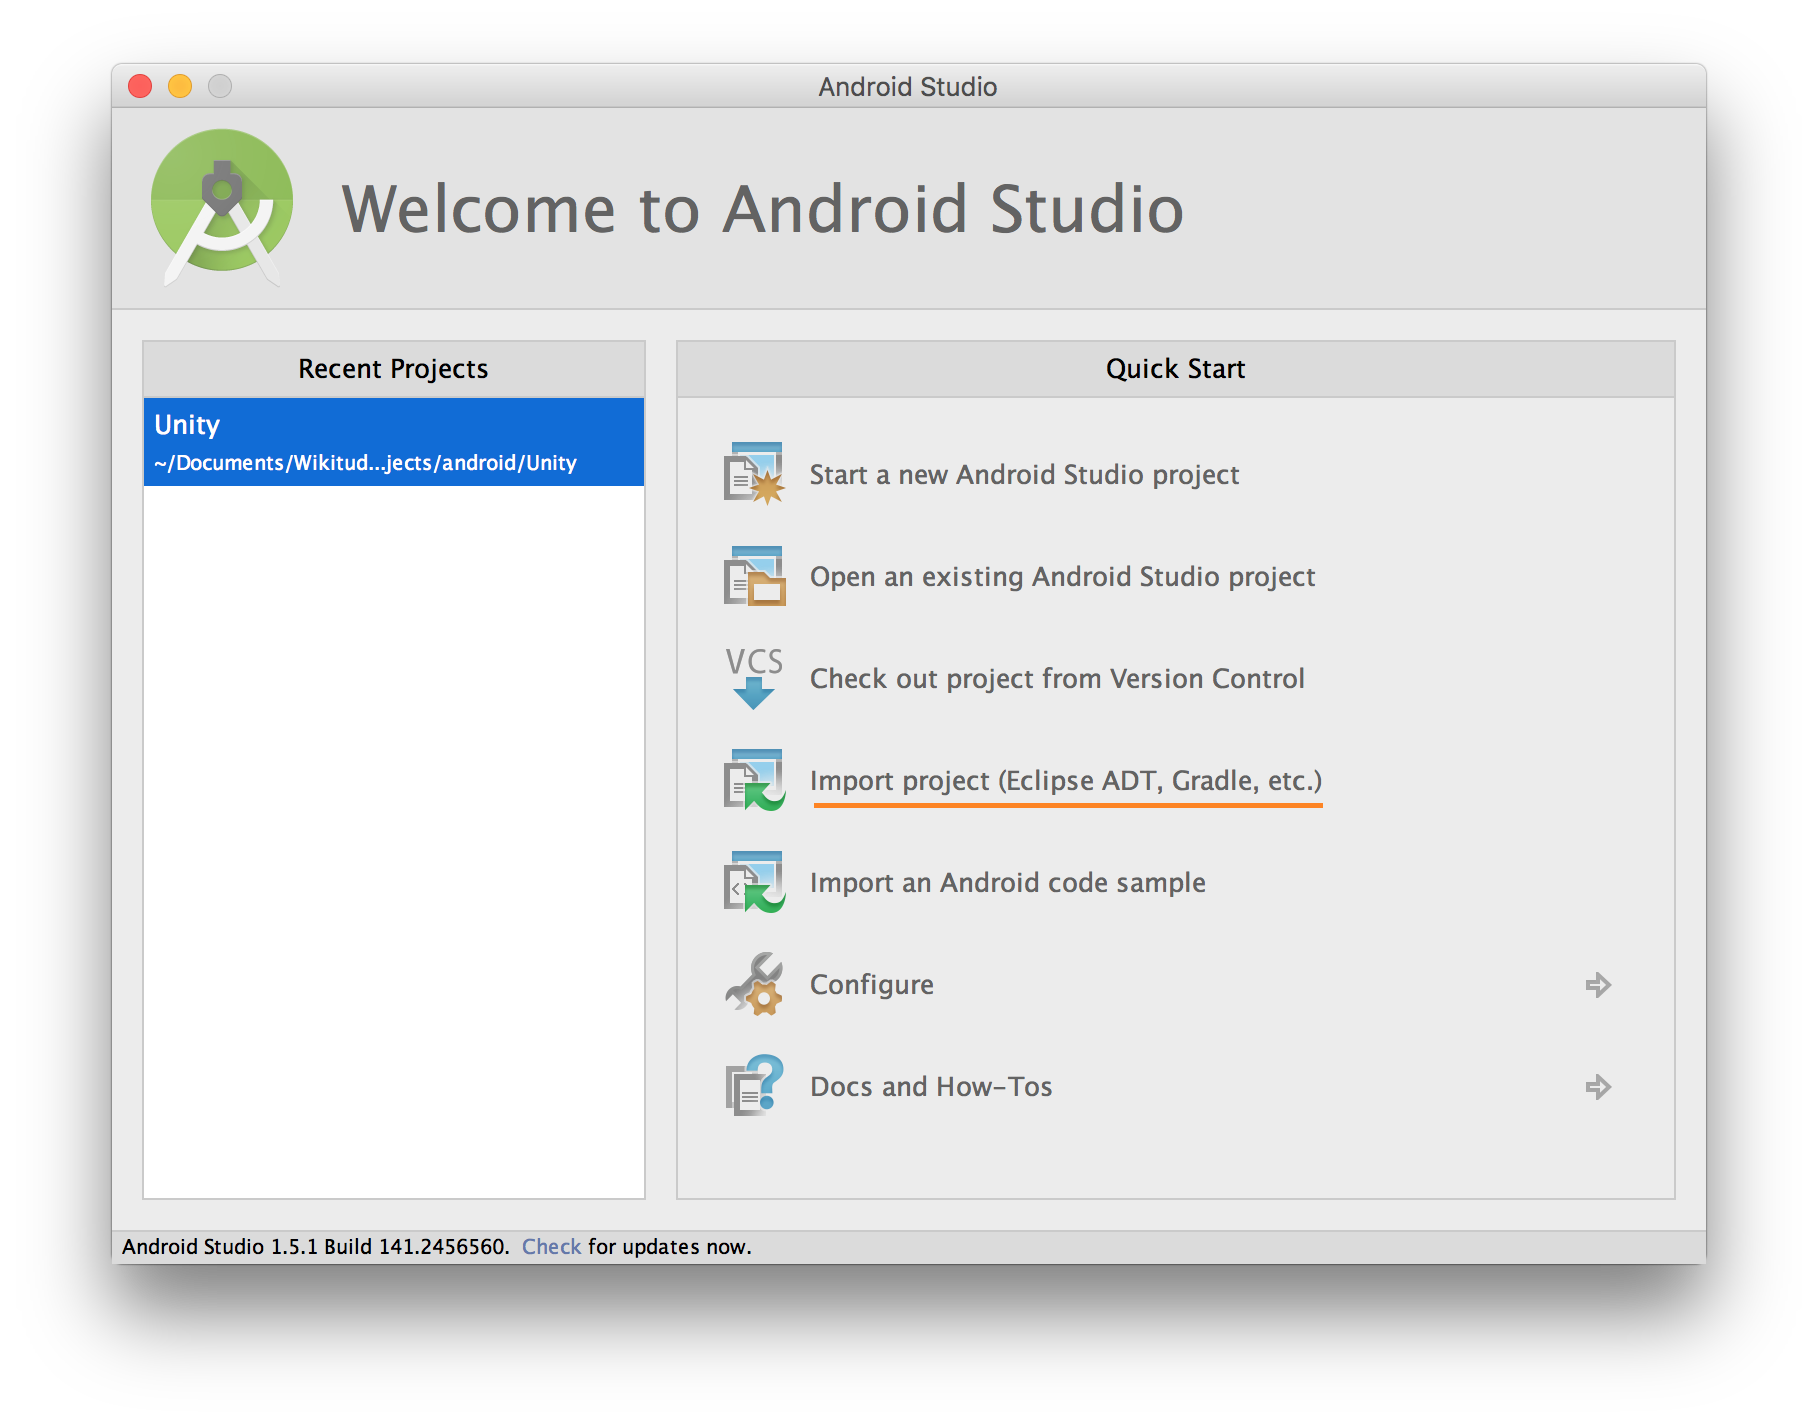
- Within the file selection dialog, navigate to the folder where you exported the project and select the folder named after your app.
- Android Studio may ask you to upgrade gradle, accept.
- Android Studio may complain about
minSdk versionandtargetSdk versionbeing set. Remove the line from theAndroidManifest.xml(<uses-sdk android:minSdkVersion="19" android:targetSdkVersion="24" />), and re-run gradle. - The project is now running in Android Studio
Export to Visual Studio
When building for UWP, the following settings need to be enabled to make sure that the SDK is compatible with Unity.
From the Build Settings menu, please make sure that:
Target Deviceis set toPCBuild Typeis set toD3DBuild and Run onis set toLocal Machine
Additionally, from the Player Settings -> Other Settings:
Graphics APIsis set toDirect3D11Scripting Backendis set toIL2CPP
And from Player Settings -> Publishing Settings:
CapabilitieshasInternetClientandWebCamenabled
At this point, the project can be exported to Visual Studio. Once the project is exported, you can build the project for x64.
Unity Requirements and supported versions
- Unity 2017.4 LTS or higher
- Rendering engines
- OpenGL ES 2
- OpenGL ES 3.x
- Metal (iOS only)
- Direct3D 11 (UWP only)