Setup Guide Unity Plugin
There are only a few steps necessary to add the Wikitude Unity Plugin to your existing Unity project. This guide will explain them in detail. In general the steps are
- Import the Wikitude.unitypackage into your project
- Add the
WikitudeCameraandImageTrackerorCloudTrackerprefab to the Unity scene hierarchy and configure their properties - Add a custom augmentation to the tracker as child GameObject to the
Trackable - Export your project and change Xcode Build Settings in order to fully integrate the Wikitude Native API in your Unity project
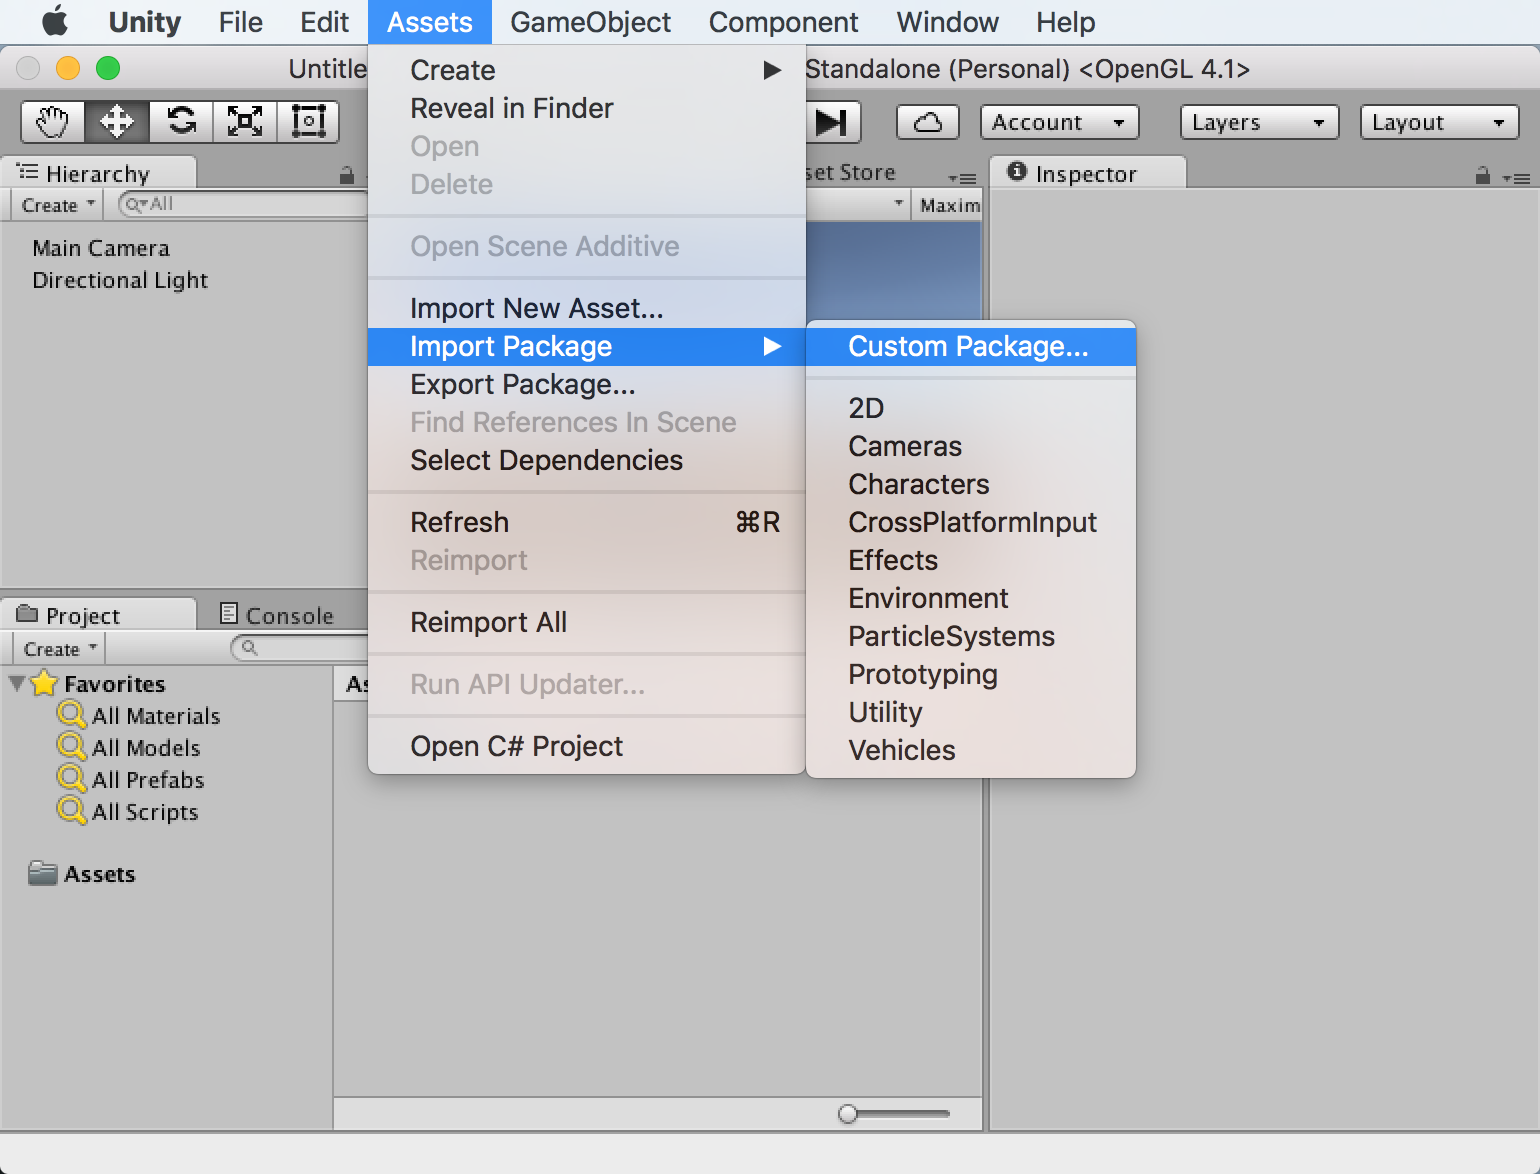
Import the Wikitude.unitypackage
The Wikitude Unity Plugin comes as a standard .unitypackage and can be imported through the usual Unity package import procedure.
In your Assets inspector, right click and choose Import Package -> Custom Package.
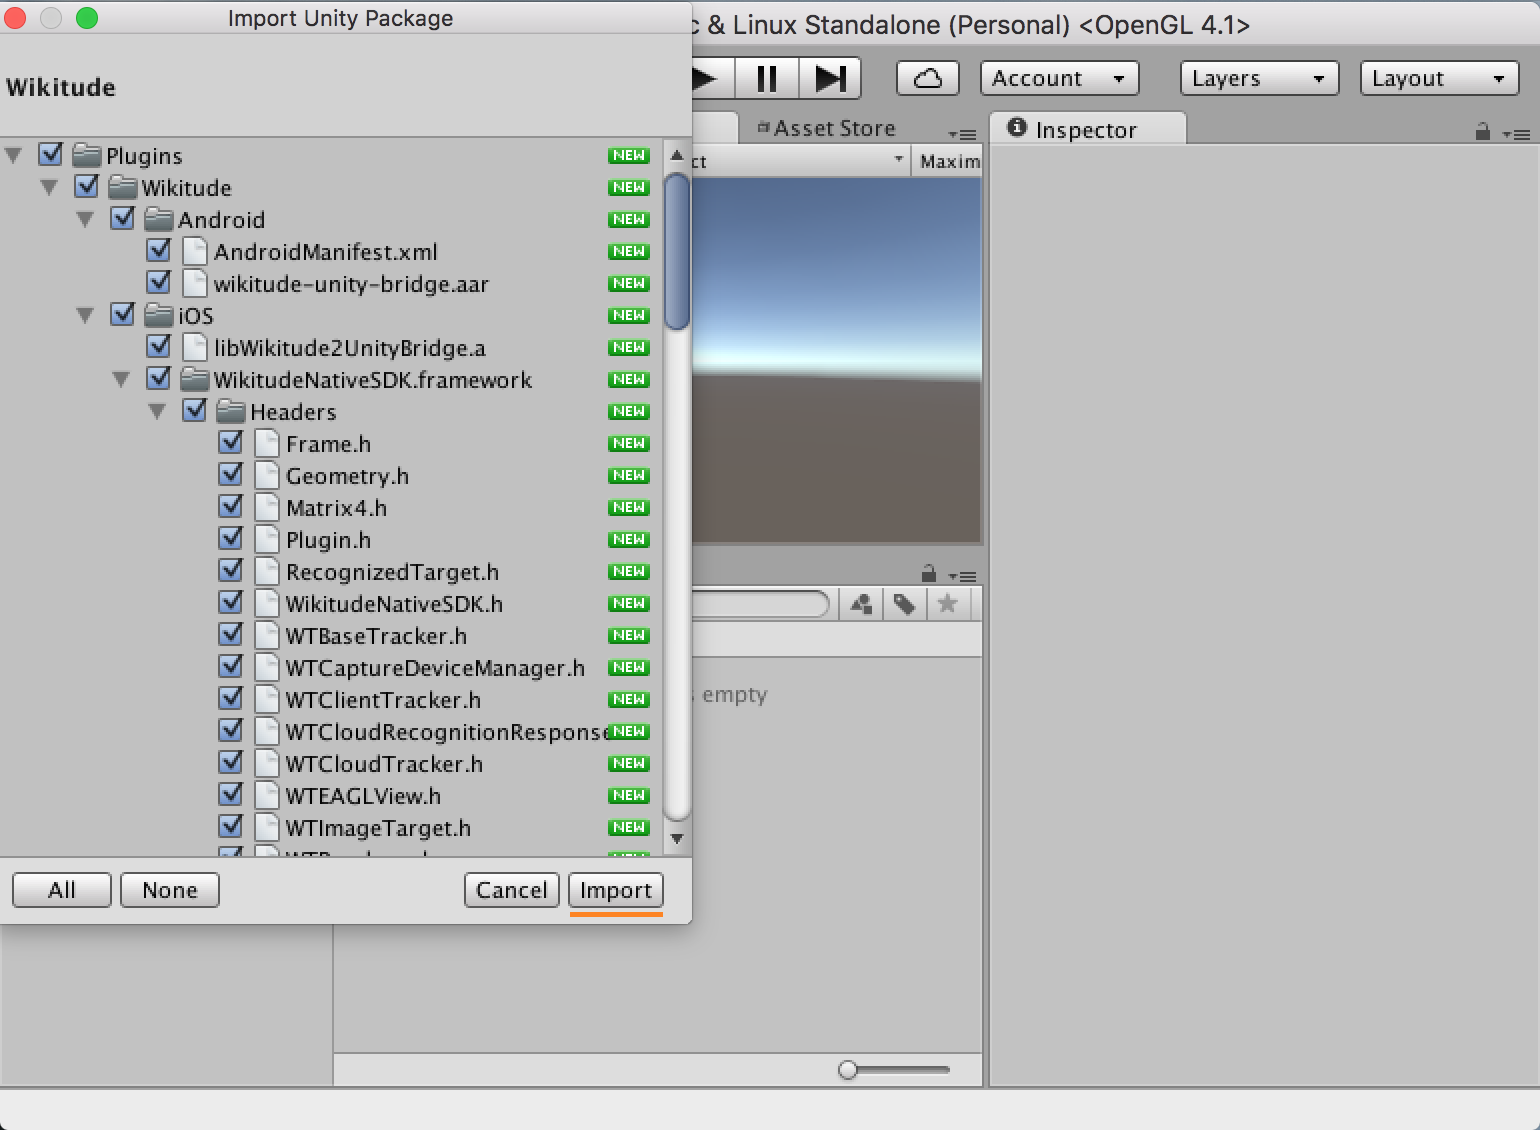
 Select the downloaded Wikitude.unitypackage in the presented open file browser and click
 open. You should import all items that are part of the Wikitude.unitypackage.
Use the Wikitude Unity plugin
After the Wikitude.unitypackage was imported, its components and scripts can be used to define a custom augmented reality experience. The example section describes in more detail how those prefabs and scripts can be used to do so.
Export and Xcode Build Settings Changes
Once the application is setup in Unity and ready for testing on a real device, it needs to be exported as an Xcode project for iOS or built for Android either directly by creating an .apk file using Unity or by exporting an Android Studio project.
Export to Xcode
iOS developers need to open the exported project and manually do the steps listed below.
- Before exporting, make sure the
Target minimum iOS versionis set to 8.0 or later in the Unity in Player Settings. This can also be done in the Xcode project, but setting it in Unity will ensure it doesn't get overwritten when rebuilding your project. - The
WikitudeNativeSDKframework has to be added as anEmbedded Binary. Please refer to the Wikitude iOS Native SDK setup guide for more information. - The build setting
Enable Bitcodeneeds to be set toNO. - The build setting
Always Embed Swift Standard Librariesneeds to be set toYES. - In the
Info.plistfile, make sure there is an entry forNSCameraUsageDescriptionwith an appropriate value if you plan to deploy to iOS 10 or higher. Not doing so will lead to a runtime crash on the device.
After these steps are done once, building with Append or by pressing Cmd + B will ensure that the settings are kept.
Export an .apk file
If you don't need an Android Studio project, building directly from Unity is the fastest way to run your app on an Android device.
- In Unity open
File | Build Settings...
- Make sure
Androidis the current build target. If not, selectAndroidfrom the list and clickSwitch Platform - Click
Build And Runand choose where to save the .apk file. If you have an Android device connected, it will also install the app on it.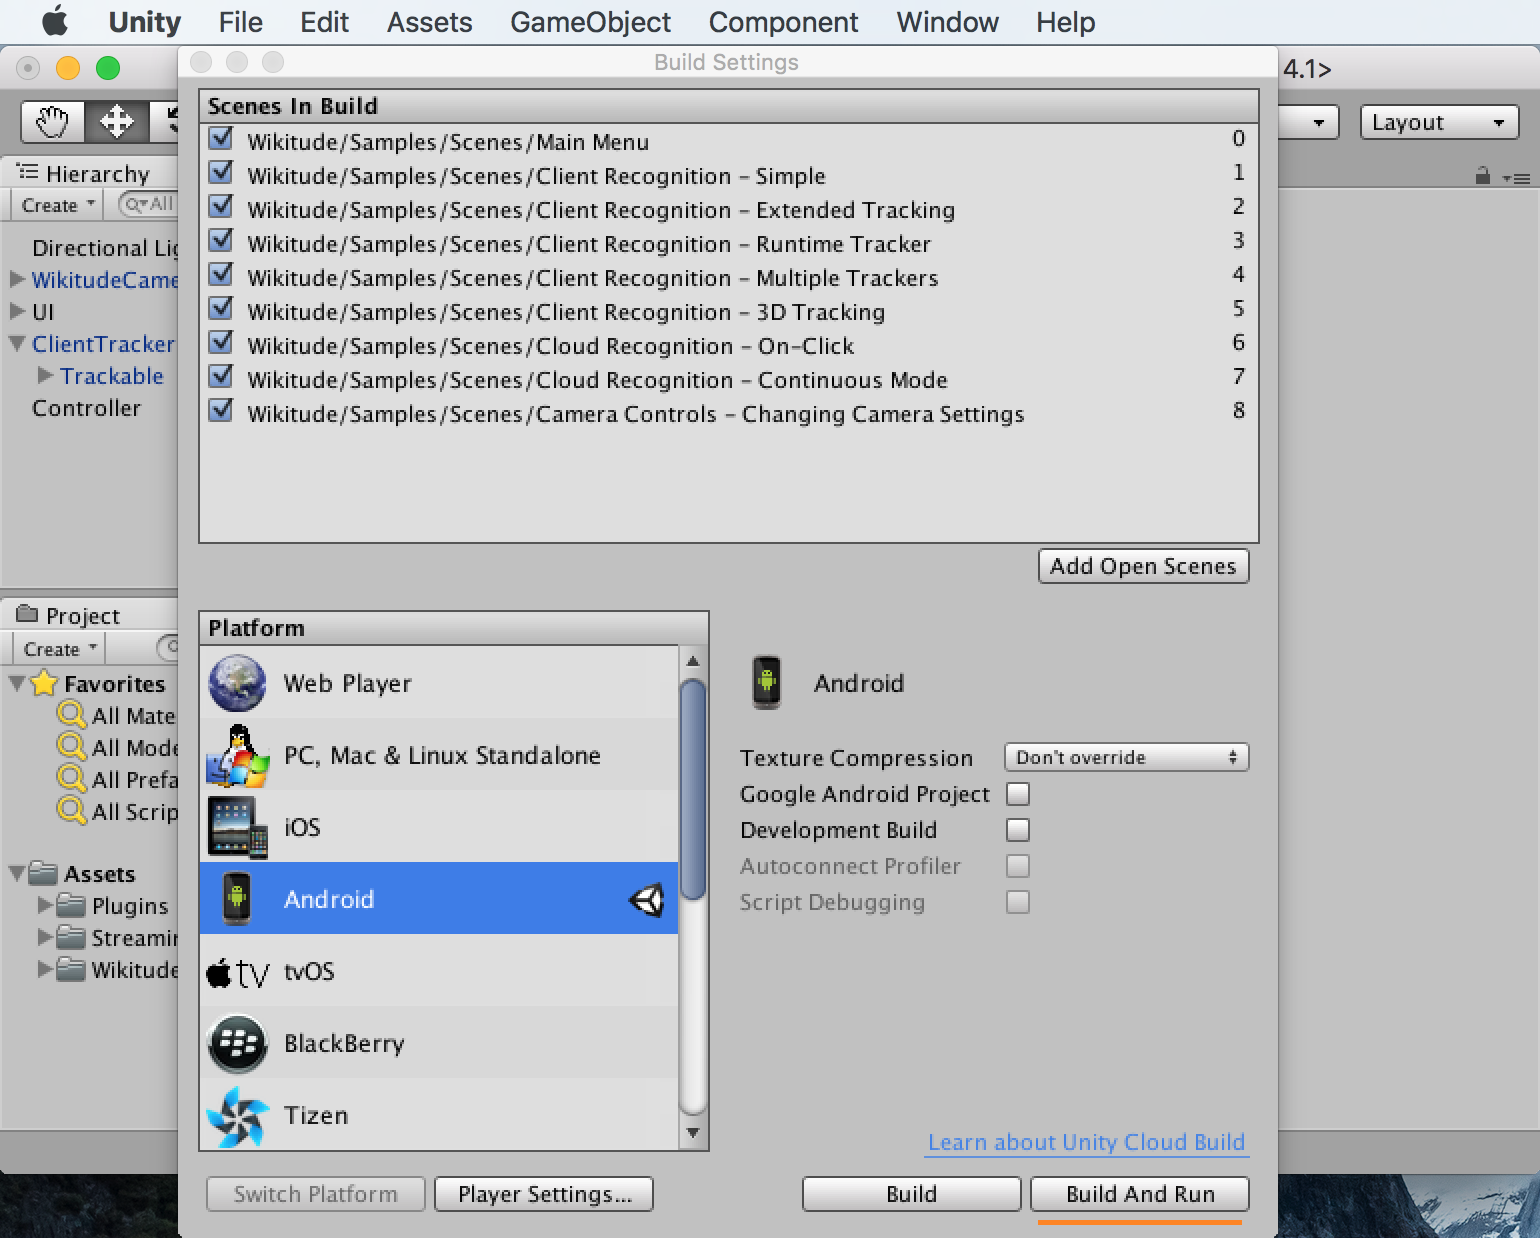
After this is done once, pressing Ctrl + B (Windows) or Cmd + B (Mac) will automatically create the .apk file and install it on your device, if it is connected.
Export to Android Studio
Unfortunately Unity projects exported as Android Studio projects do not work out of the box. Some manual work is required which we described in detail below:
- In Unity open
File | Build Settings..., checkGoogle Android Projectand clickExport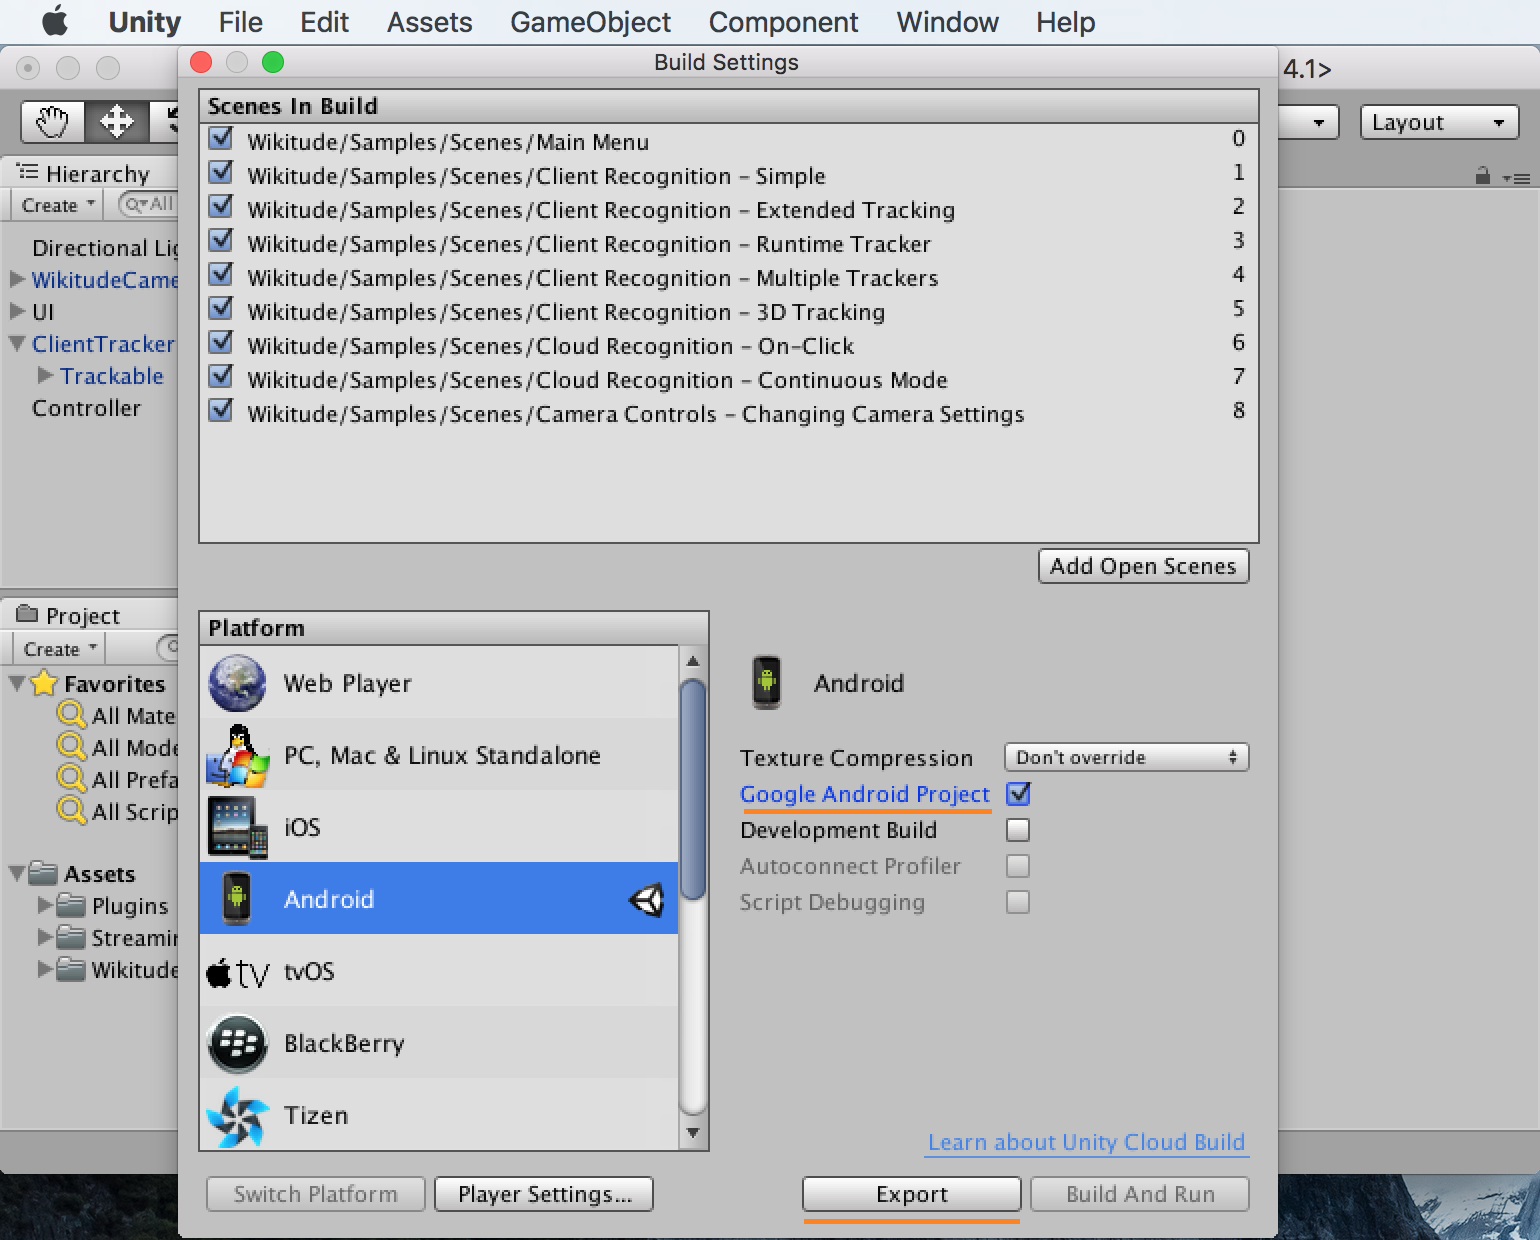
- Open Android Studio and click
Import Project (Eclipse ADT, Gradle, etc.)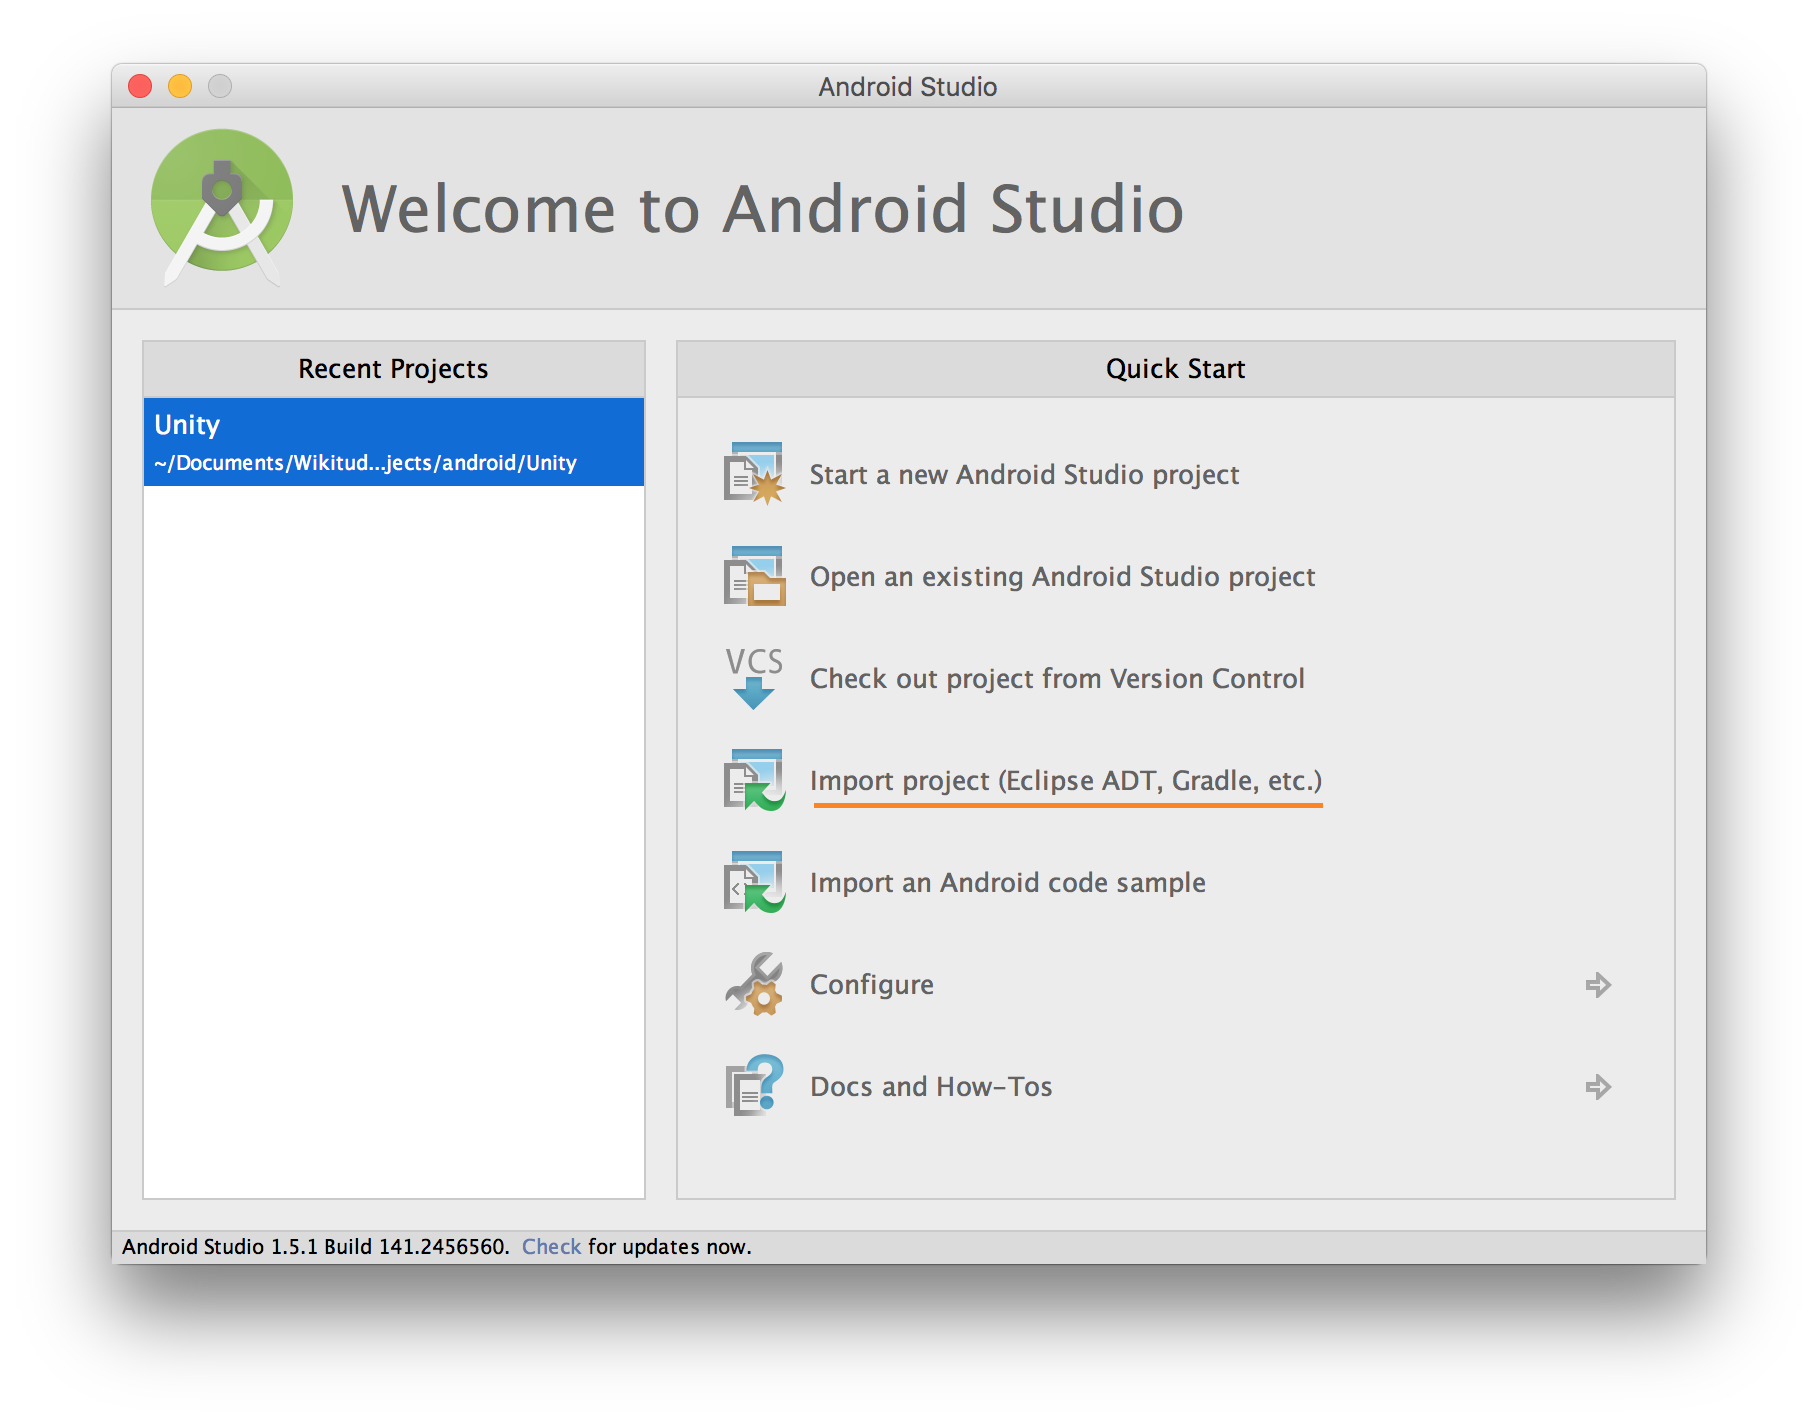
- Within the file selection dialog, navigate to the folder where you exported the project and select the folder named after your app
- In the next step choose a new, empty folder to import and click on
Next - Finish importing by clicking
Finishon the next screen - In Android Studio open
File | New | New Module ...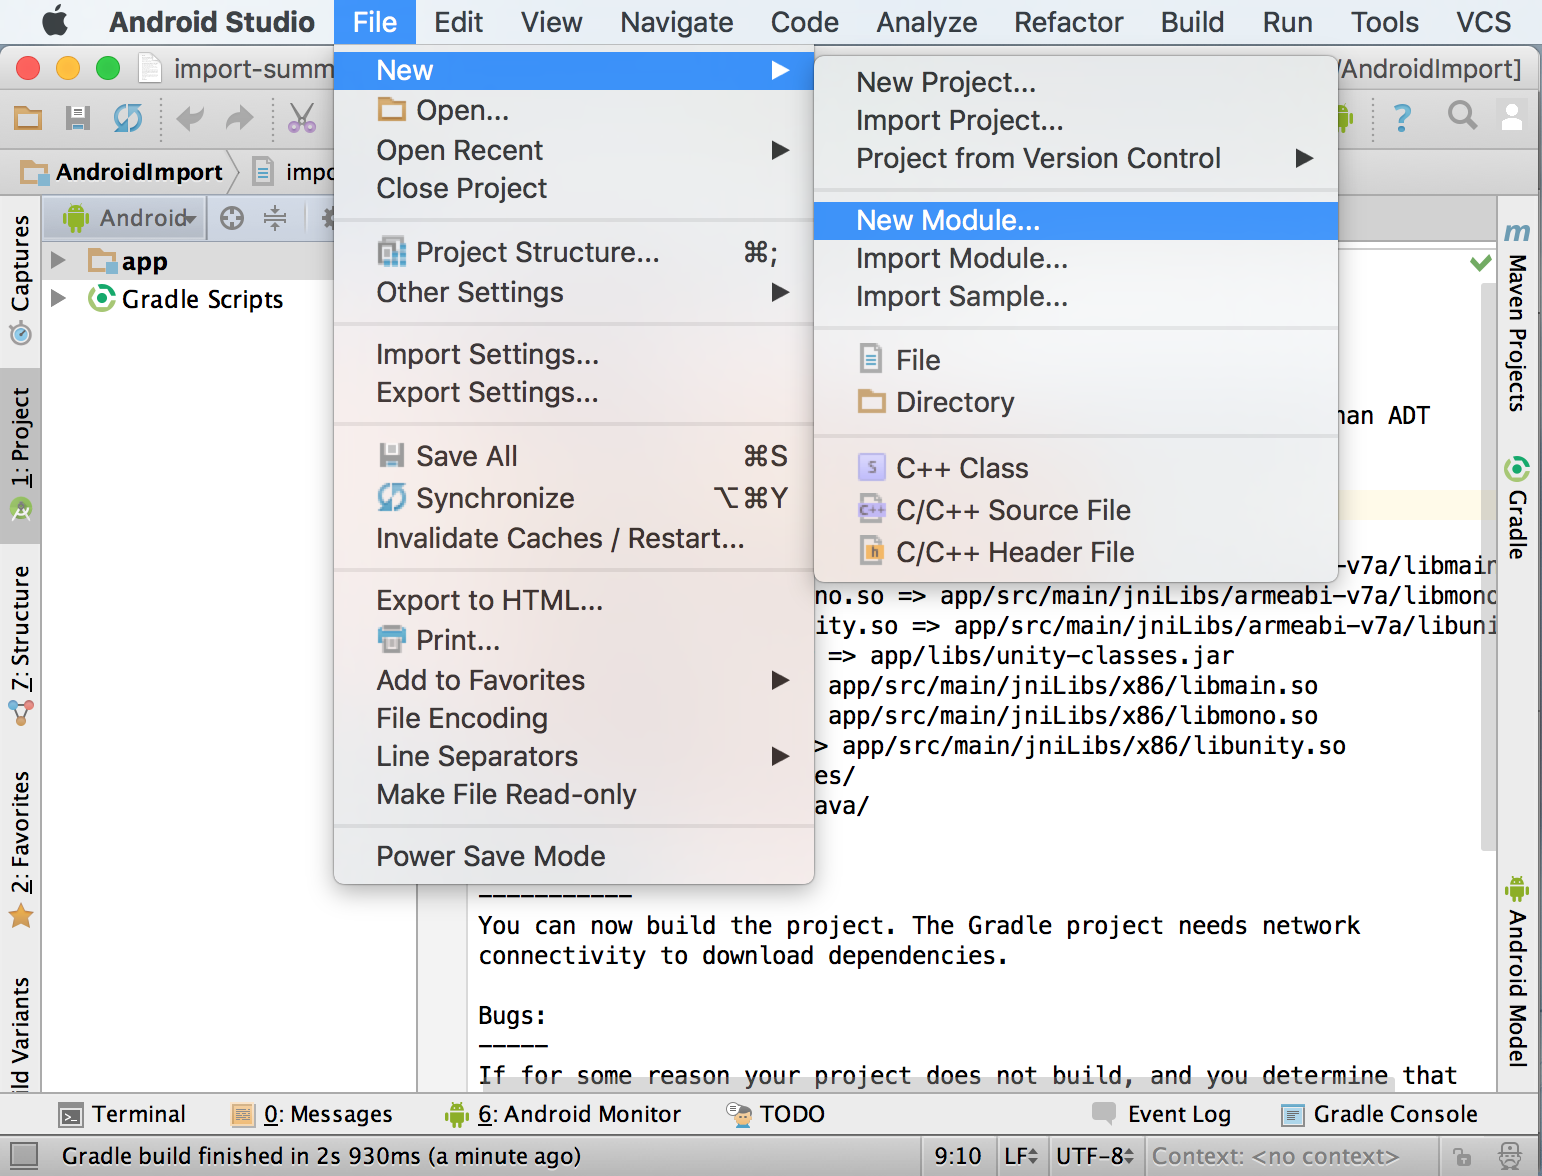
- Select
Import .JAR/.AAR Packageand click onNext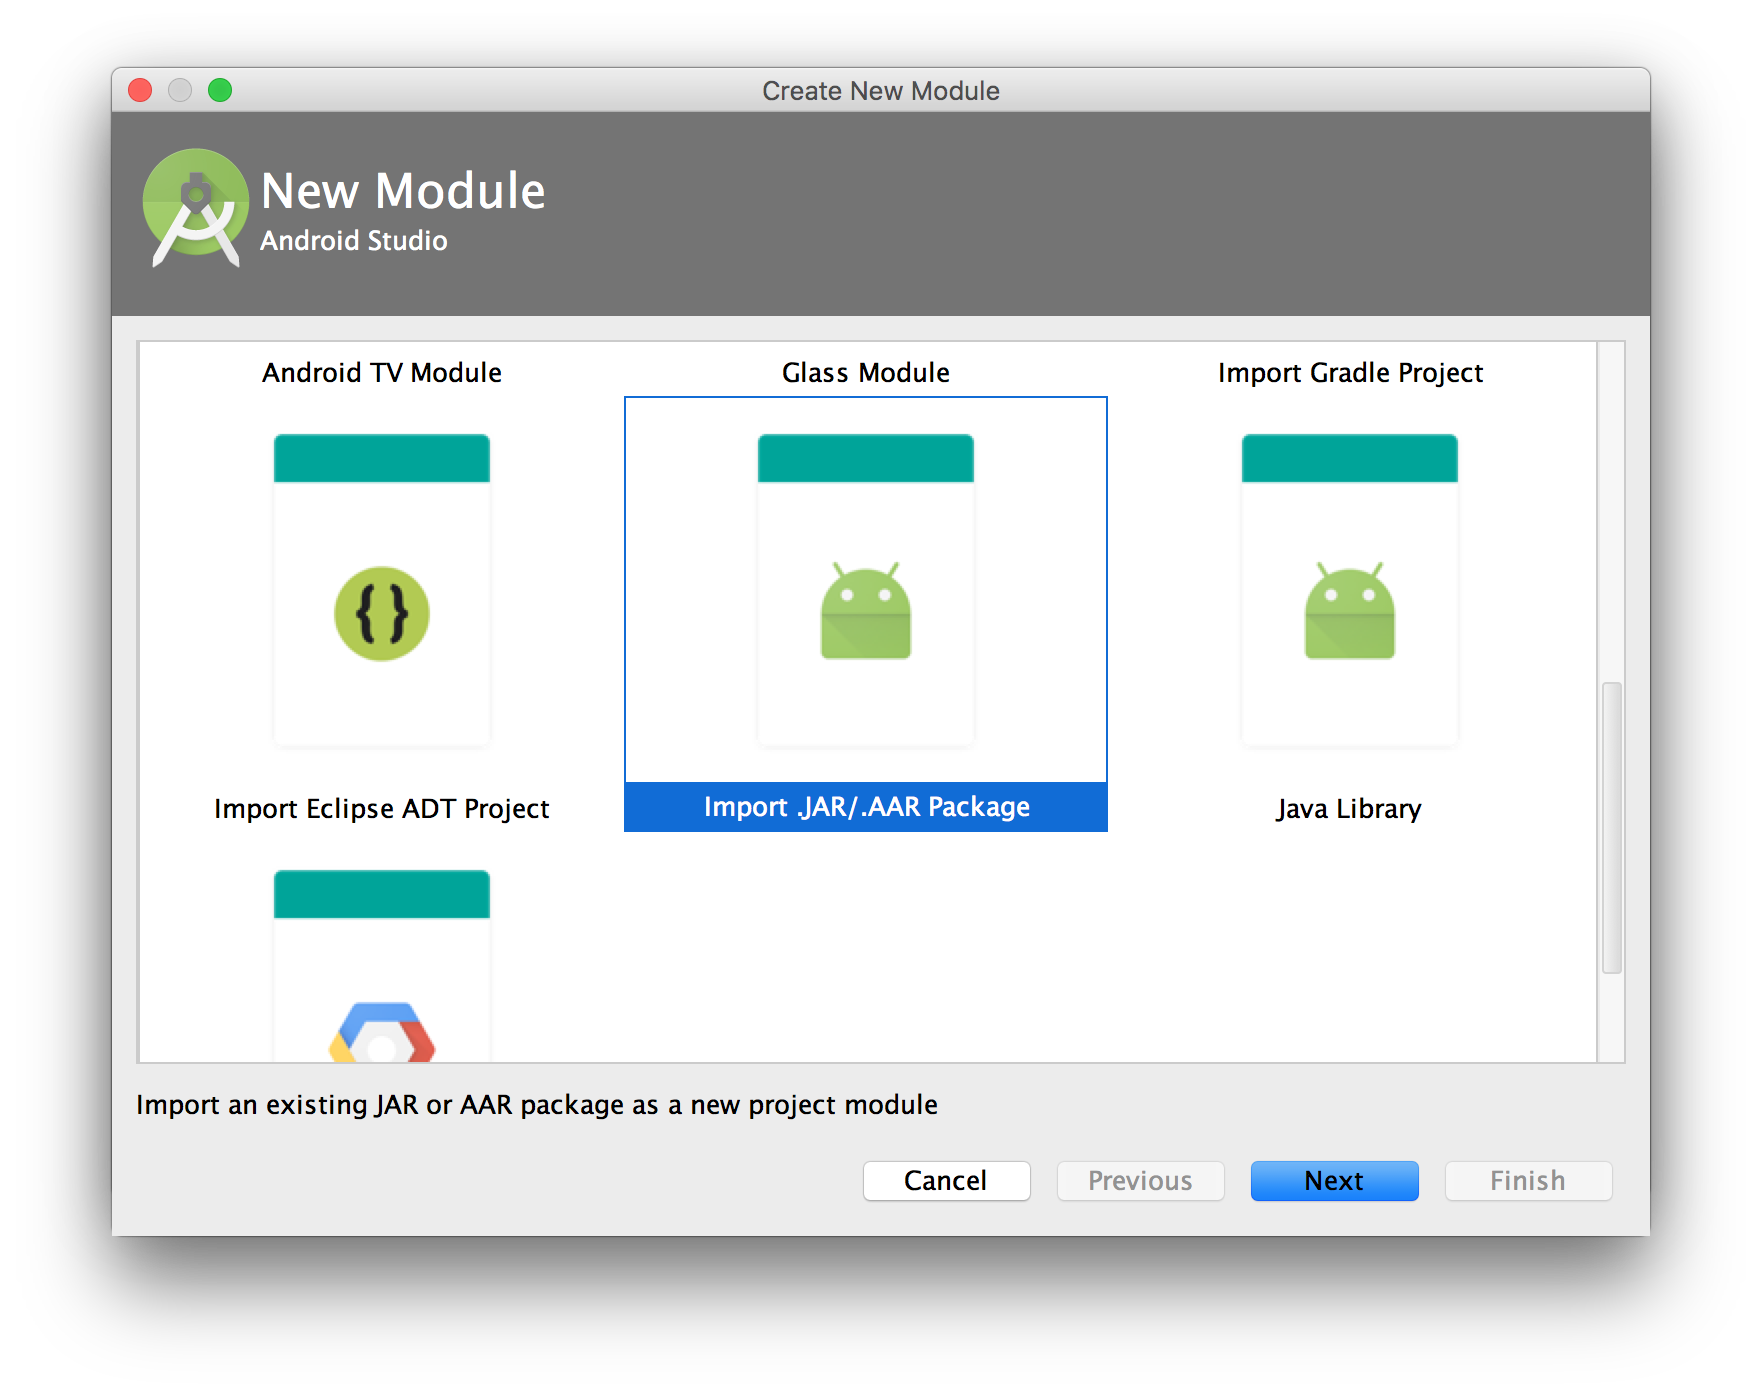
- For
File name:navigate to the folder where you originally exported the project from Unity and then to the sub-folder named after your app - Select the file
wikitude-unity-bridge.aarunder libs and click onFinish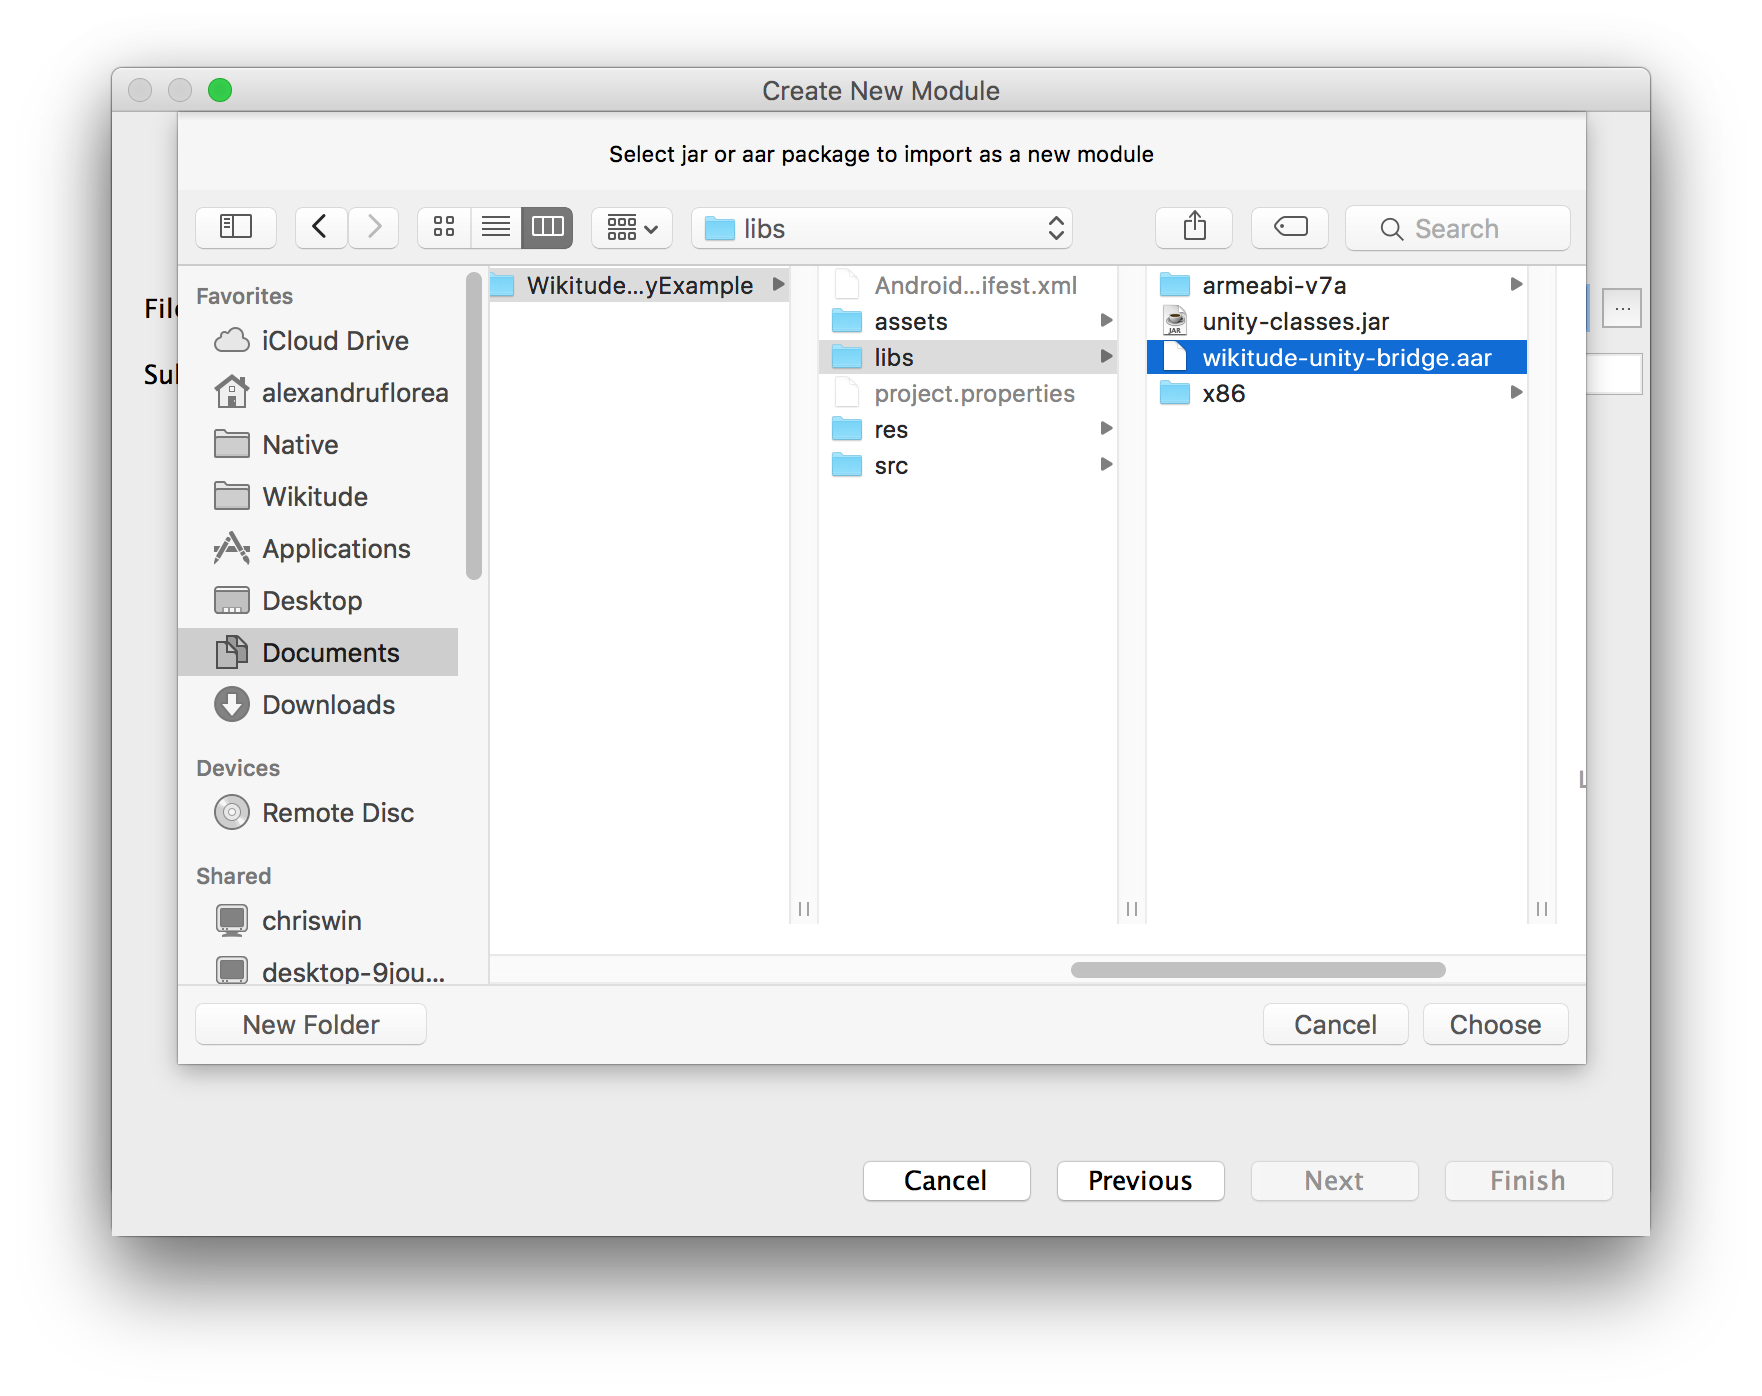
- Open the file
build.gradle (Module: YOUR_APP_NAME)and add the linecompile project(':wikitude-unity-bridge')under dependencies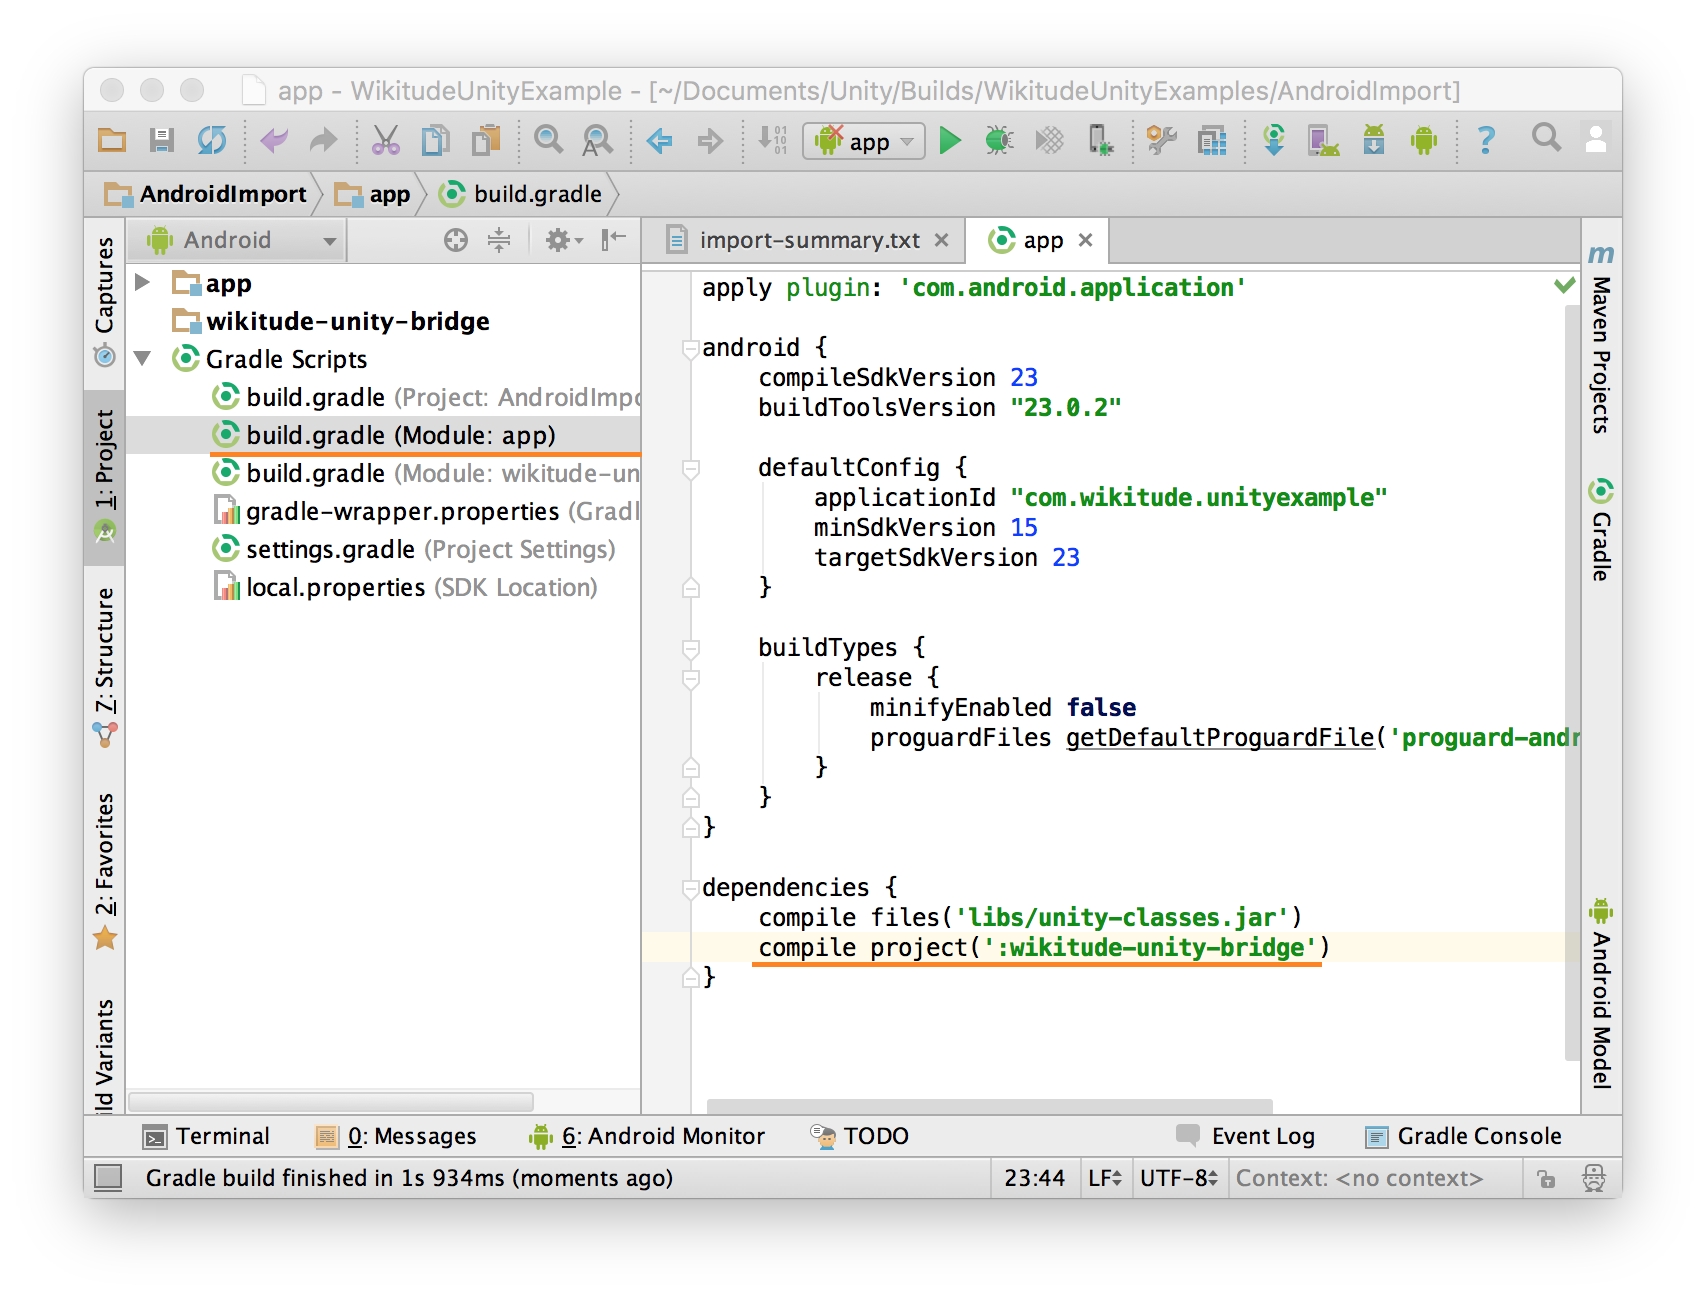
- The project is now running in Android Studio
Unity Requirements and supported versions
- The plugin is compatible with Unity 5.1.0 and higher, but the samples require at least 5.2.0 to work properly. However, all the samples except for the Camera Settings sample can be run on versions 5.1.x if you delete the
CameraSettingsController.csfrom the scripts folder - Rendering engine
- OpenGL ES 2
- OpenGL ES 3.x
- Because Unity currently doesn't support 64 bit libraries on Android, performance on such devices might be lower than similar devices running iOS 64 bit.