Create Project
When you log into the Wikitude Studio for the first time you will redirected to the dashboard page, which will be empty at the beginning. From here you will later on see
- a quick report on the activity of your project
- a table of all your projects
- a
Create new projectbutton
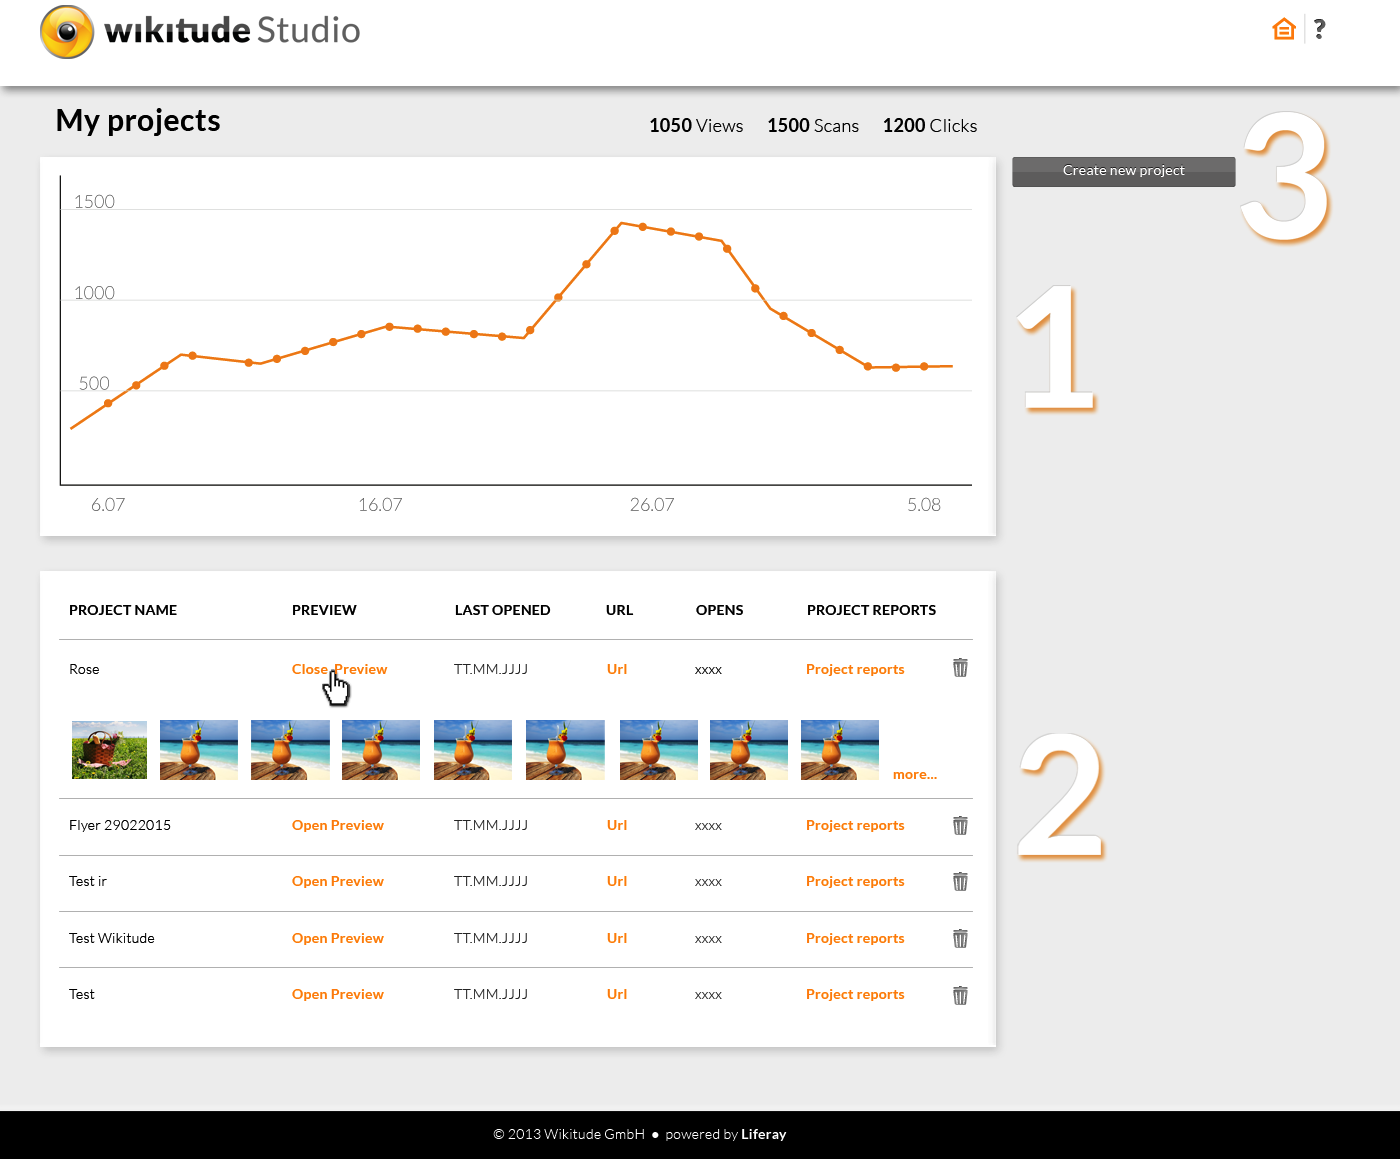
A project is a container for your target images. You can create as many projects as you like. Simply click Create new project in the right sidebar in the dashboard page.

Wikitude Studio will then create an empty project for you with the temporary title Untitled Project. Click onto the name and edit it right away. You can change the name of your project at any time.
![]()
Upload Target Images
After you have created a project you will need to upload the images you want to augment. These images are called "target images" and are used as reference for recognizing the same image whenever it appears in the live camera image. You can either use an image which is hosted on a remote server by entering the URL to the image or upload an image from your computer.
Add new target images to the project either by clicking on + Add Target Image or drag & drop them on the gray area. Supported file formats include PNG and JPEG. If you are using a PNG image, please make sure that it does not contain any transparent pixels; only solid colored images are supported.
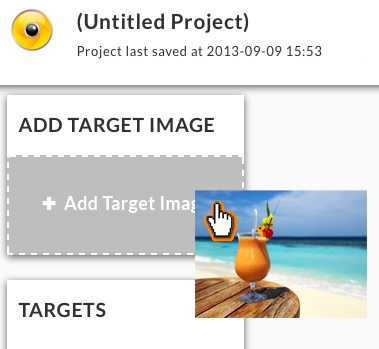
The image will then be uploaded, rated (star rating) and added to your project. The image will also appear in the work area in the middle of your screen. In our best practice guide we are showing which images can be recognized best and are suitable for tracking purposes. Make sure to read this guide in detail.
Images from Cloud Services
When using remote images from cloud storage services like Dropbox or Google Drive make sure to enter the public link to the actual file. Especially Google Drive does not offer a public URL to a file easily (see this thread here on stackoverflow or search for "permanent link Google Drive").
When using Dropbox just copy your file into the public folder and use the public URL of this image.
Add Augmentations to your Image
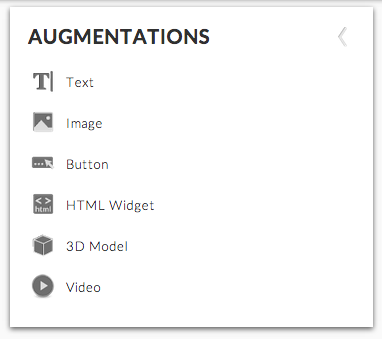
Once your target image has been uploaded successfully you can start to add augmentations onto your target image. Select the augmentation you want to add from the augmentations box on the right-hand side and it will be added to your target image.
The Wikitude Studio offers various types of augmentations for you to work with. Each type is explained in more detail on this page.
Preview your Studio project and test on a Device
After putting together the augmentations your project is ready to be previewed and tested on your device.
- Click on
Preview in the upper right corner and your project will be saved and prepared to be previewed
 - A page will appear on your screen showing the blank target image. Keep the browser page open, as this will be your target image to test.
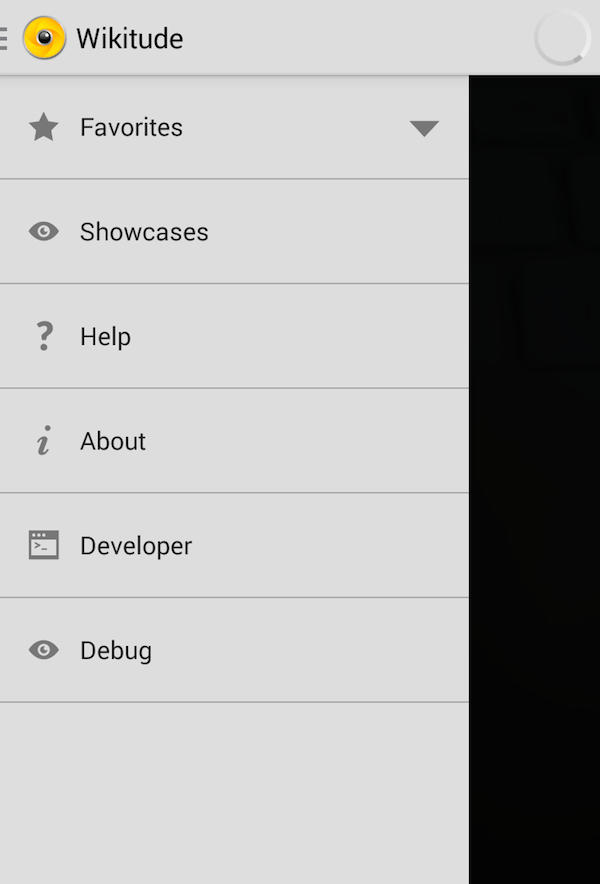
Grab a phone or tablet meeting the minimum requirements and follow the steps below
- Download the Wikitude App from Google Play or Apple App Store (make sure you have version 8.0 or newer installed)
- Launch the Wikitude App on your device
- Open the menu by swiping on the left side
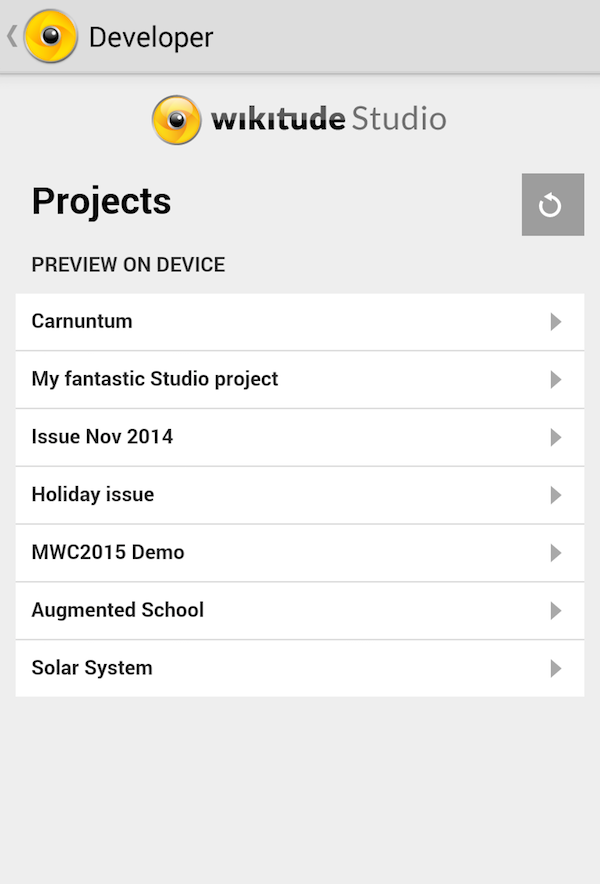
- Click on Developer
- Log-in with your Studio account
A list with all your projects will show up. Select the project you want to preview and point the camera at the target image.
Supported devices to work with the Wikitude Studio
To be able to run image recognition with good user experience a device with a capable CPU is required:
- Android: armv7a and NEON support - something along the lines of Samsung S2, or Nexus 10.
- iOS: Apple A5 CPU - something along the lines of an iPhone 4S, iPad2 and iPod Touch 5th generation.
Export Project
Once you are ready with your project you can export the project:
- Upload to Wikitude App
- Upload to the Wikitude Hosting Service (automatic)
- Download for hosting the project on your own server
- Download for using the project in an offline app
Wikitude App
Export your project to the Wikitude App and make your augmented reality experience available to the world. This export option is the quickest and easiest way to share and distribute your augmented reality experience.
Once you click Publish on the export page your project will be immediately available in the Wikitude App.
Name: The name of your project under which it should be presented in Wikitude 8. The name will be indexed by the Wikitude search engine. Users of Wikitude 8 can find your project by looking for the name of your project, unless you activated Private Mode for your project.
Tags: A comma-separated list of tags describing the main features of your project. Tags are indexed by the Wikitude search engine. Your project can be found based in Wikitude 8 based on your tag description, unless you activated Private Mode for your project.
Search Code: The search code is used to quickly search for and launch your project in Wikitude. You can set the search code to any term you like. Note, that the search code is unique for all Wikitude Studio users. (You may choose to use the Search Code to promote your AR project if you like, for example like this: "Simply type 'Money' into Wikitude's Search Box to launch our AR experience!" - see also recommended reading below on "How to share your project".)
Please note that the Project code is case insensitive. Users can enter any variation of your code with upper- and lower-case letters and your experience will launch (e.g. MyCode, MYCODE and mycode will all lead to the same project)
The Project Link The Project Link is a regular link, that every user can open in a browser on their mobile device. It consists of our domain code.wikitude.com and your search code (e.g. http://code.wikitude.com/money). Once entered, the link will automatically open the Wikitude App with your project. In case Wikitude is not installed on the user's device, the user will be prompted to install the app first.
You can also use the Project Link to promote your AR project directly from your mobile website or by stating your own domain URL www.xyzcompany.com/ARmagic on your advertising collateral and forwarding it to http://code.wikitude.com/money - see also recommended reading below on "How to share your project".
Read more about how to use the Search Code and Project Link in the chapter "How to share your project"
Description: A description for users of Wikitude 8 to better understand the nature of your project. The description will be indexed by the Wikitude search engine. Users of Wikitude 8 can find your project by looking for the description of your project, unless you activated Private Mode for your project.
Private Mode: Activating Private Mode for your project will remove it from the search box from Wikitude 8. The only way to access your project is then directly using the Project Link.
Project Thumbnail: The image is used in the list of search results to illustrate your project.
Wikitude Hosting
Wikitude hosts your project files for you in a public web folder. The files can only be accessed with the unique Project link, which is generated for each of your project. A user opening this page in Wikitude App will see the live camera image. Once the user scans a target image from your Wikitude Studio project your augmented reality experience will start.
This export option is the default option and your project is uploaded to the Wikitude Hosting service automatically. Every time you make changes to your project and click Preview or Export those changes are also transferred to the Wikitude Hosting service.
Self-Hosting
If you prefer to host your AR project yourself on your servers this is your “Export” choice . Simply click Generate Project Files Now to download them to your computer. From there you can upload the project to your own servers of your choice and host them yourself.
Your project will be packaged as zip file, which contains all required files. This includes the target collection and any kind of augmentations. Images, 3D models and video overlays are packaged as well, whereas full-screen videos and HTML Widgets are packaged as online version (offline not available).
Offline App
The "Offline App" export option is perfect for apps which are not meant to connect to the internet during its use. All of the required augmentations will be bundled into your own app based on the Wikitude SDK. Wikitude offers App Templates beside the packaged Studio project files to help you get started with an offline app.
App Template
App Templates for Wikitude Studio are pre-configured app projects containing an offline version of your Wikitude Studio project. The App Template can be imported into your IDE (Xcode, Android Studio, Eclipse) and is a starting point for your own customization. Working with App Templates requires knowledge of app development for iOS or Android. In this chapter you can find more details on App Templates.
Next: read our guide for creating the optimal target image and improve tracking results.